
An on-demand course lets you create flexible, self-paced training that learners can access anytime.
You can use an on-demand course to build anything from a simple one-page resource or a single lesson to a complete multi-lesson training program with tests, feedback, skills, and certificates.
Examples of how you can use an on-demand course include:
- One-page resources and reference materials
- Single-topic or microlearning courses
- Multi-lesson training programs
- Standalone tests and knowledge checks
- Onboarding and compliance training
- Role-specific or skills-based training
Get started
To get started:
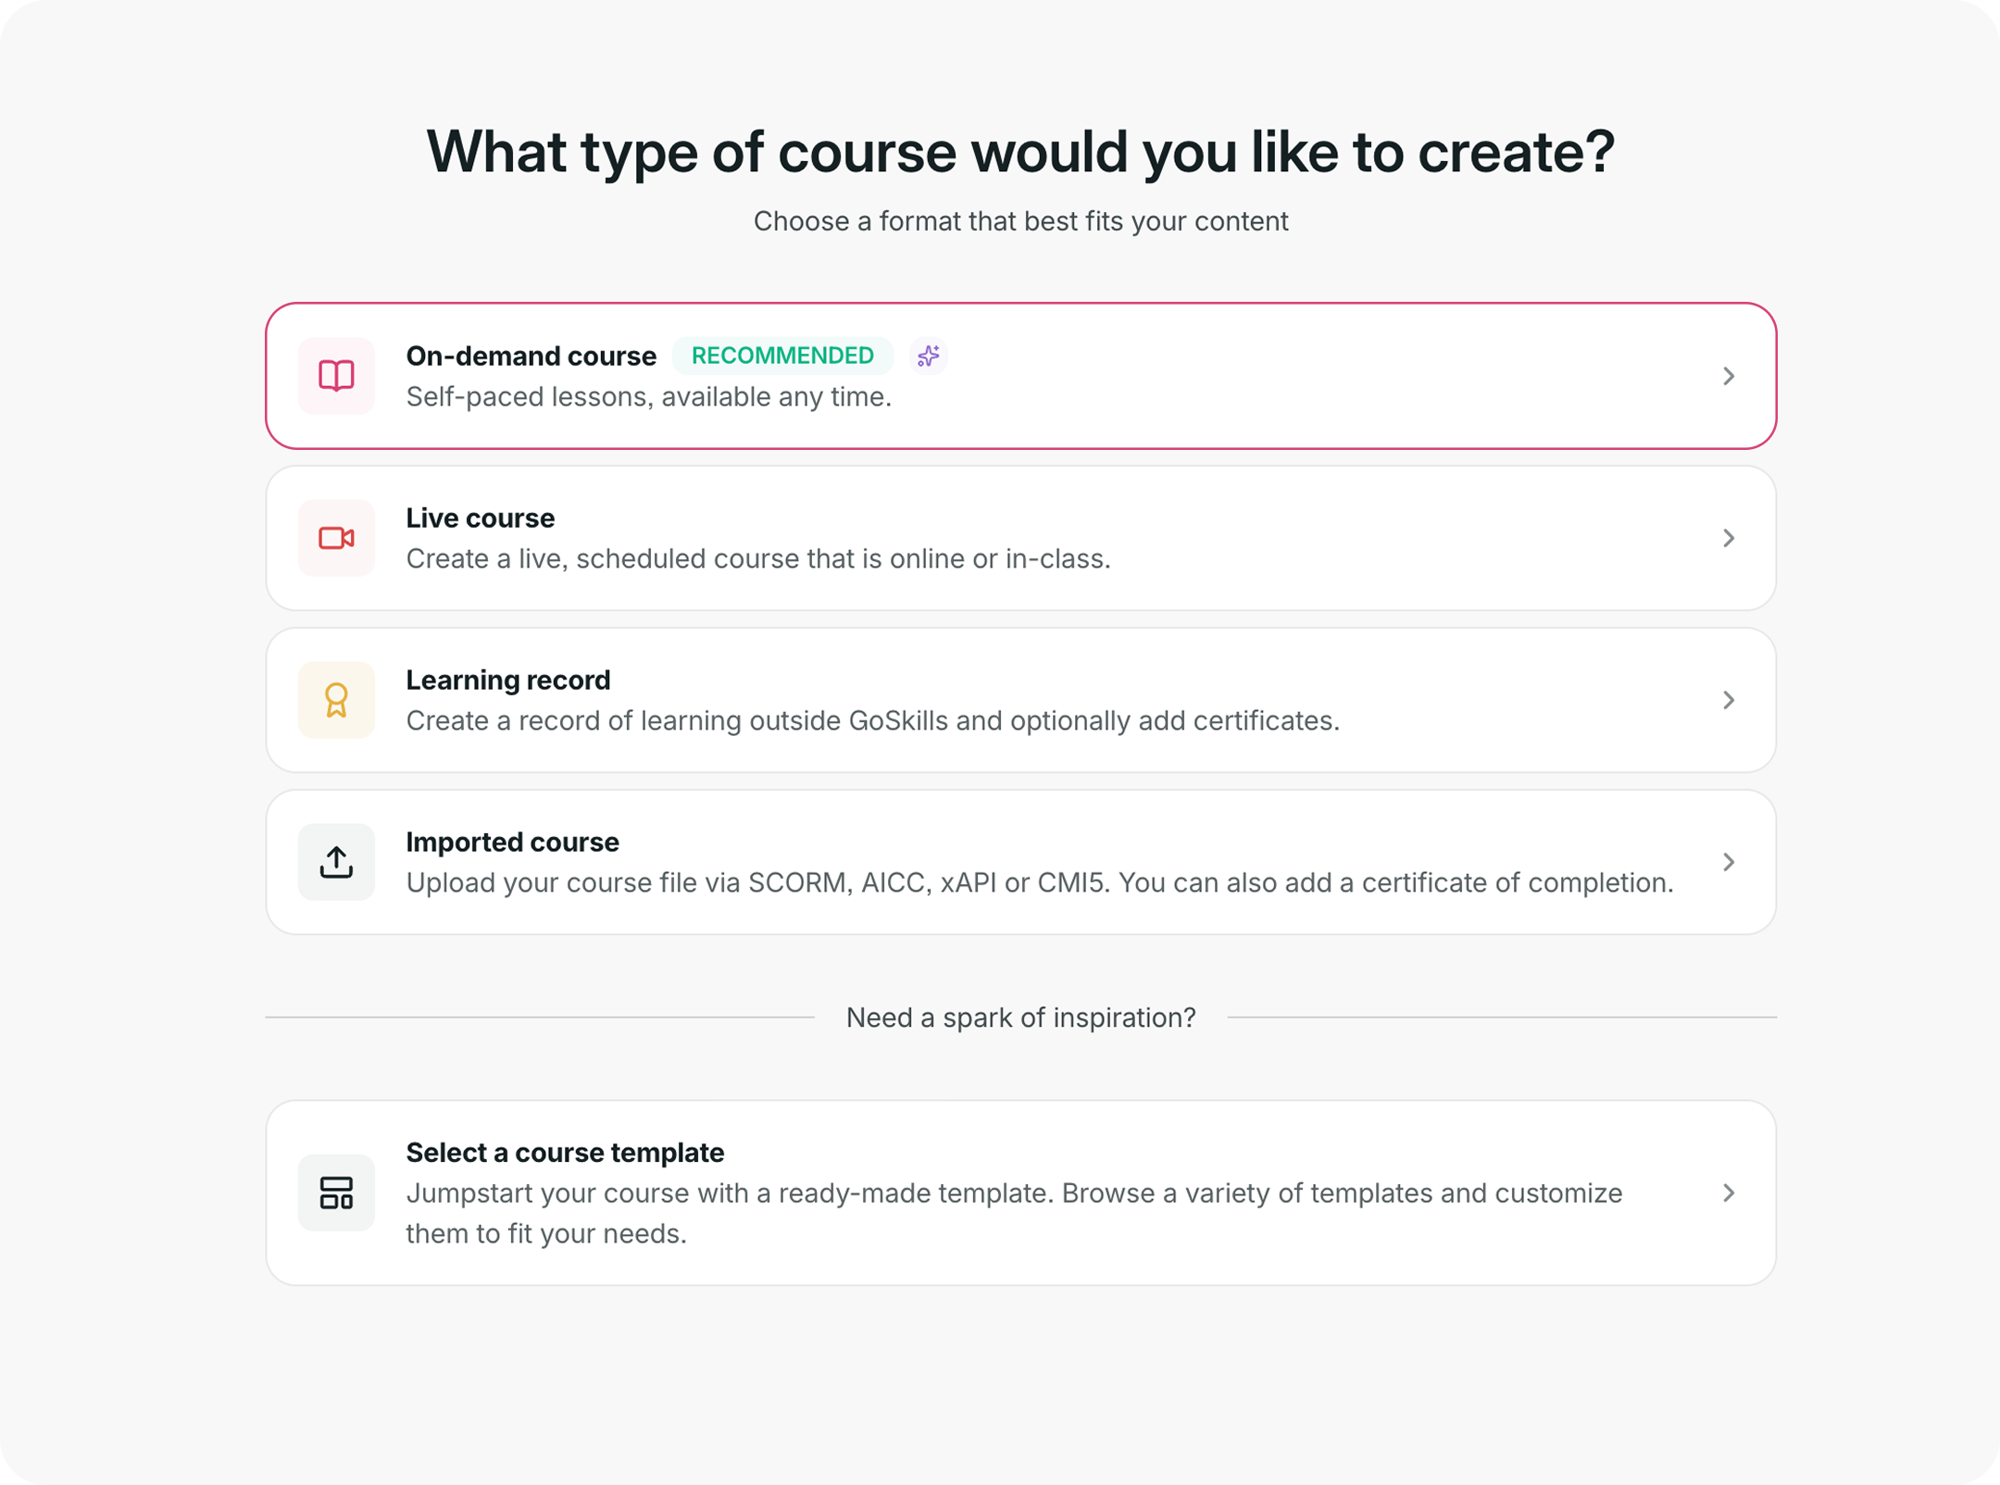
- Switch to the Creator role, go to Your courses, and select Create a course.
- Select On-demand course from the available course types.
- Your new course will open in the GoSkills Course Builder.
Add content to your course overview page
The course overview page is where you can introduce your course and tell learners what they can expect.
Select Add a block to add content to the overview page. Available content blocks include:
- Text
- Image
- Video
- File
- Table
- Accordion
- Button
- Divider
- PDF preview
- Code
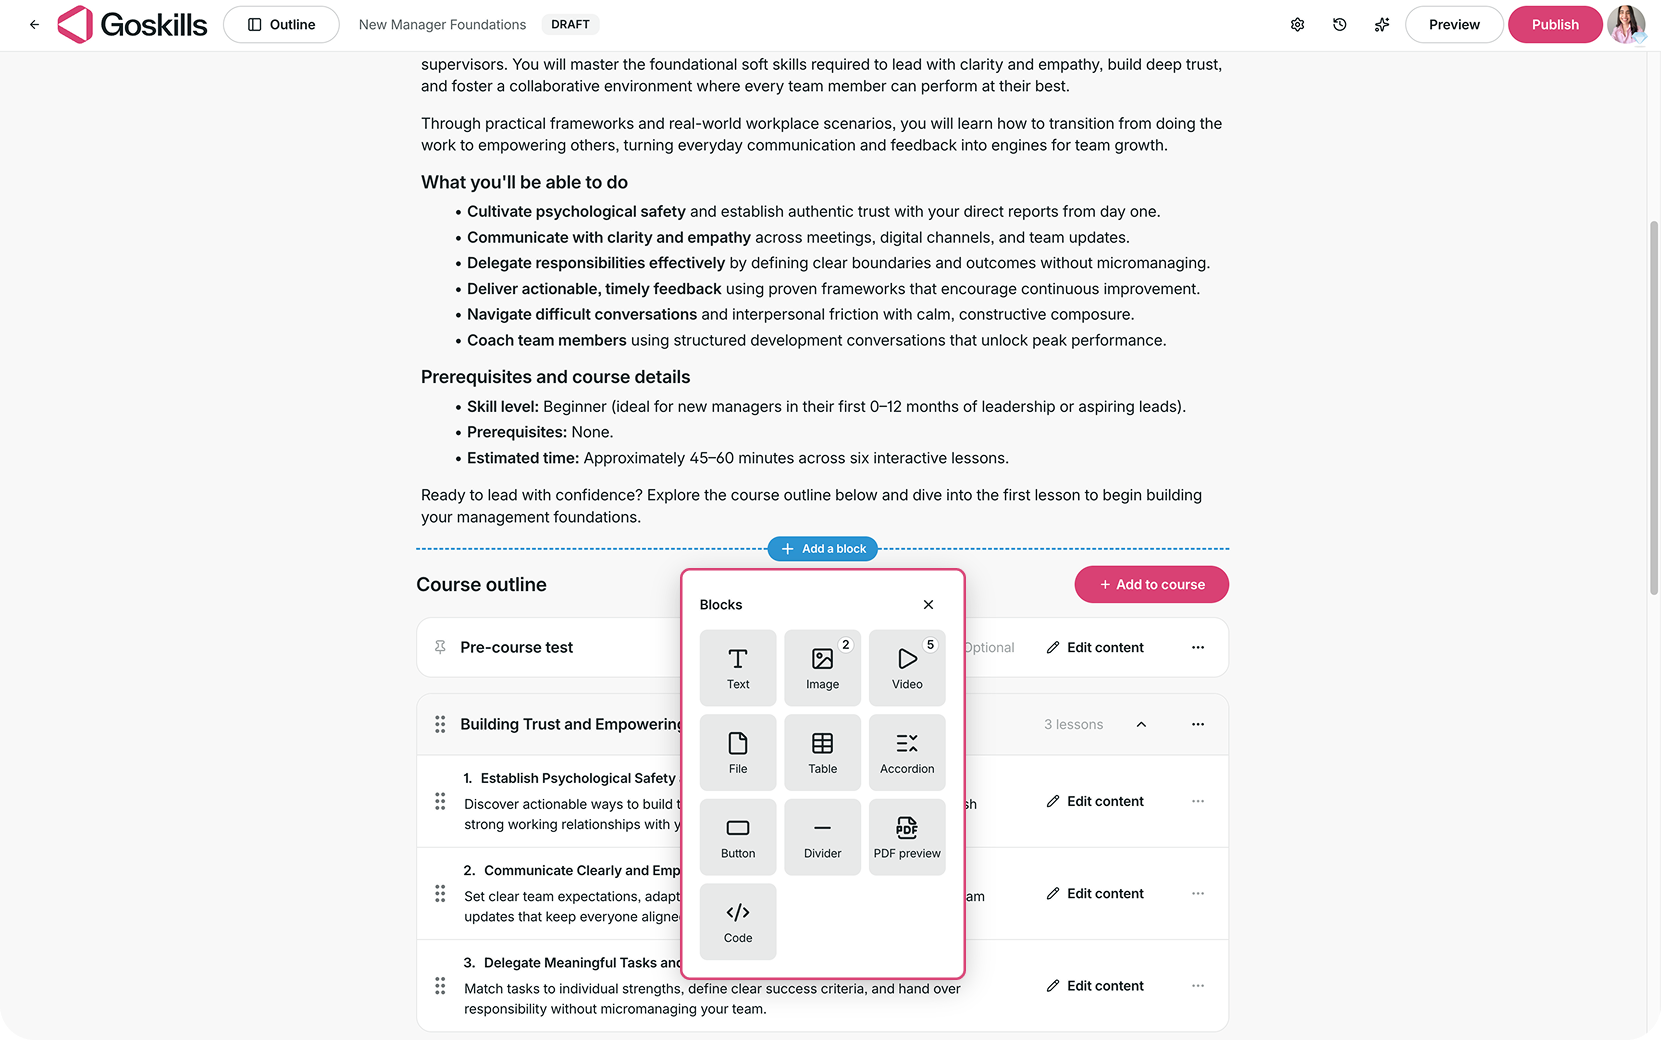
You can combine different blocks to customize the overview page with the content your learners need.
Build your course outline
Below the course overview page, select Add to course to build your course outline.
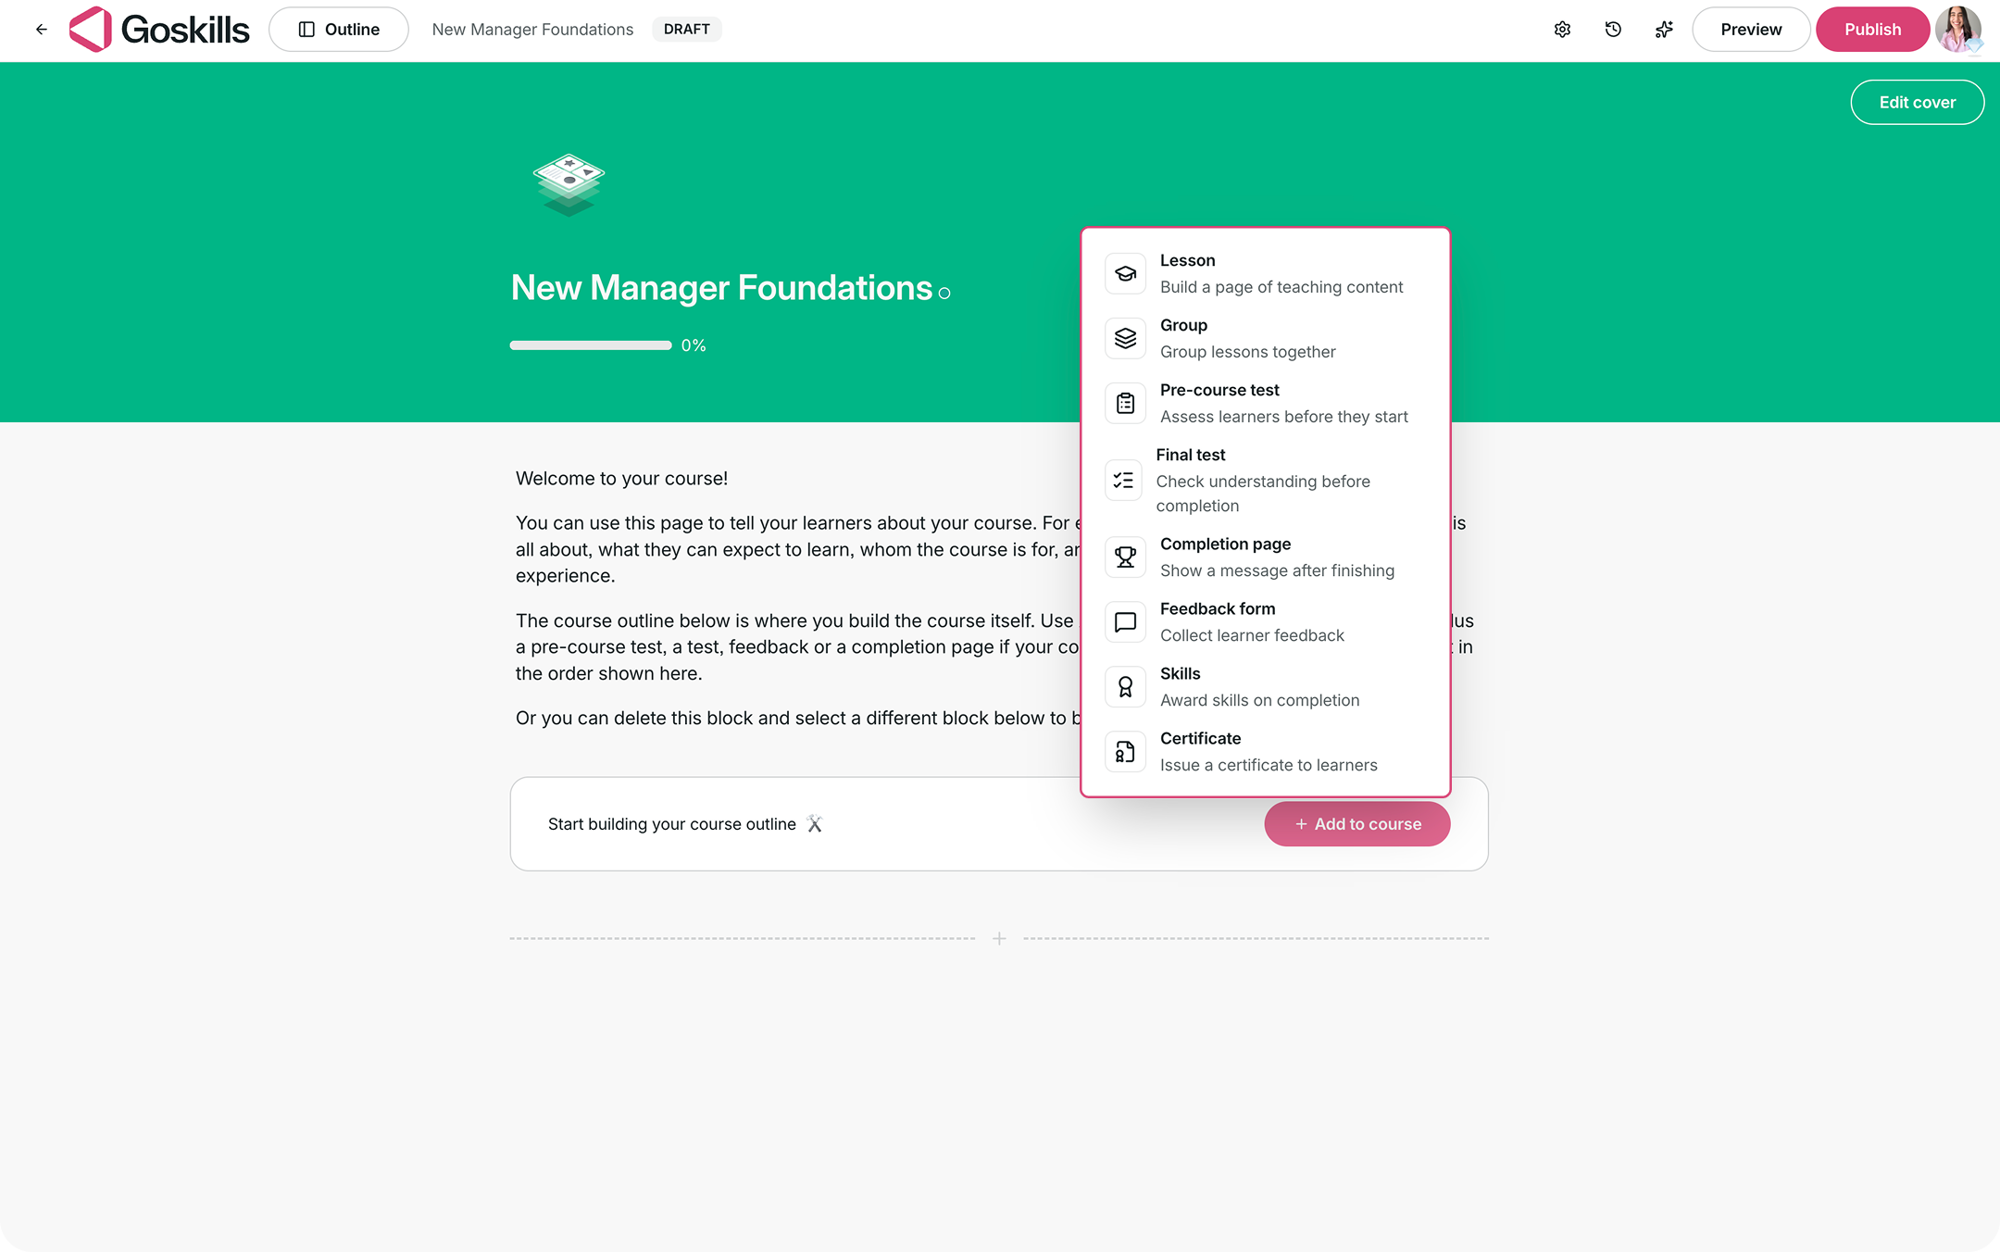
You can add the following components:
- Lesson
- Group
- Pre-course test
- Final test
- Completion page
- Feedback form
- Skills
- Certificate
You can add the components you need as you build, giving you flexibility over the structure of your course.
Creators can also use Genie, GoSkills’ AI course creator, to speed up course development by generating course content with AI. Learn more about creating courses with Genie.
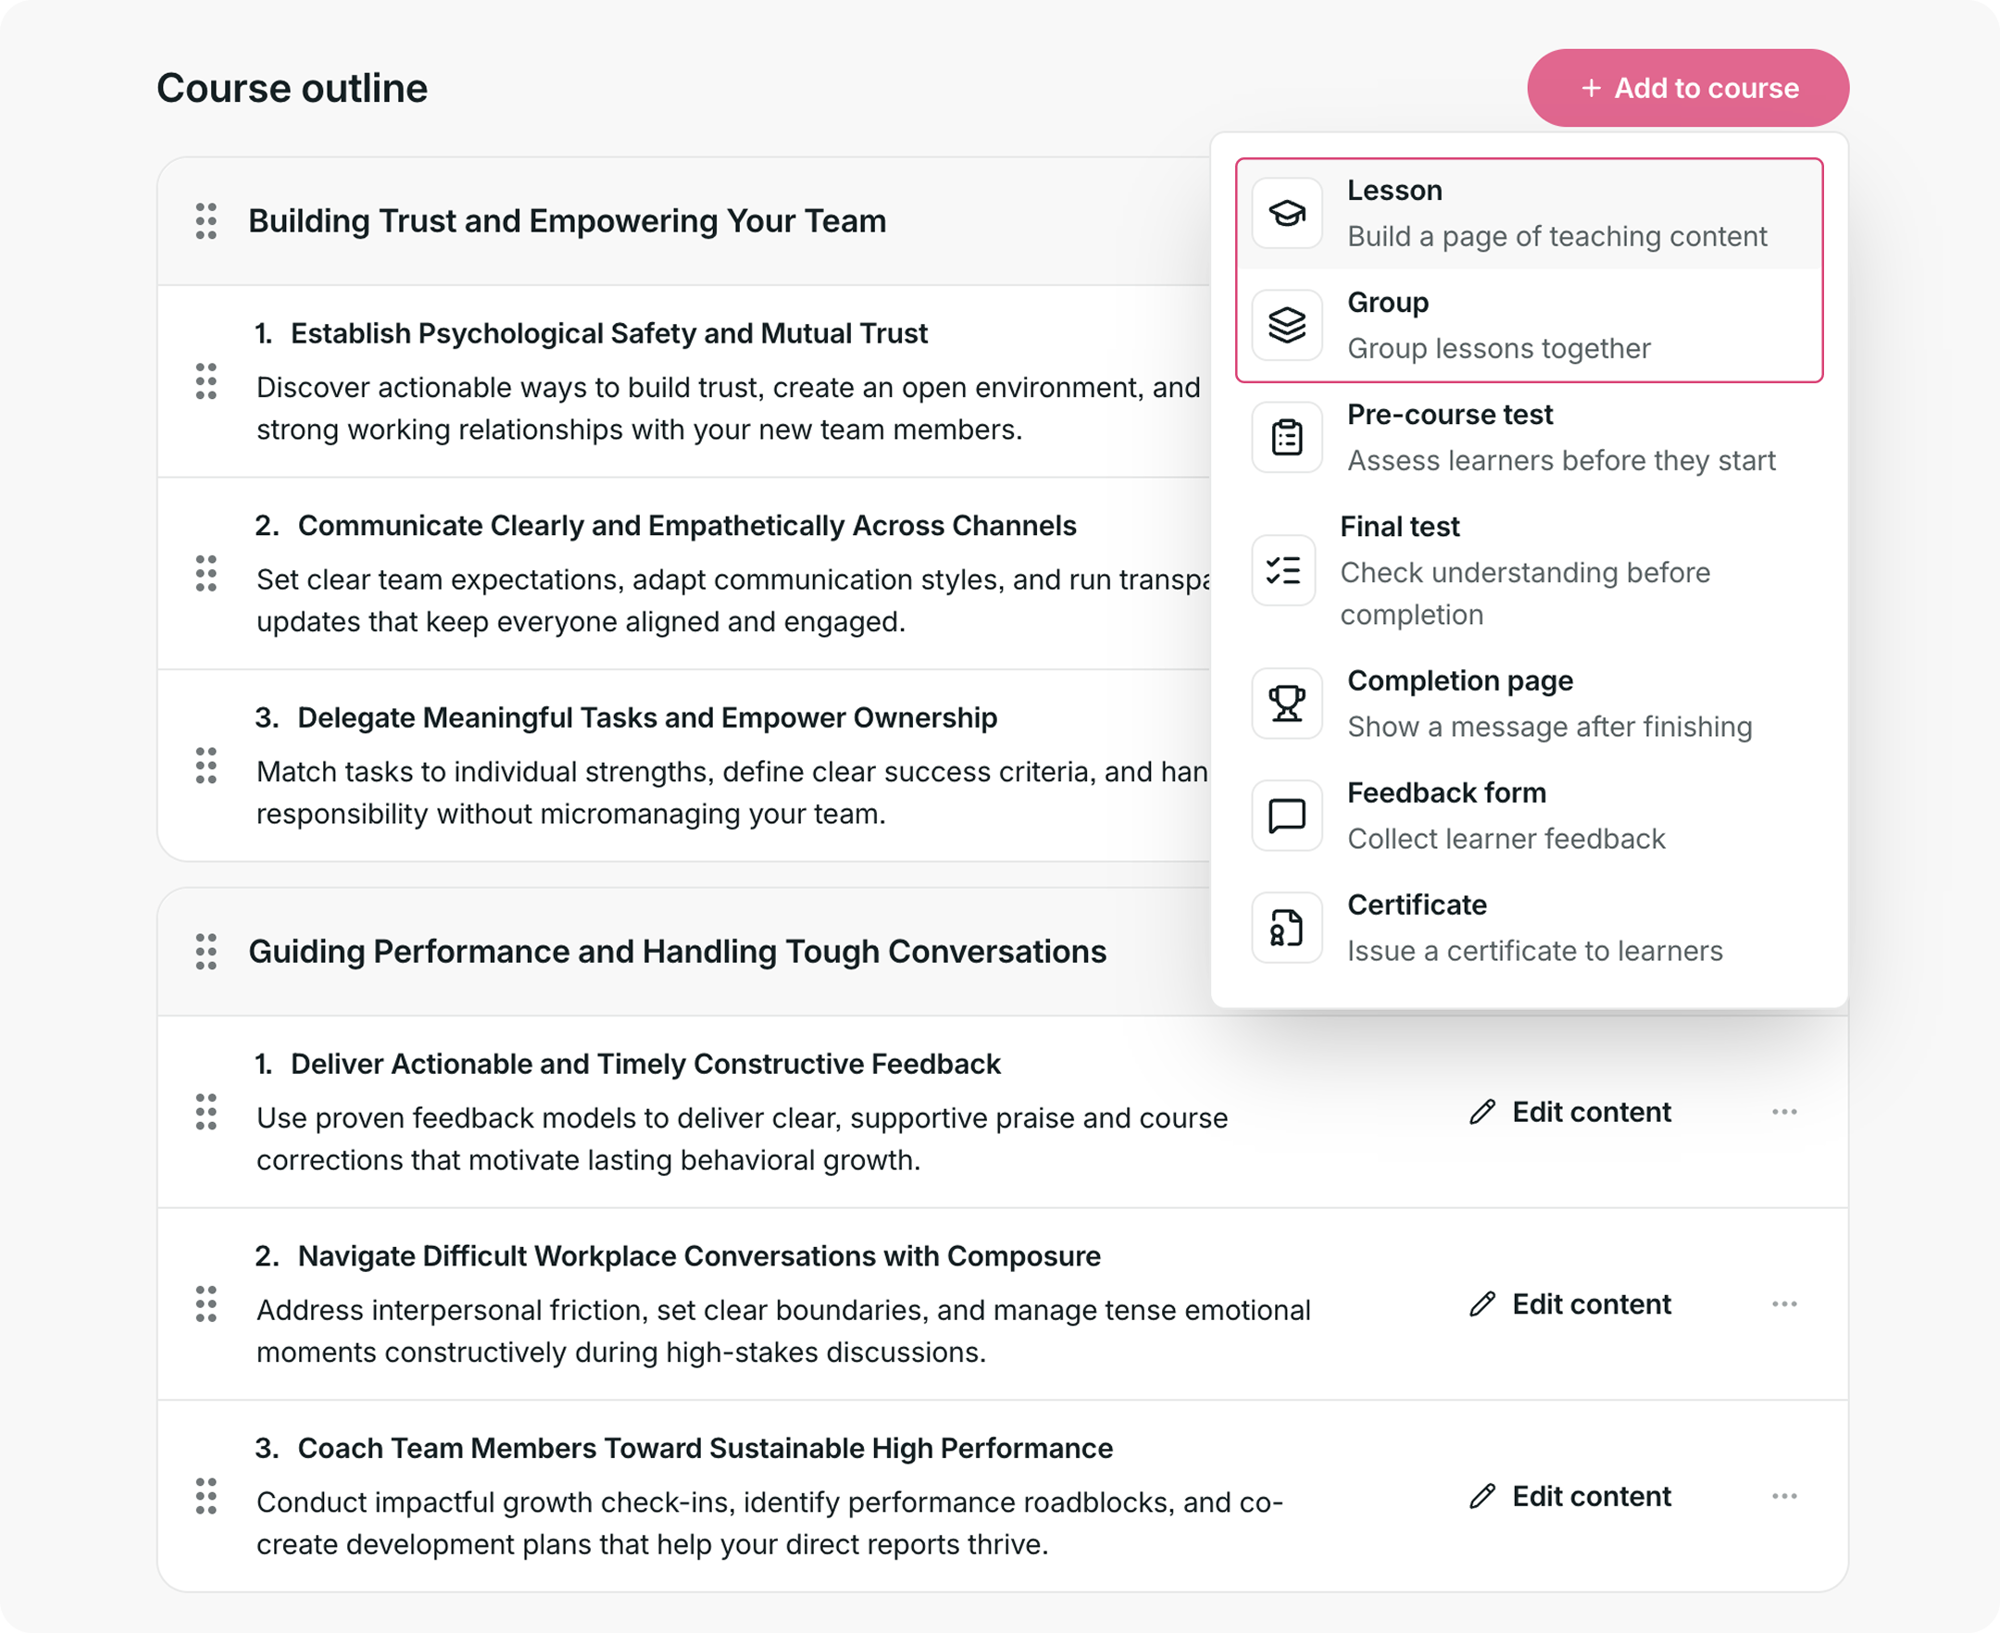
Lessons and groups
A lesson is a page of teaching content within your course. You can use content blocks to build each lesson with the learning material you want learners to work through.
A group lets you organize related lessons together. This is useful for breaking a larger course into topics, modules, or sections so learners can follow the course more easily.
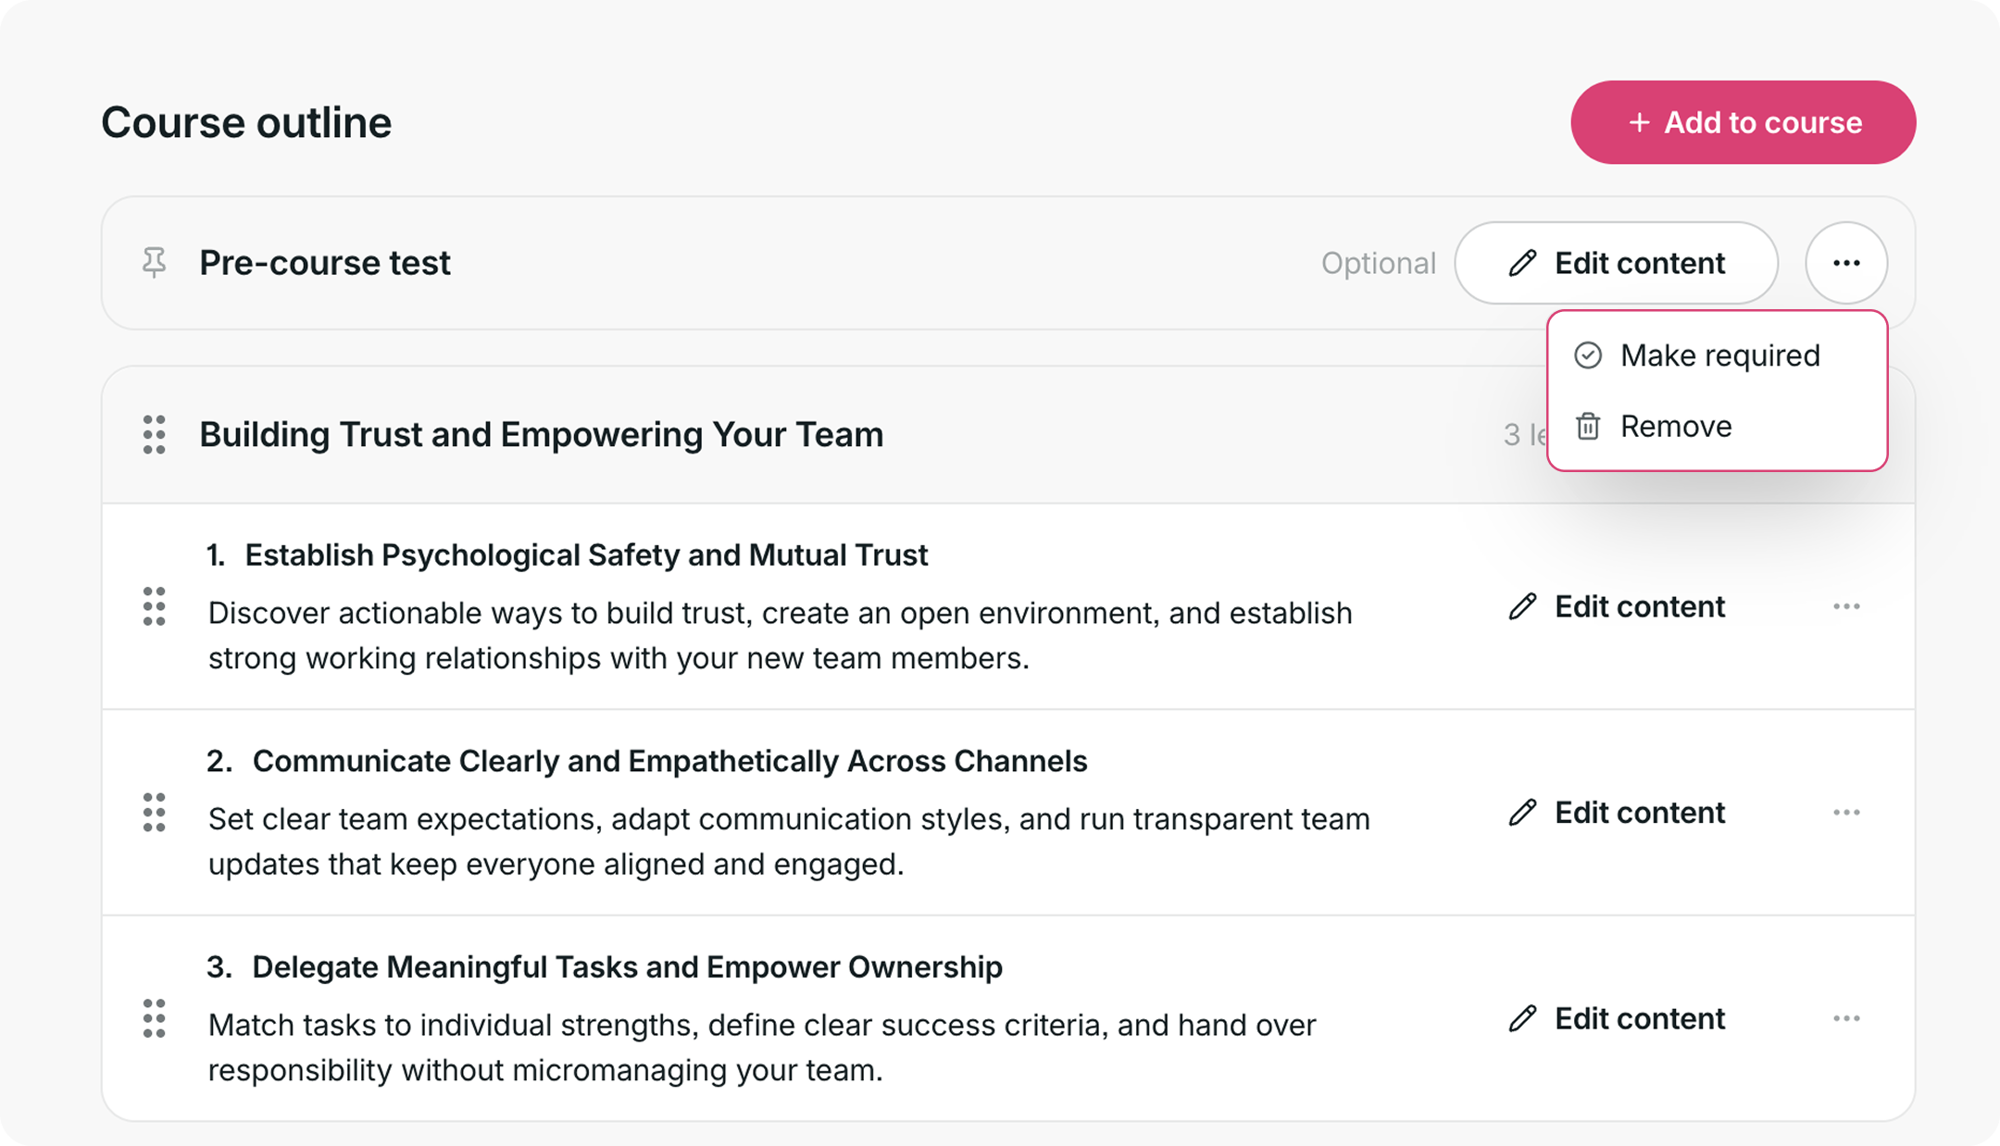
Pre-course test
A pre-course test lets you assess learners before they begin the main course content.
The pre-course test draws its questions from quiz and single-question blocks in your lessons. If your course doesn’t contain any yet, Add content will be unavailable until you add one to a lesson.
Once questions are available, select Edit content to build your pre-course test.
You can also use the three-dot menu to make the test required or remove it from the course.
Final test
A final test lets you check learners’ understanding before they complete the course.
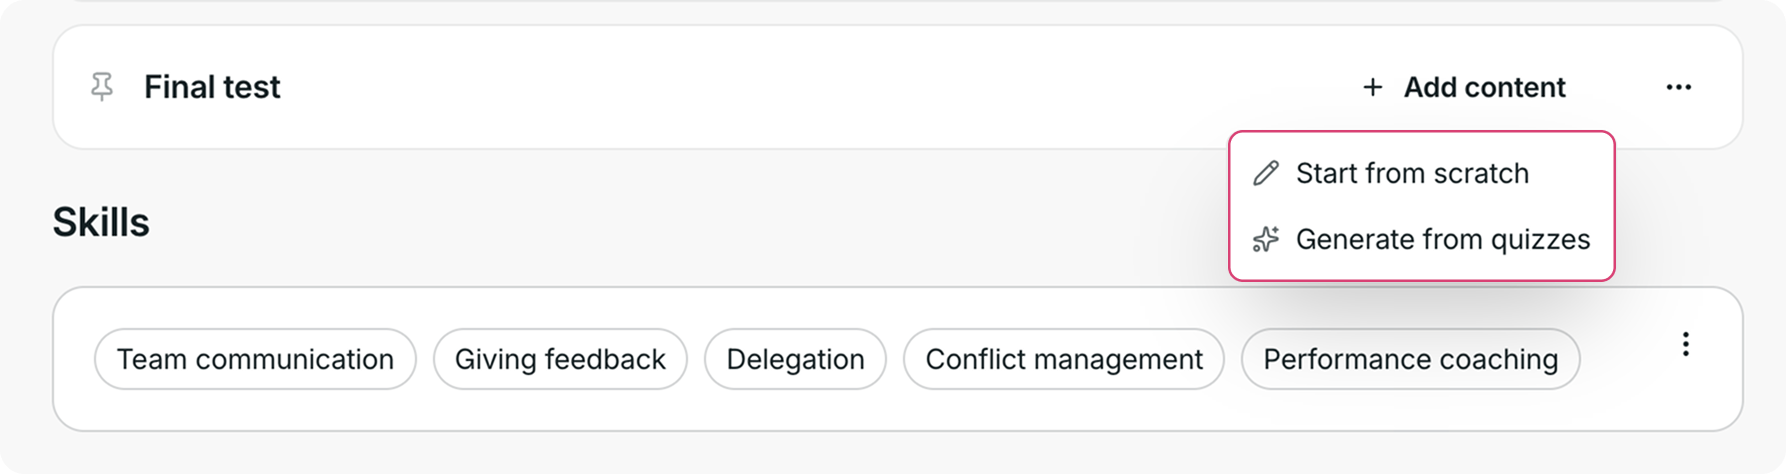
Select Add content to build your final test. You can:
- Start from scratch to create the test yourself.
- Generate from quizzes to build the test using quiz content from your course.
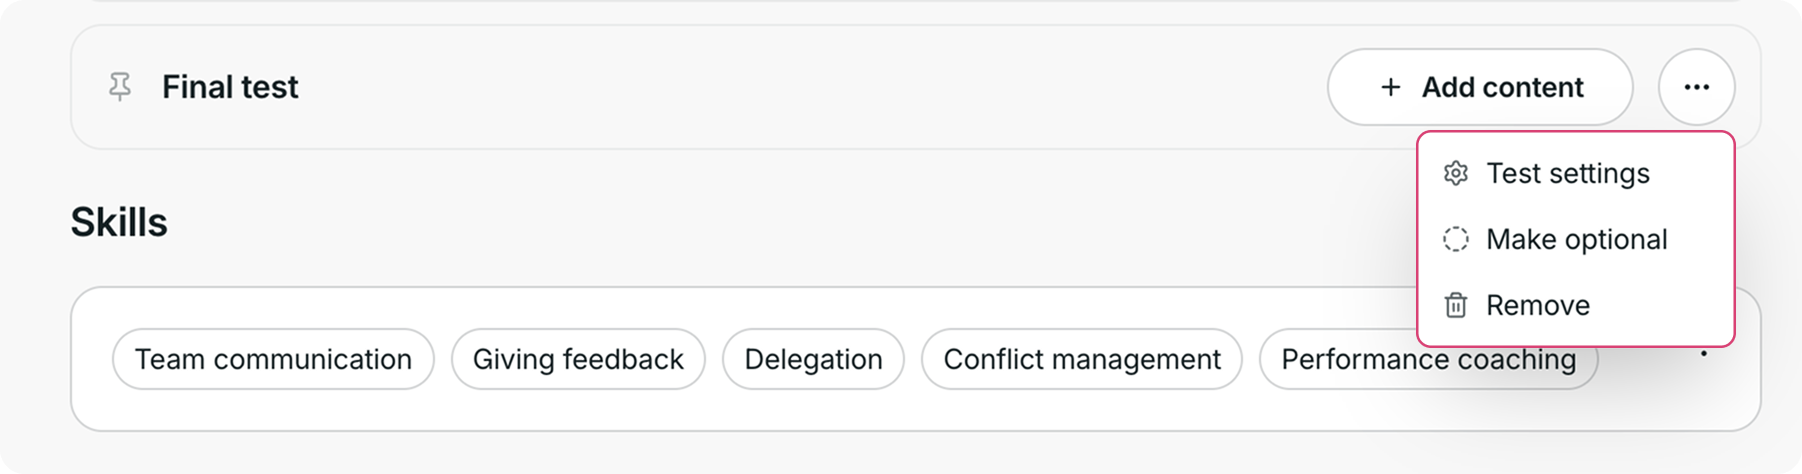
Use the three-dot menu to access test settings, make the test optional, or remove it from the course.
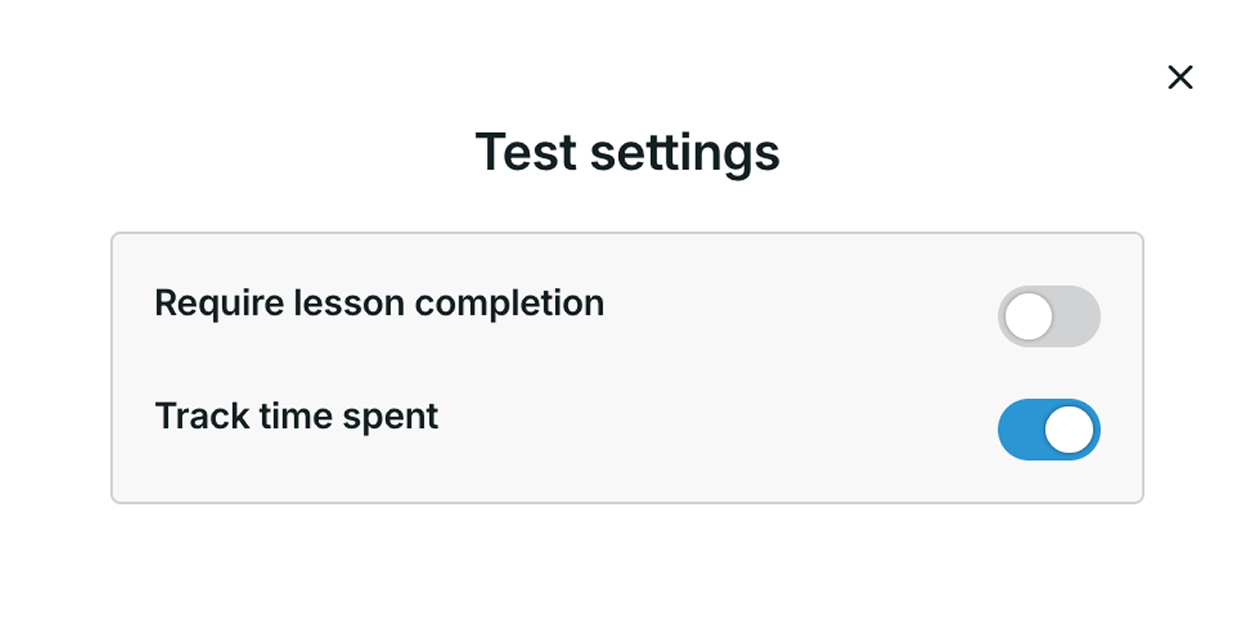
When you select Test settings, a modal will appear where you can toggle the following options on or off:
- Require lesson completion
- Track time spent
Completion page
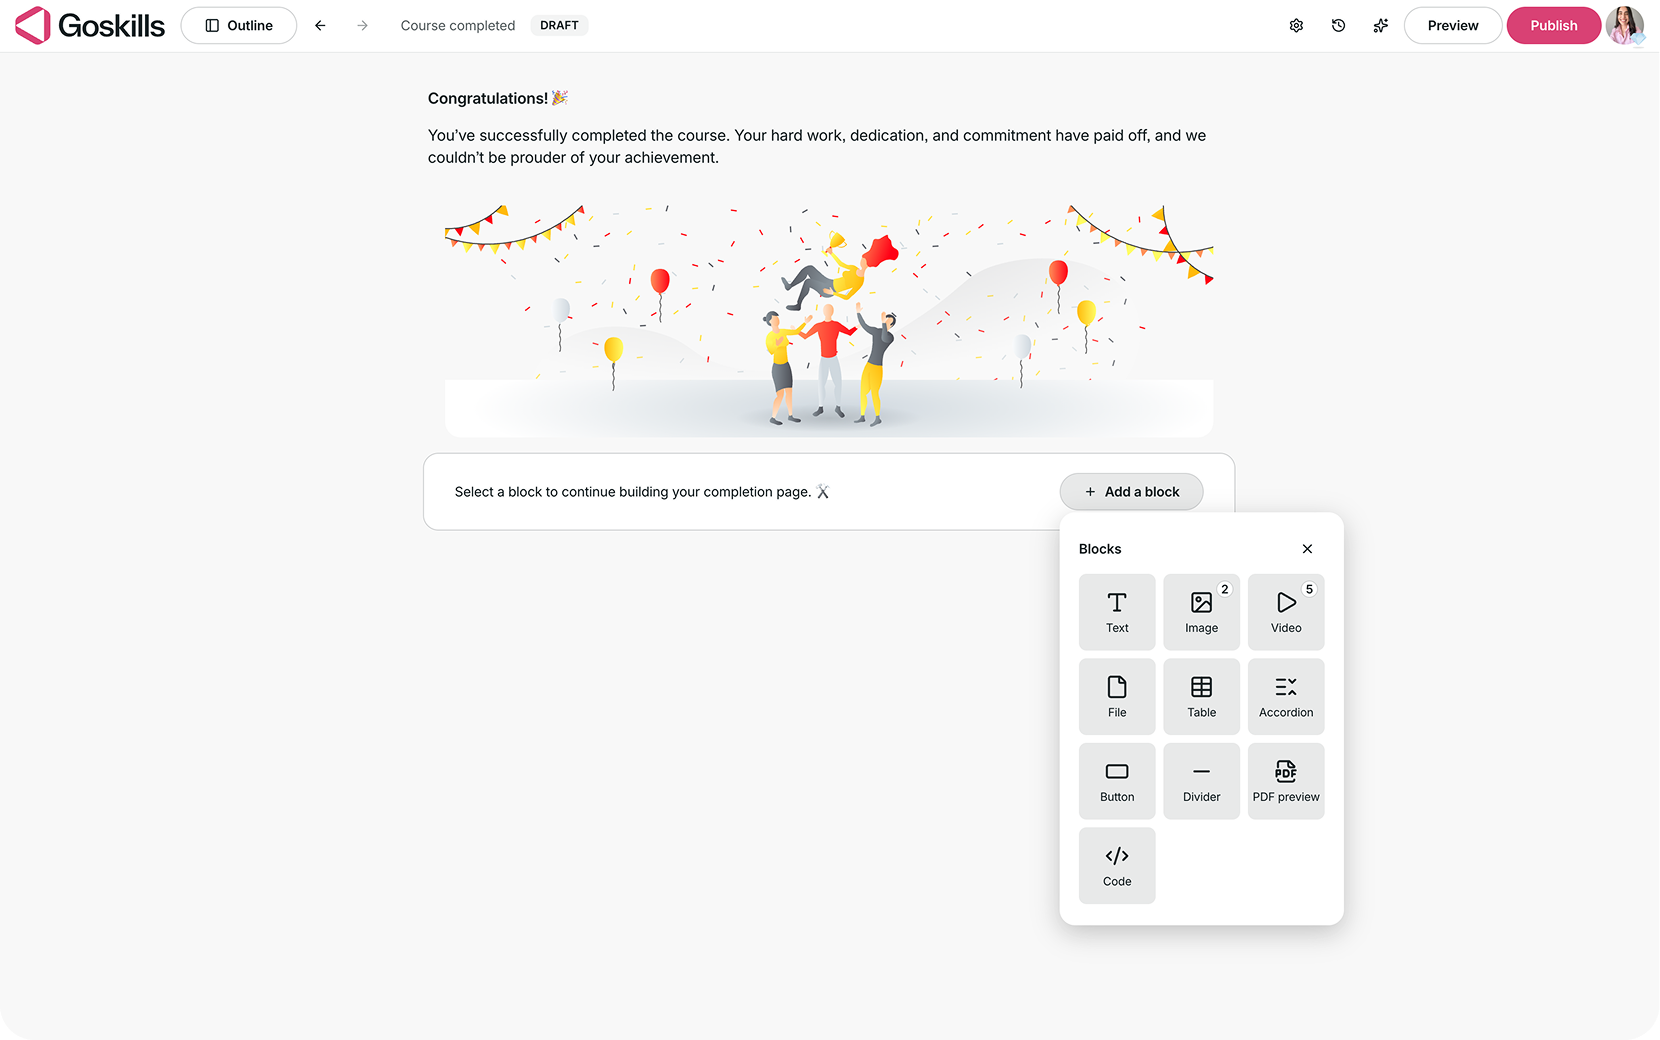
The completion page is shown to learners after they finish the course.
You can customize this page with a congratulatory message or other useful information. Select Add a block to add content using blocks such as text, images, videos, files, tables, buttons, and more.
Feedback form
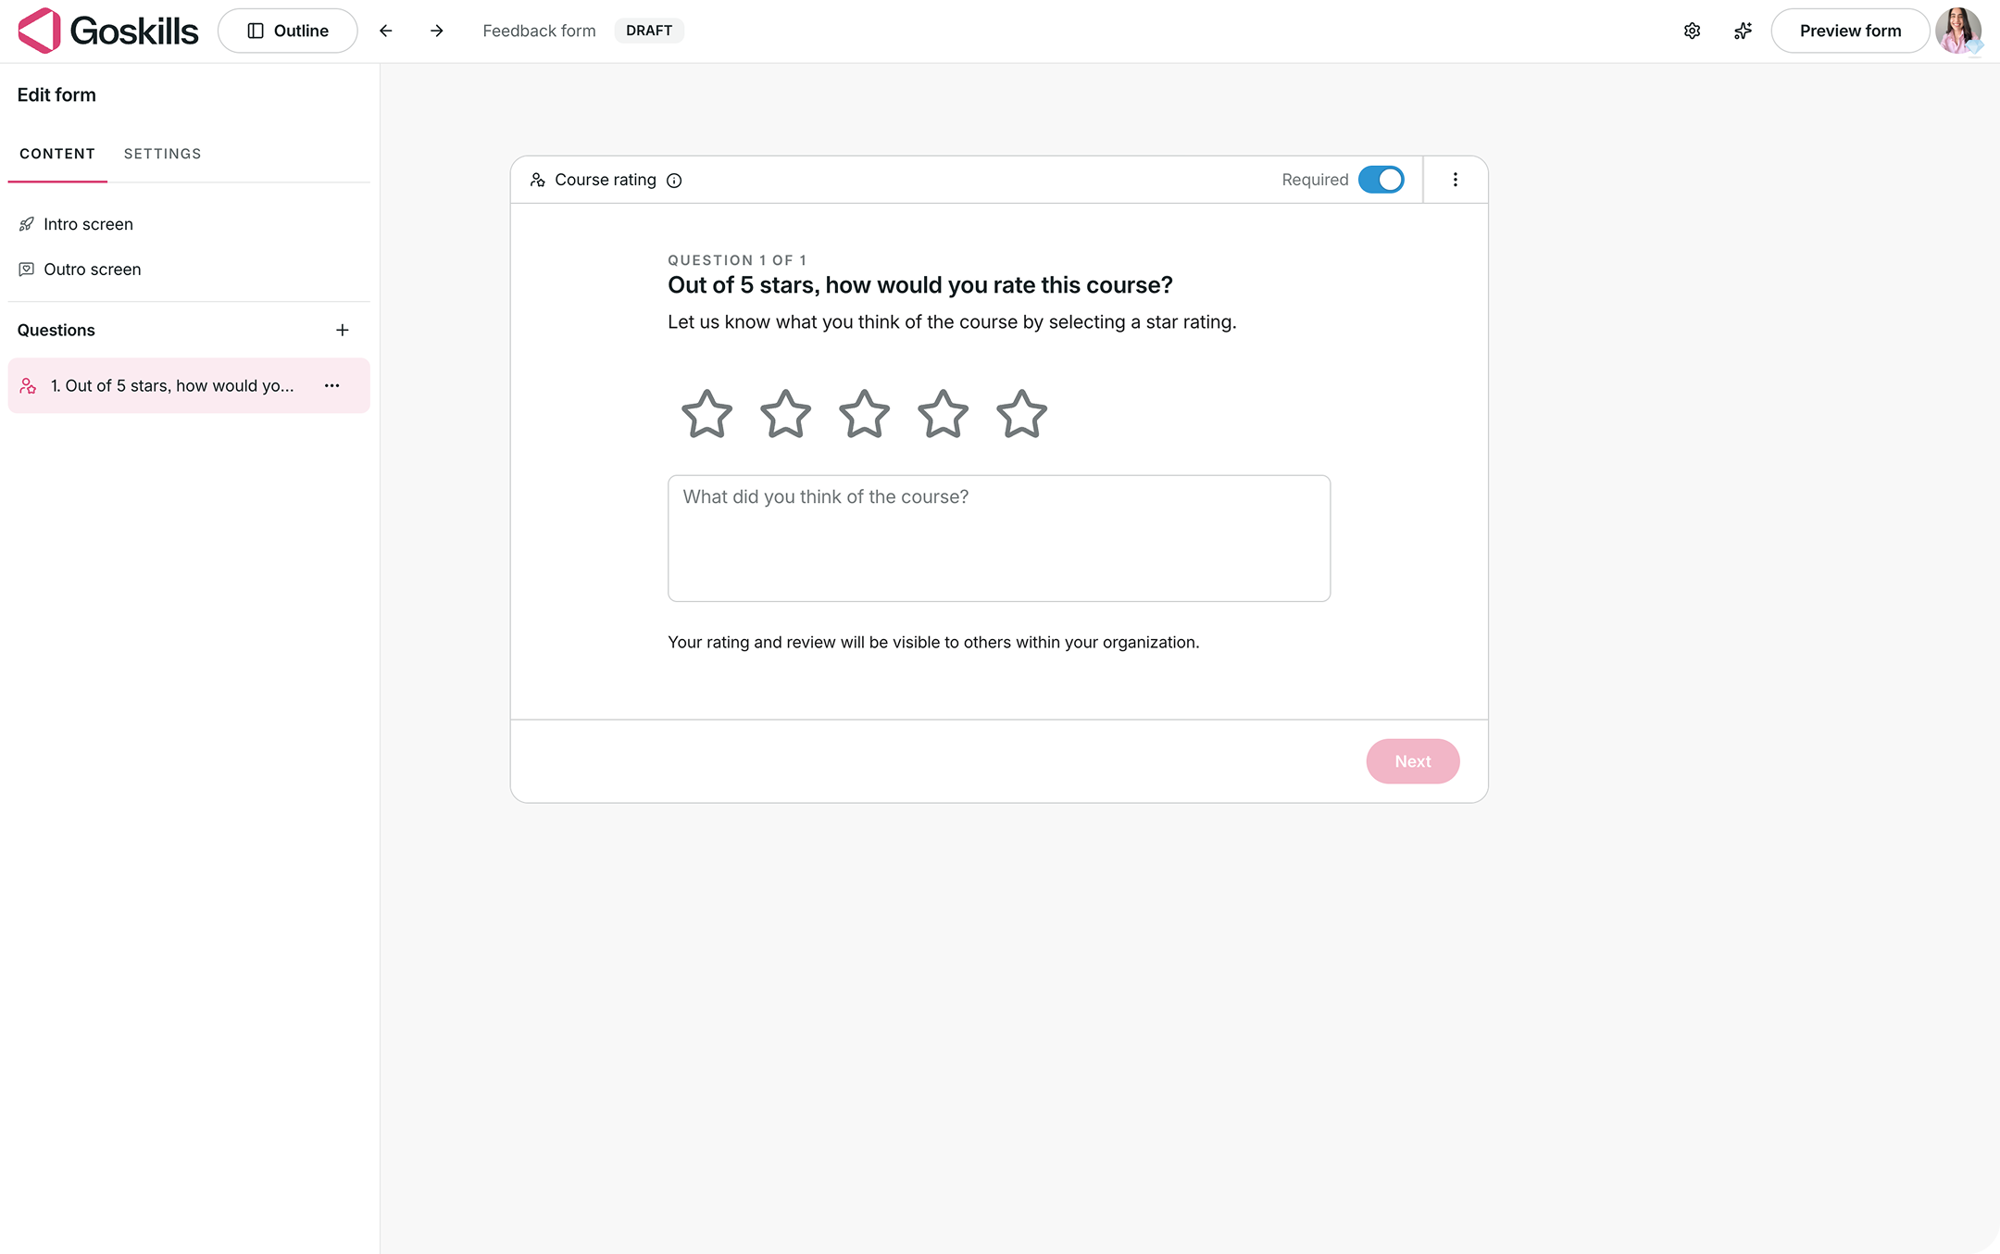
Add a feedback form to collect learner feedback about the course.
Select Edit content to customize the form. From the form editor, you can edit the intro and outro screens, add or edit questions, and choose whether individual questions are required.
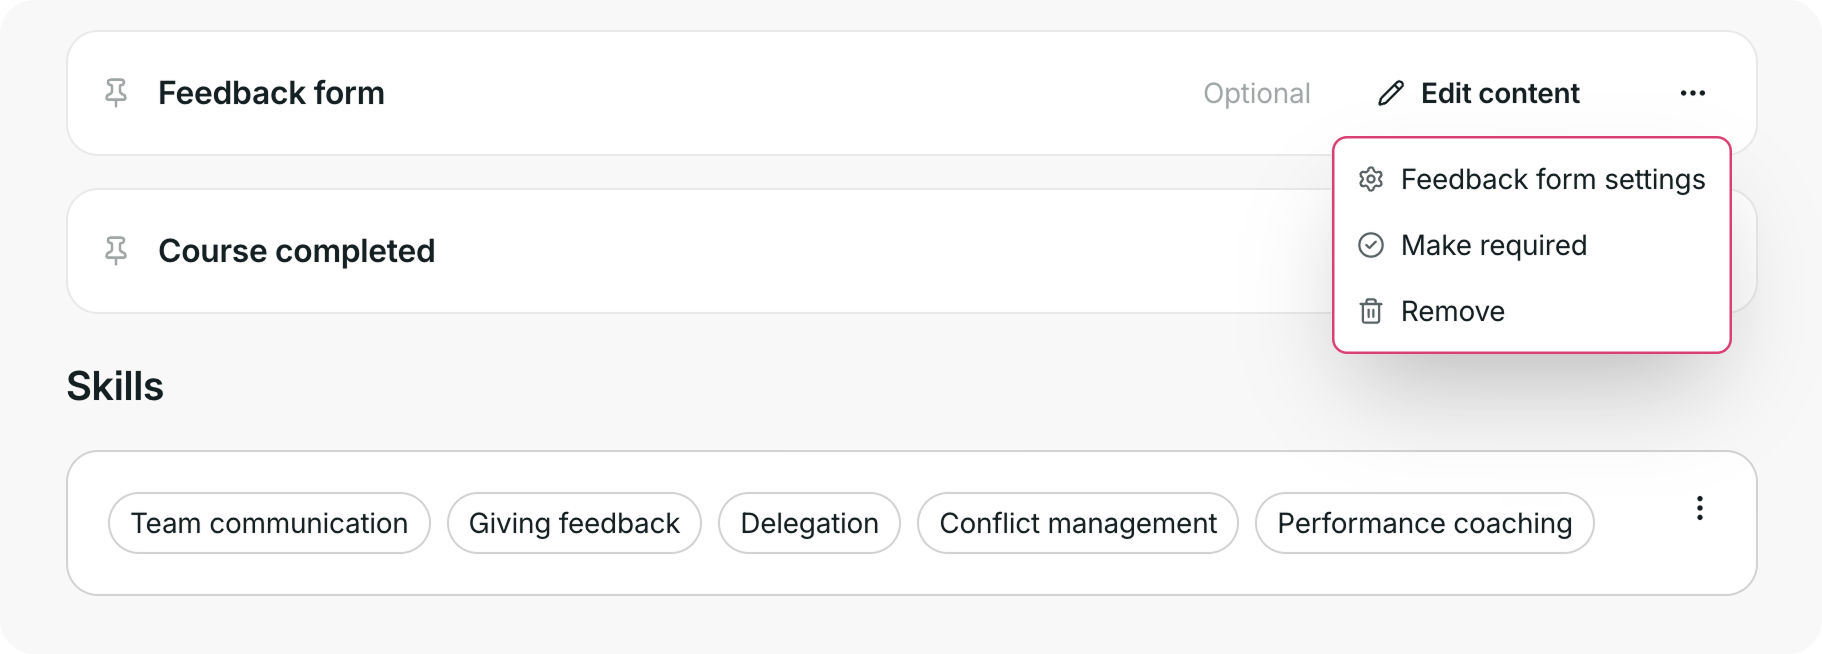
Use the three-dot menu to access feedback form settings, make the feedback form required, or remove it from the course.
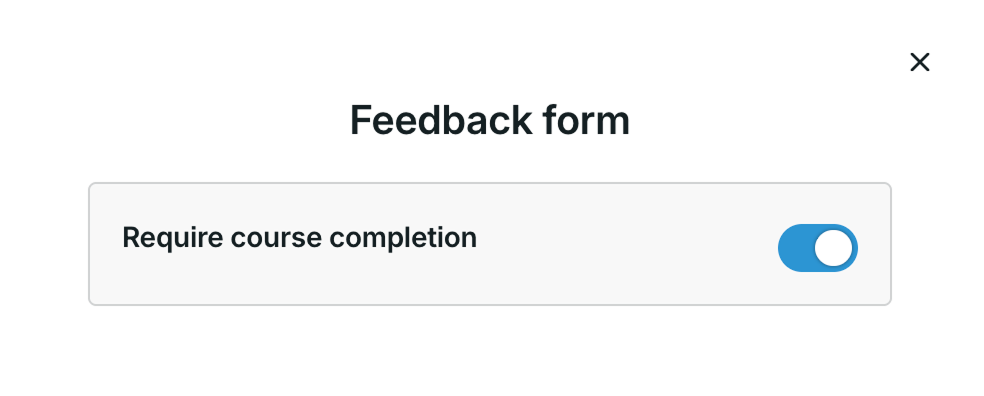
When you select Feedback form settings, a modal will appear where you can toggle Require course completion on or off.
Skills
Add skills to show what learners will gain by completing the course. You can enter up to 20 skills.
Enter each skill in the Add skills window, then select Save.
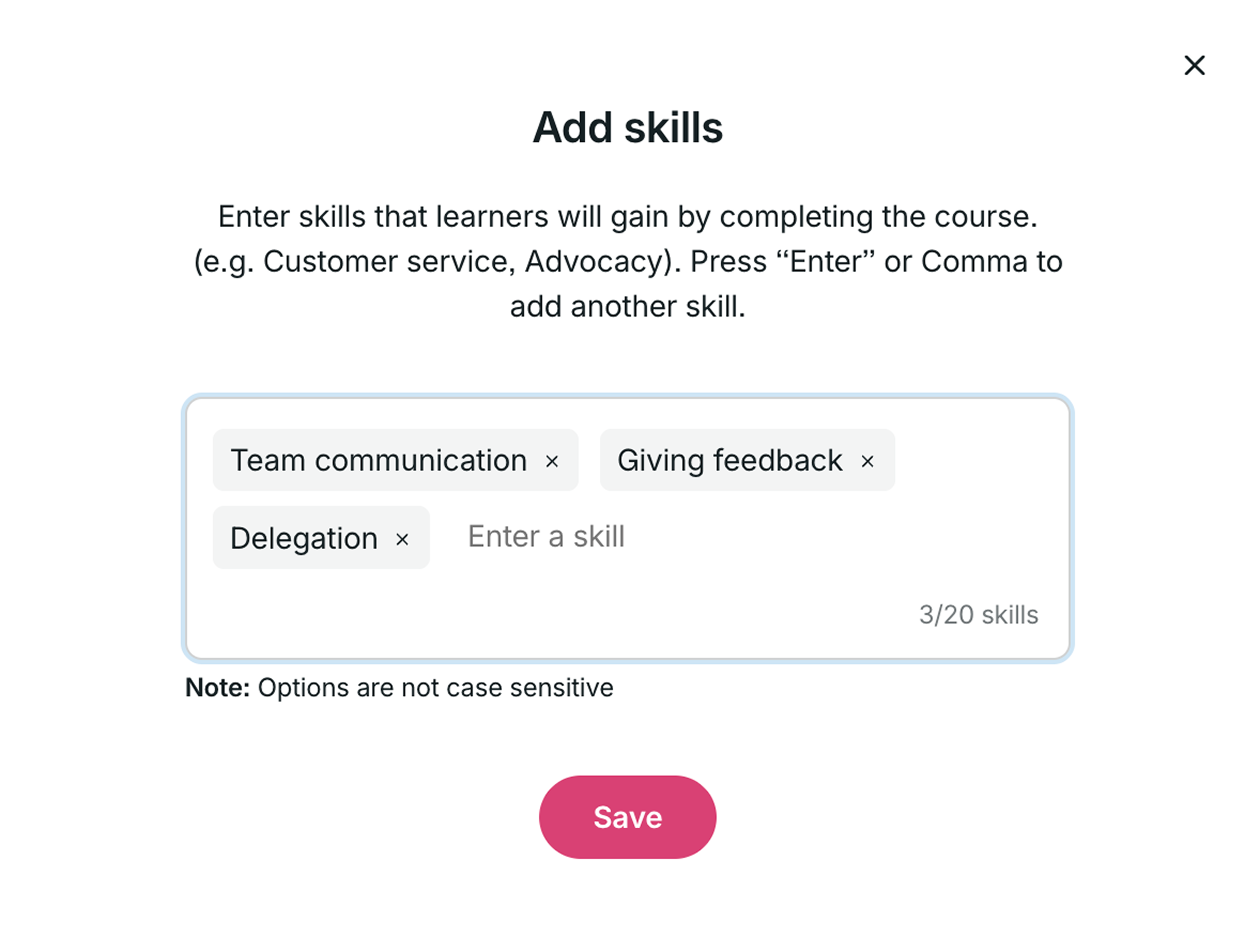
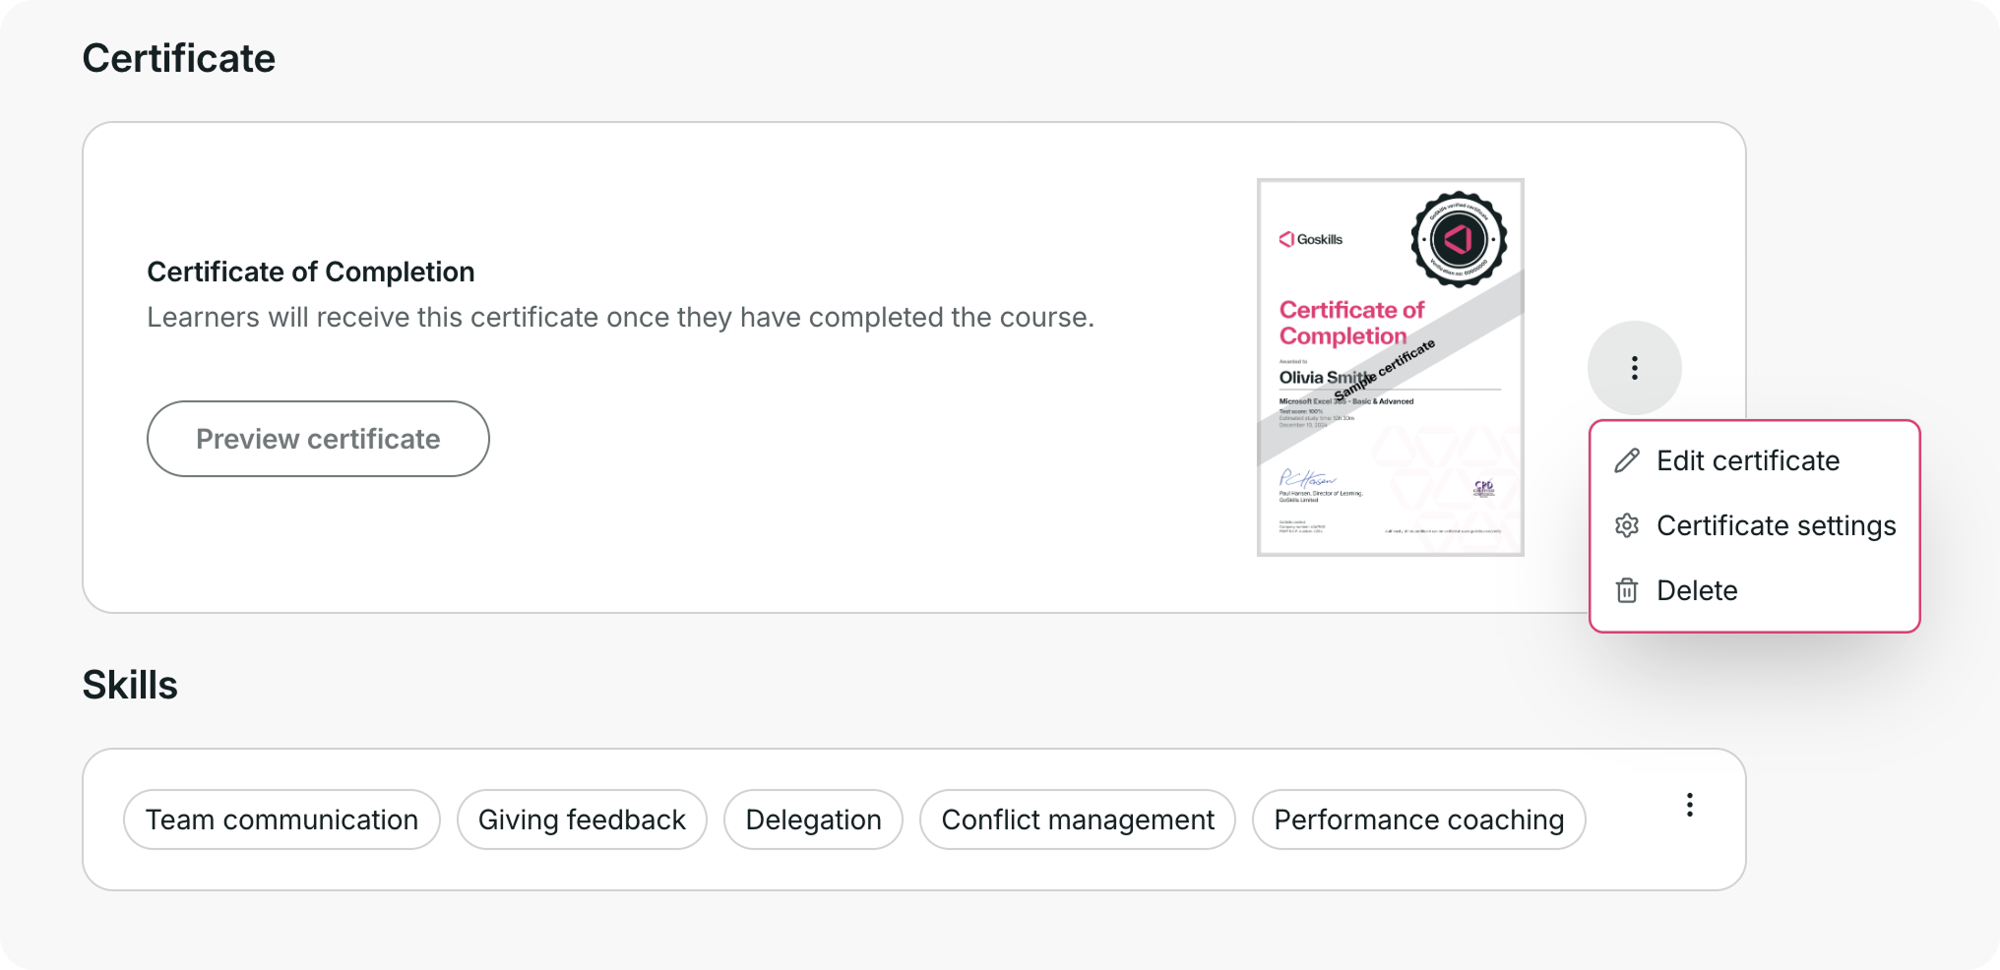
The skills you add will then appear in the Skills section of the course overview page.

Certificate
Add a certificate if you want learners to receive a certificate of completion after finishing the course.
When adding a certificate, you can choose between:
- Standard certificate: Use the ready-made GoSkills template and add your logo, company name, and authorizer details.
- Custom certificate: Use a certificate designed by your organization. A quote is required, and the GoSkills team will set it up for you.
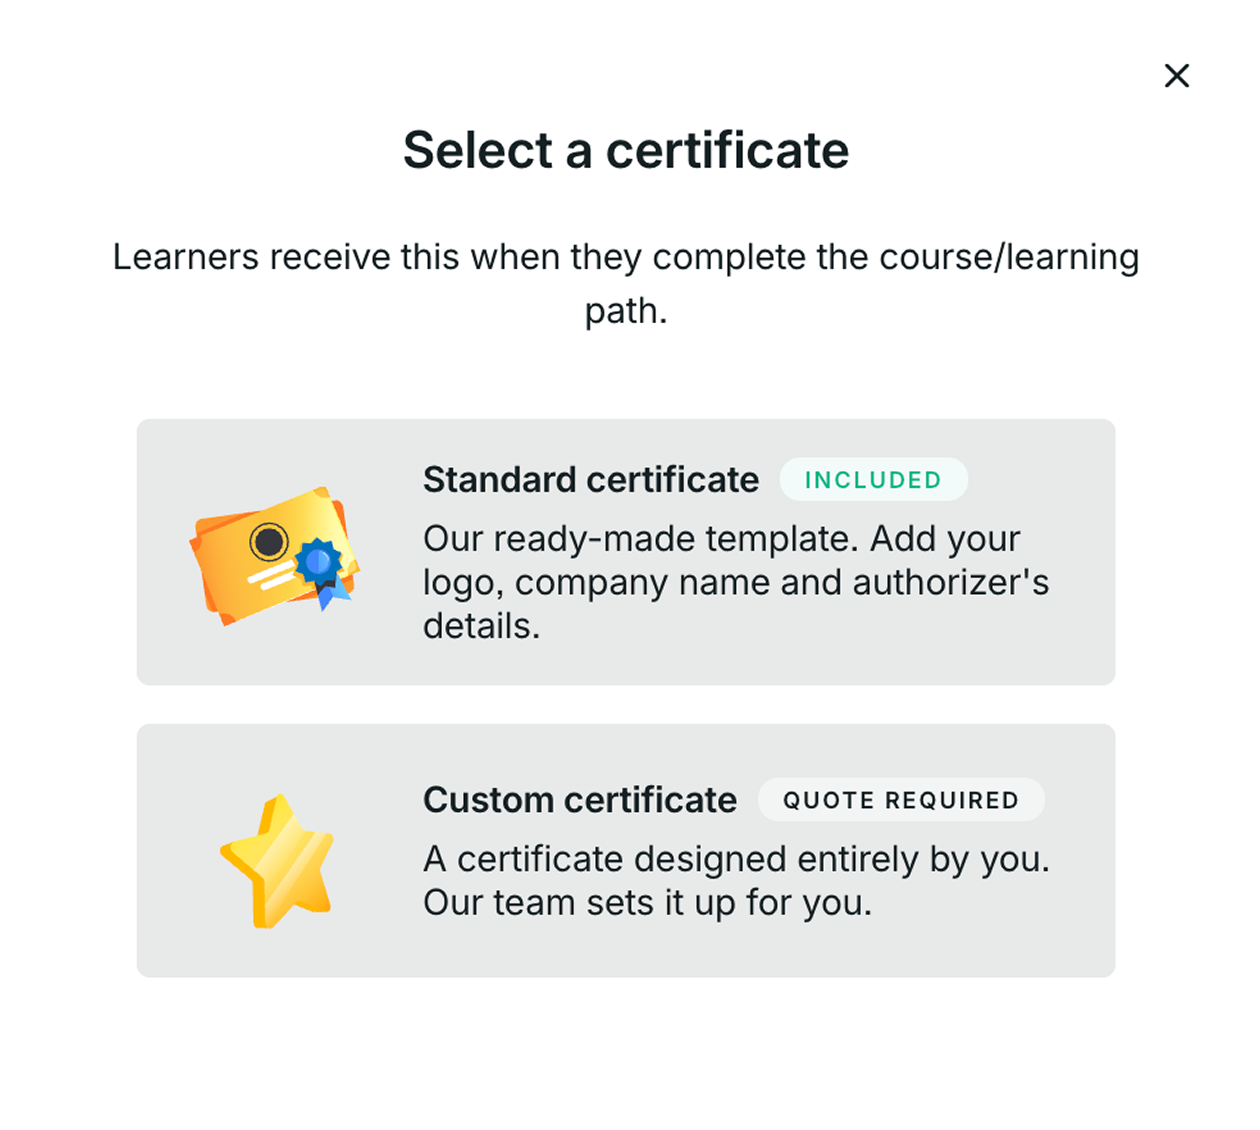
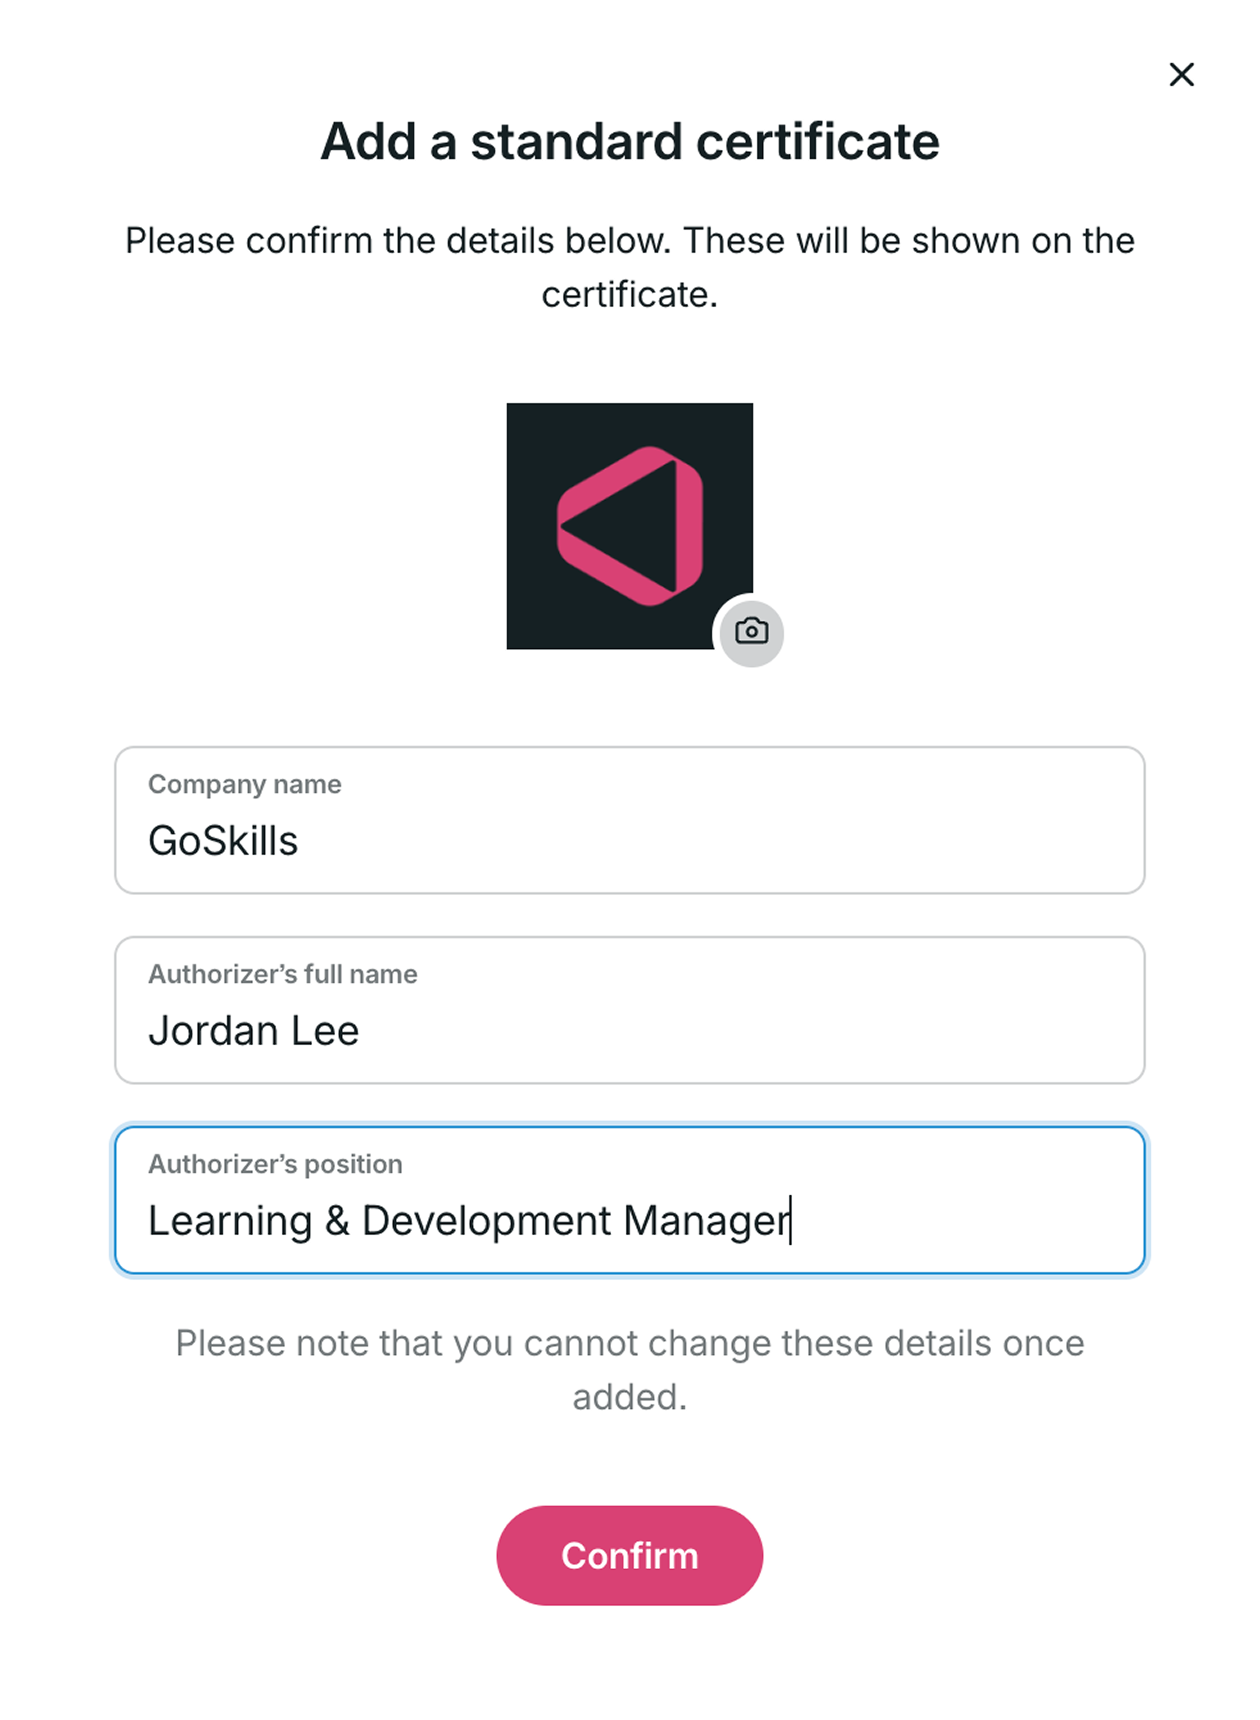
When adding a standard certificate, confirm the following details:
- Company name
- Authorizer’s full name
- Authorizer’s position
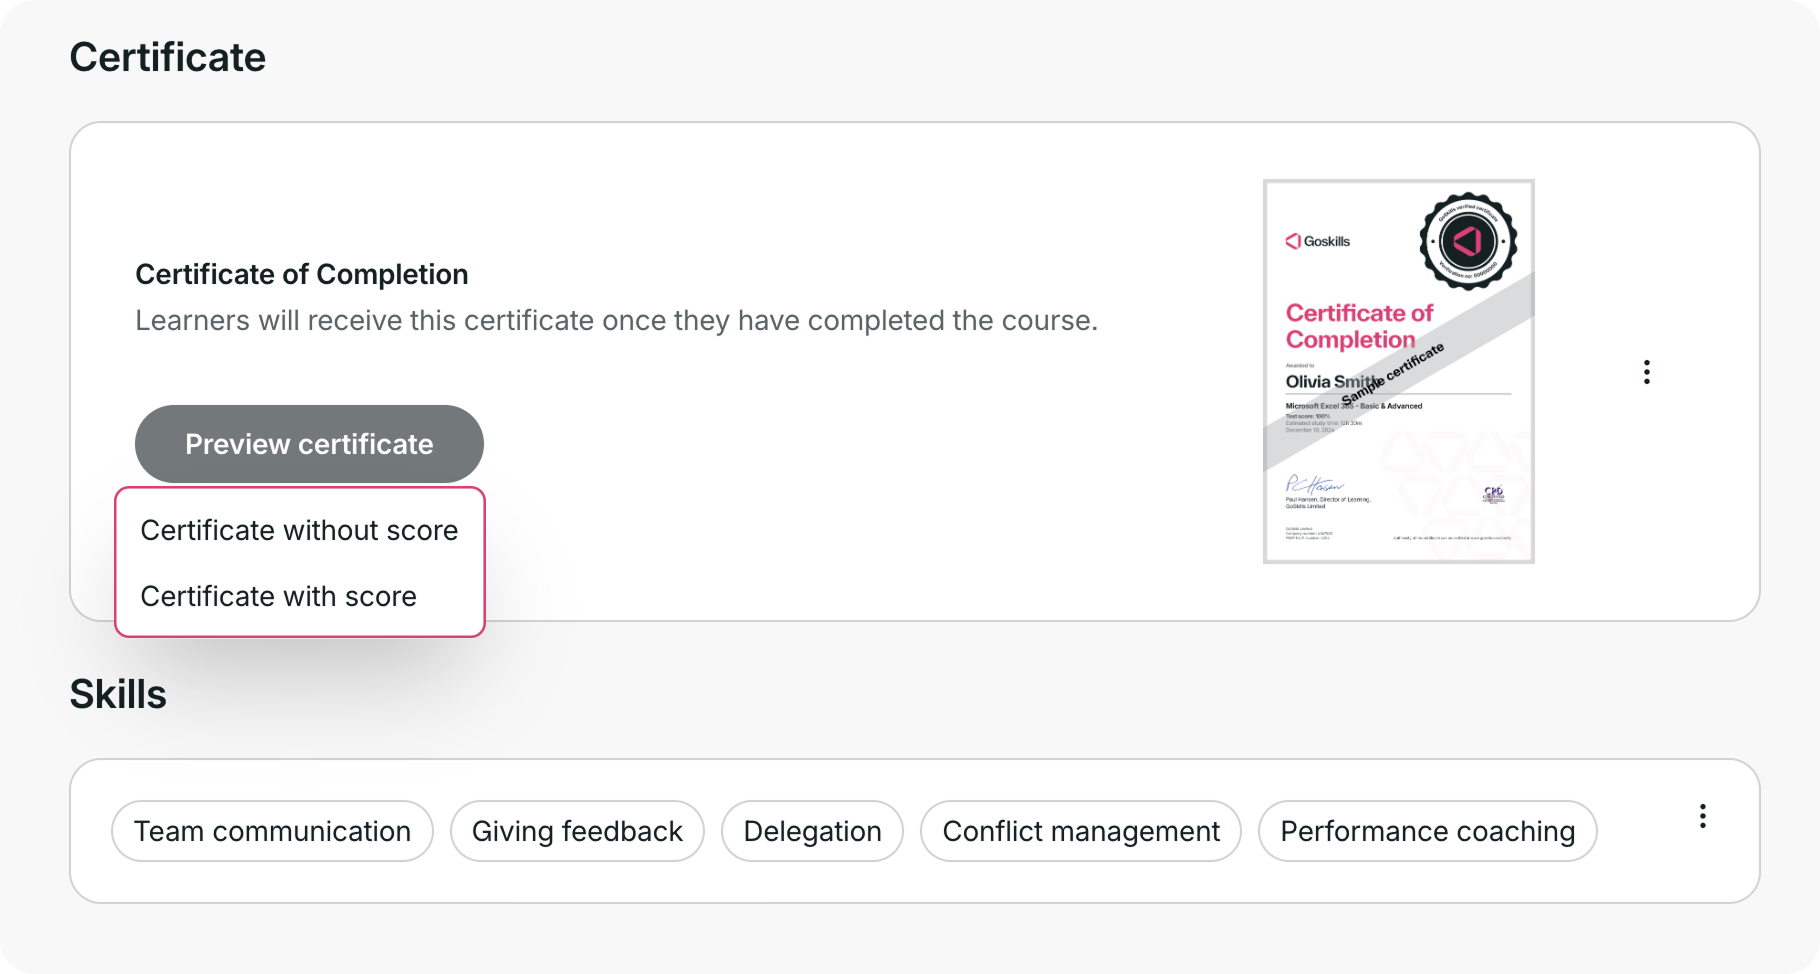
Once the certificate has been added, you can preview it or use the three-dot menu to Edit certificate, open Certificate settings, or Delete it.
Show a final test score on the certificate
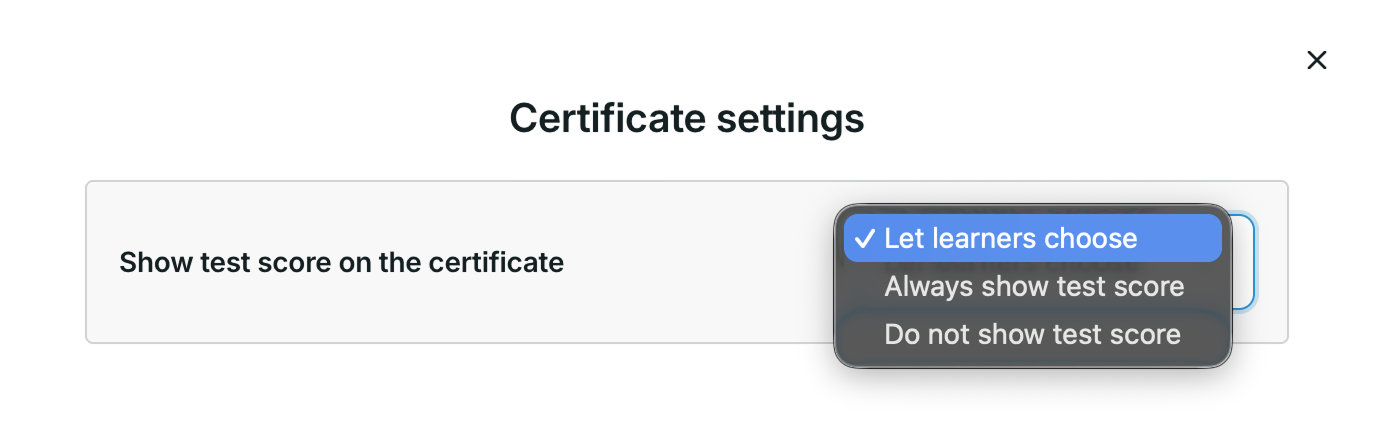
If your course includes a final test, select Certificate settings to choose whether the learner’s test score appears on the certificate.
You can choose:
- Let learners choose
- Always show test score
- Do not show test score
You can also use Preview certificate to preview the certificate with or without the test score.
View and navigate your course outline
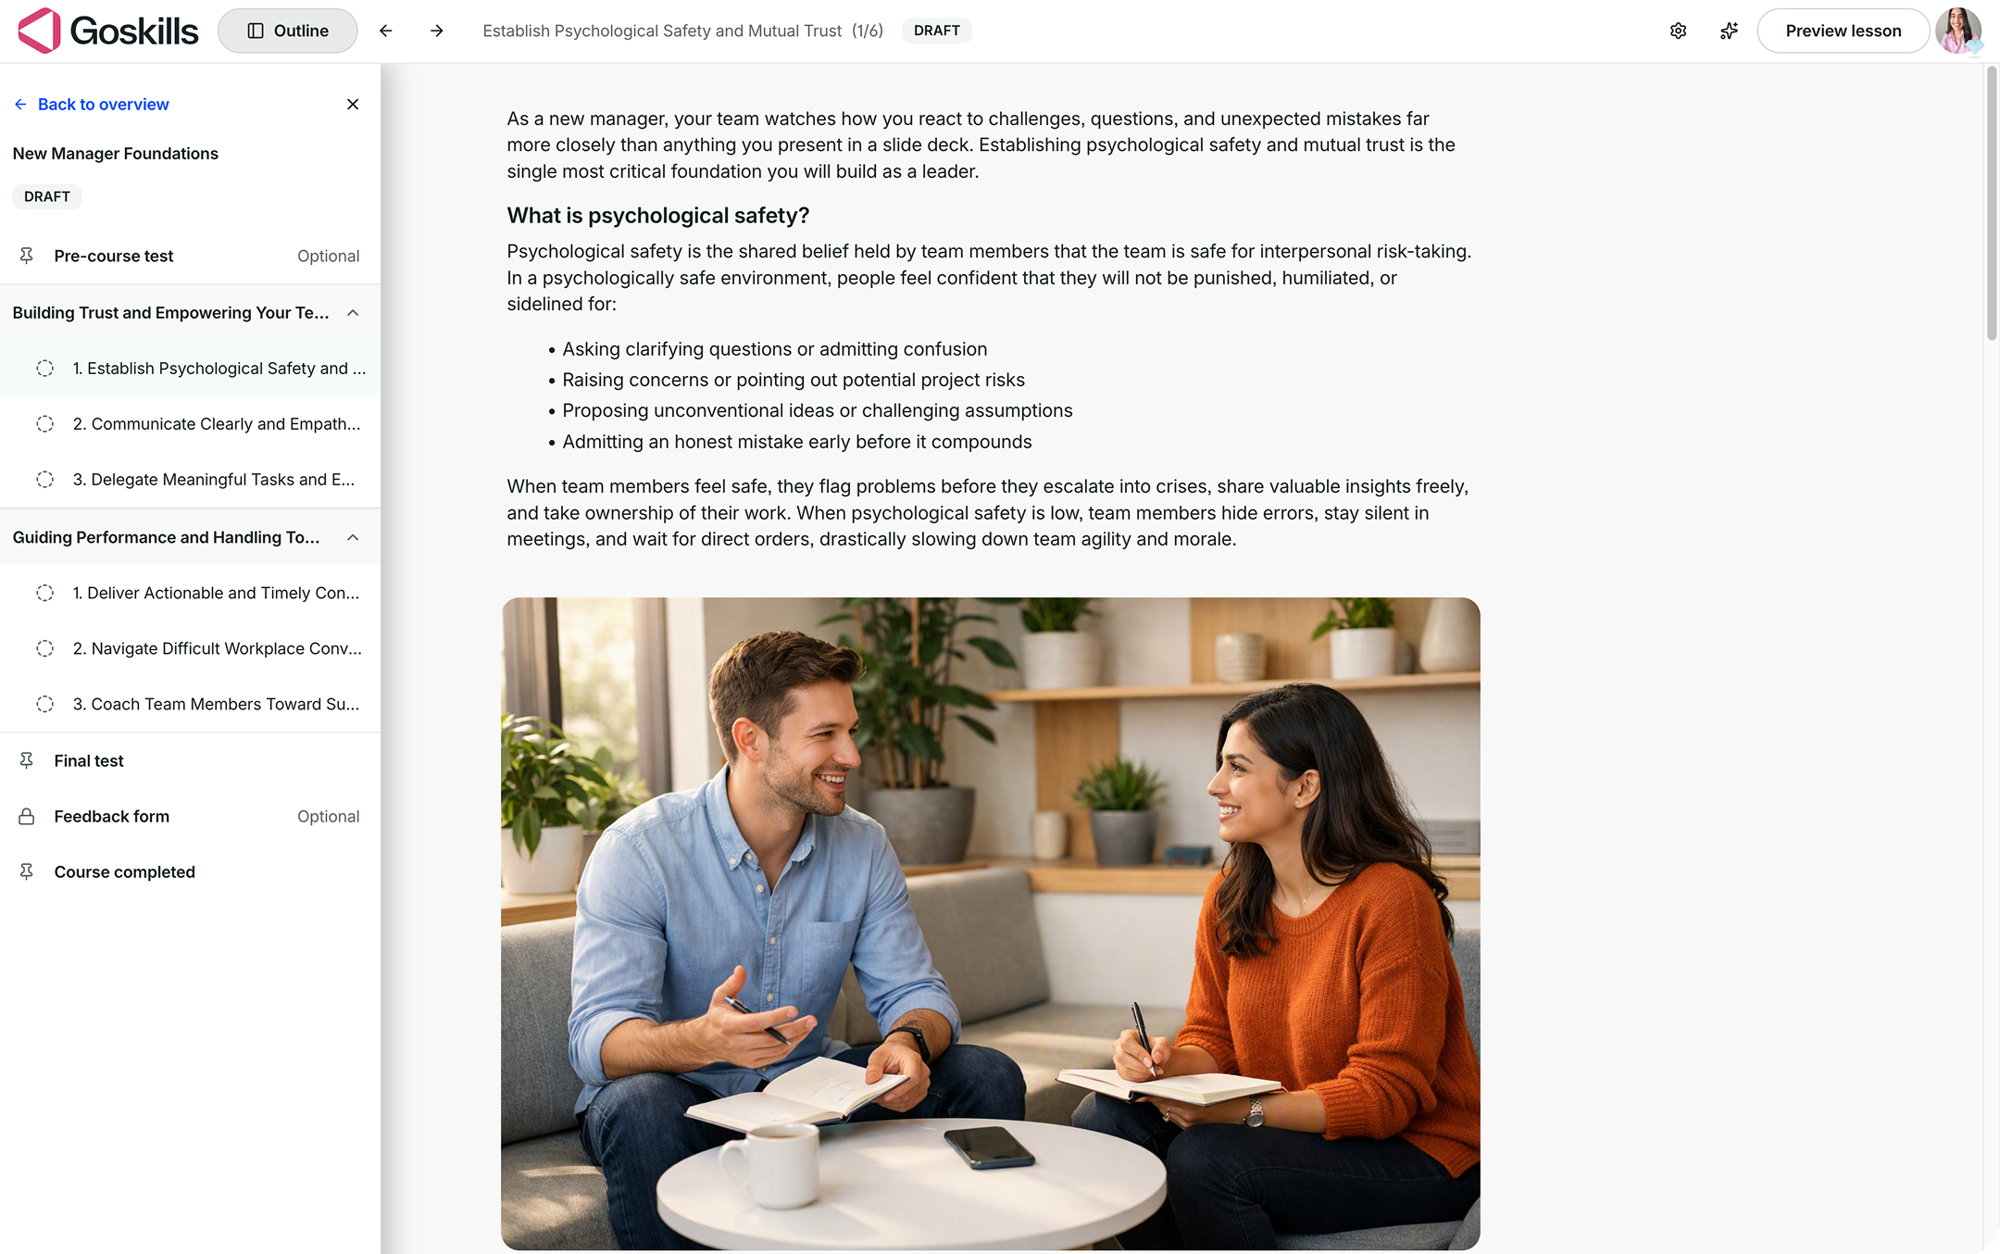
As you build your course, select Outline to open the course navigation on the left-hand side.
The outline gives you a clear view of the course structure, including your pre-course test, lesson groups, individual lessons, final test, feedback form, and completion page. You can also use it to move between different parts of the course while editing.
Need more help?
Have questions about creating an on-demand course in GoSkills? Reach out to us at support@goskills.com. We’re happy to help!