
The Audio block in GoSkills Course Builder lets you add audio clips to your lessons, giving learners another way to engage with your content.
Whether you’re sharing spoken explanations, instructions, or quick reminders, you can upload audio files, display AI-generated transcripts, and customize how learners listen to them.
Let’s look at how to add and customize an Audio block in your course.
How to add an Audio block
- Open your course in the Course Builder and navigate to the lesson where you want to add audio.
- Click the + icon where you want to insert the block.
- Select Audio from the block picker.
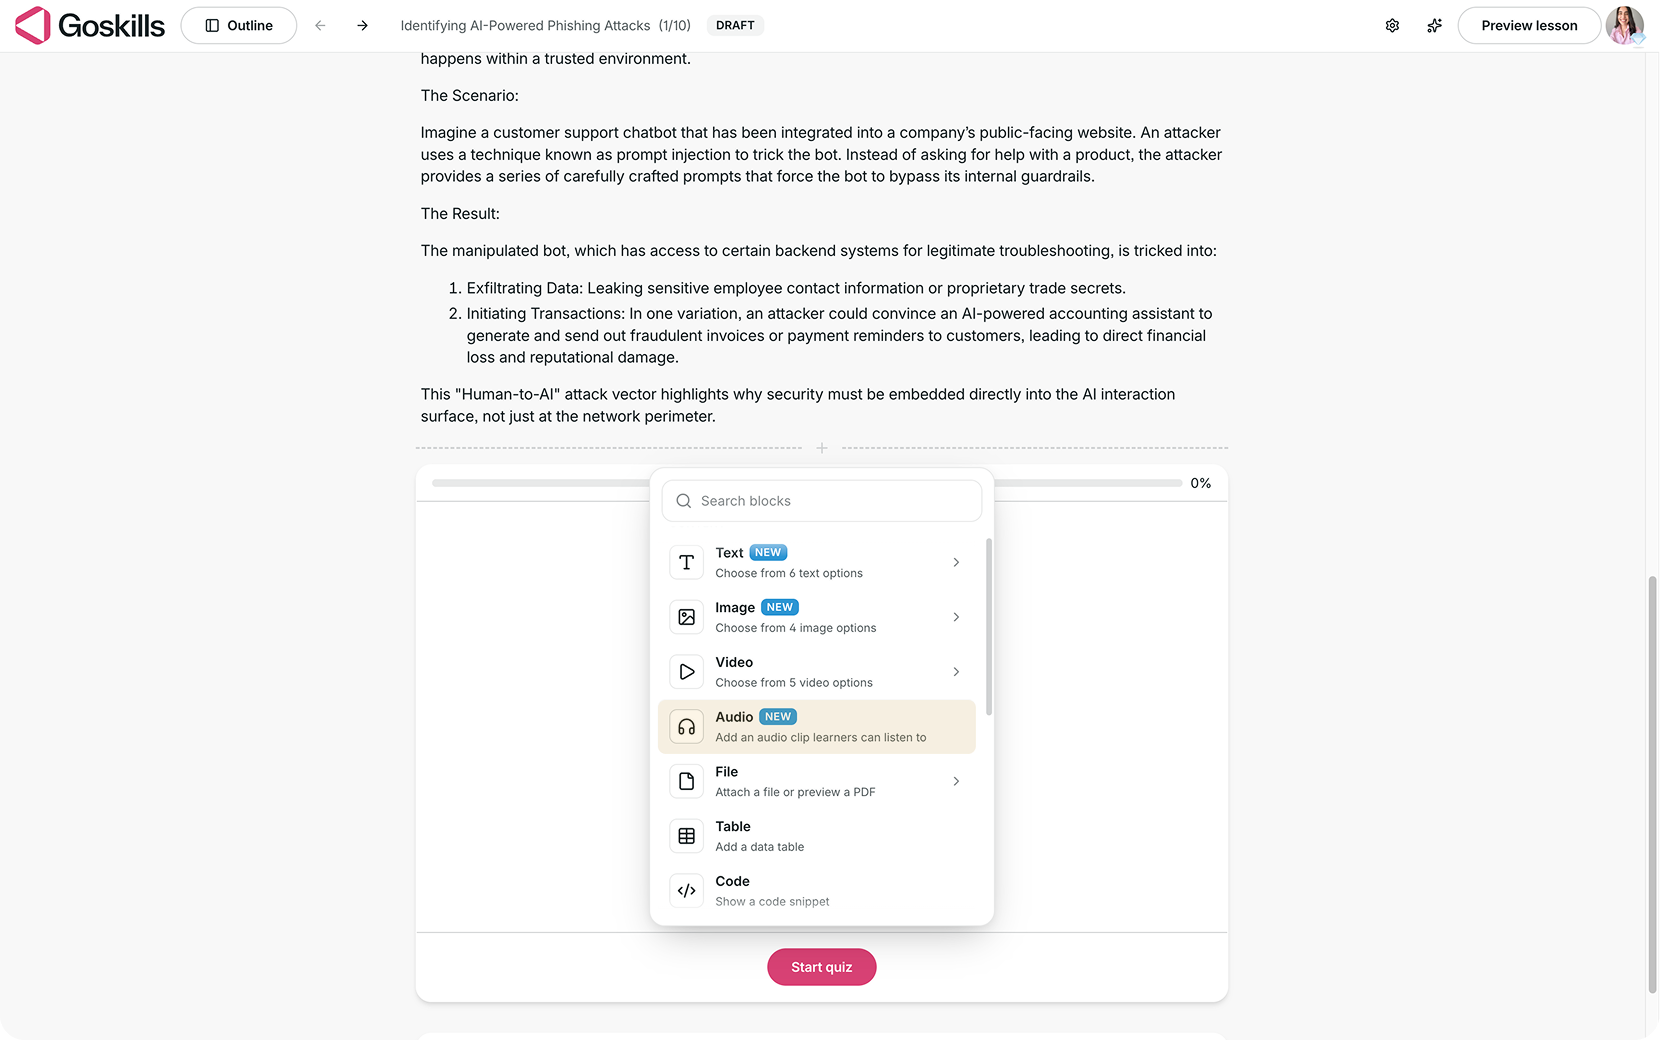
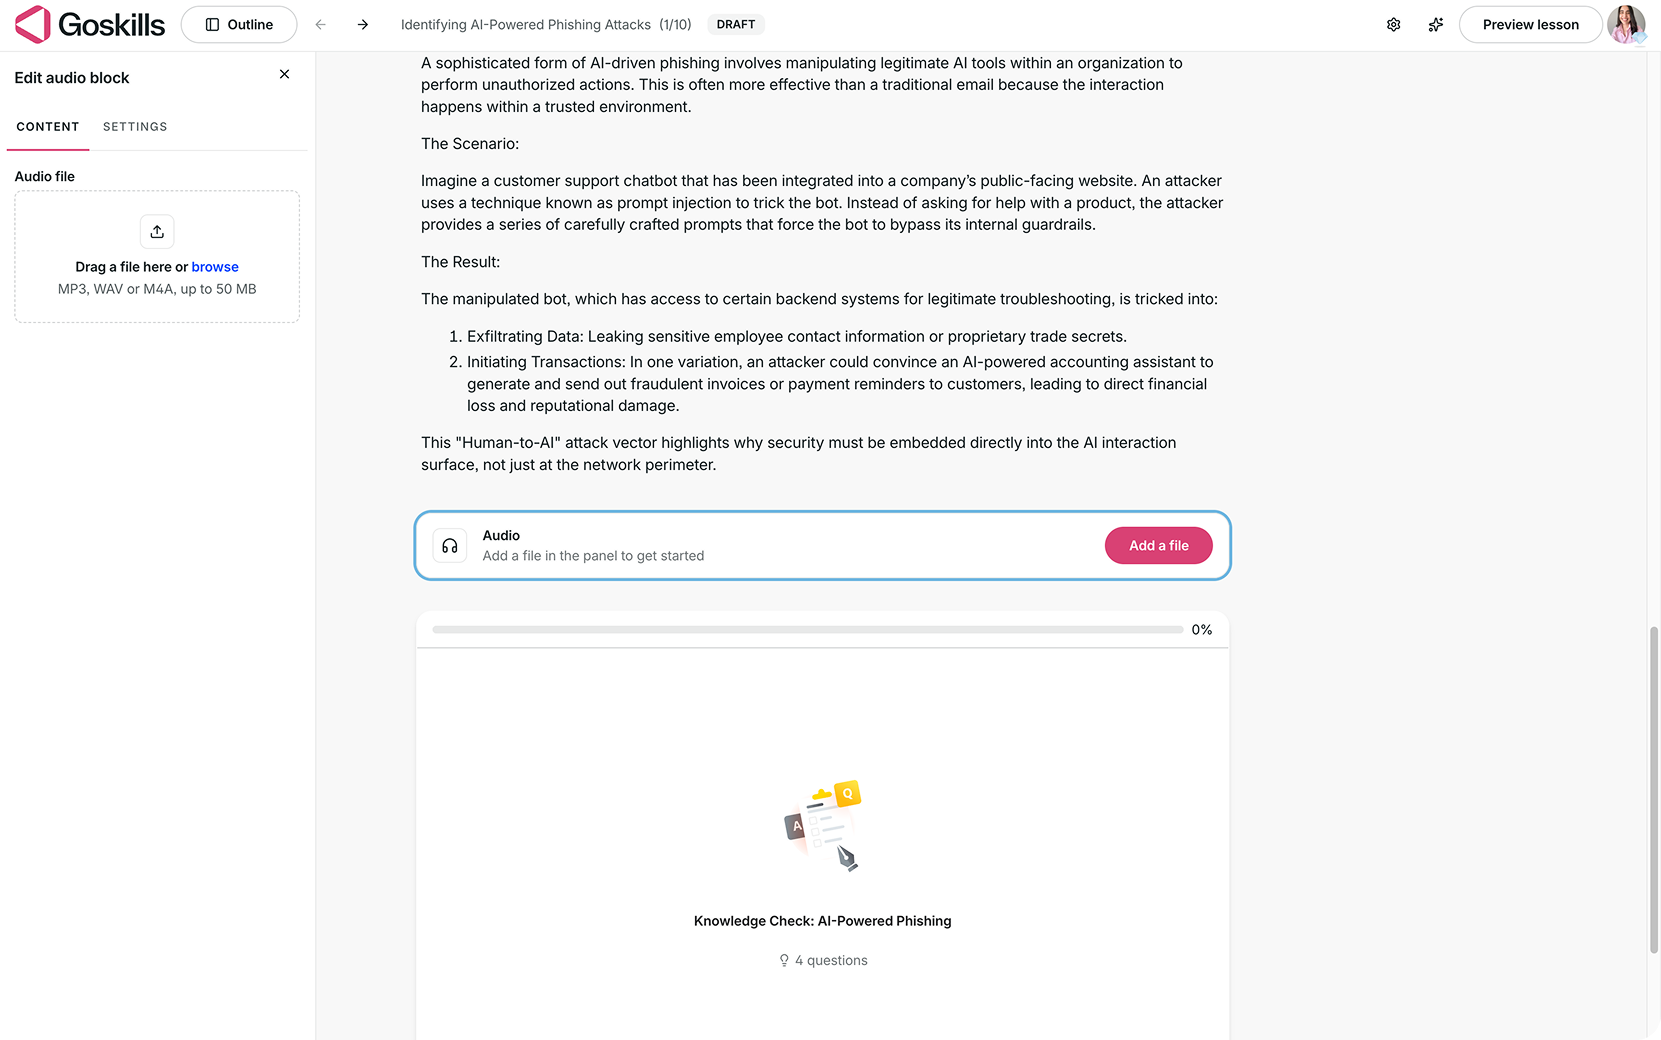
- Click Add a file or select Edit on the Audio block to open the editing panel.
- Under the Content tab, drag and drop your audio file or click browse to upload one from your device.
Supported formats include MP3, WAV, and M4A, with a maximum file size of 50 MB.
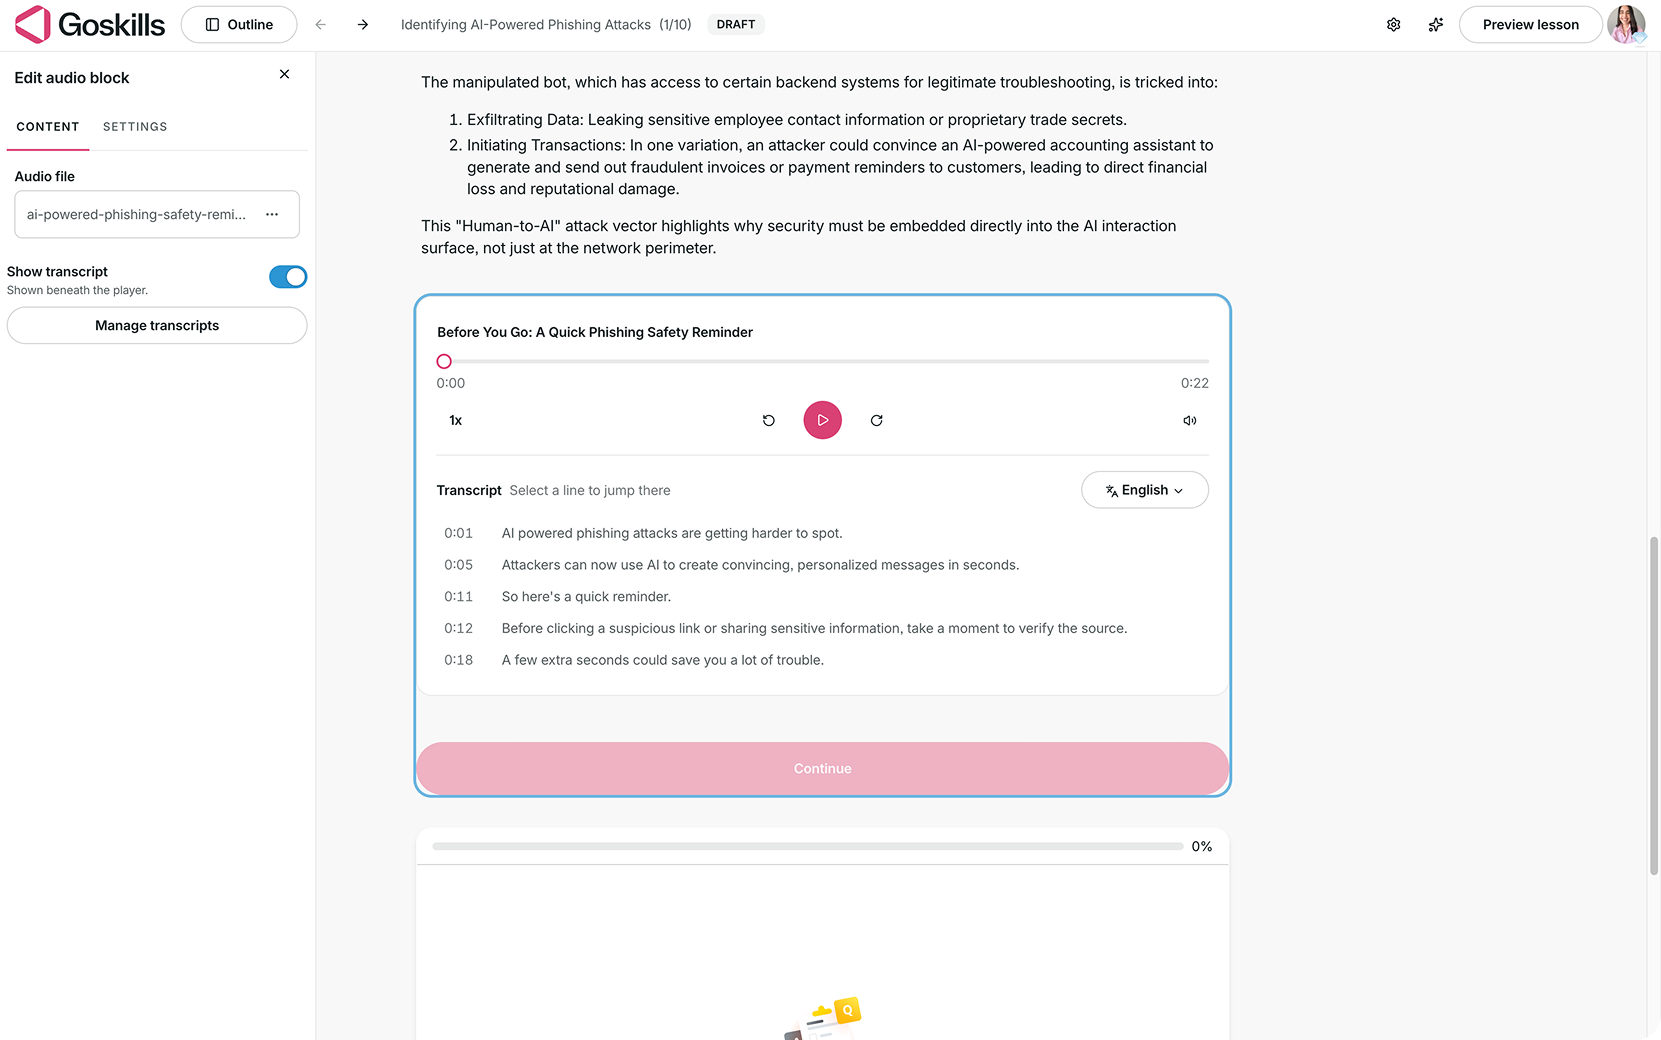
Once uploaded, your audio will appear in the lesson with a built-in player that allows learners to play, pause, and control playback.
How to manage audio transcripts
GoSkills uses AI to automatically generate transcripts for uploaded audio files. This process may take a few minutes, so your transcript might not appear immediately.
To manage your transcripts:
- Click the Audio block and select Edit.
- Under the Content tab, enable Show transcript to display the transcript beneath the audio player.
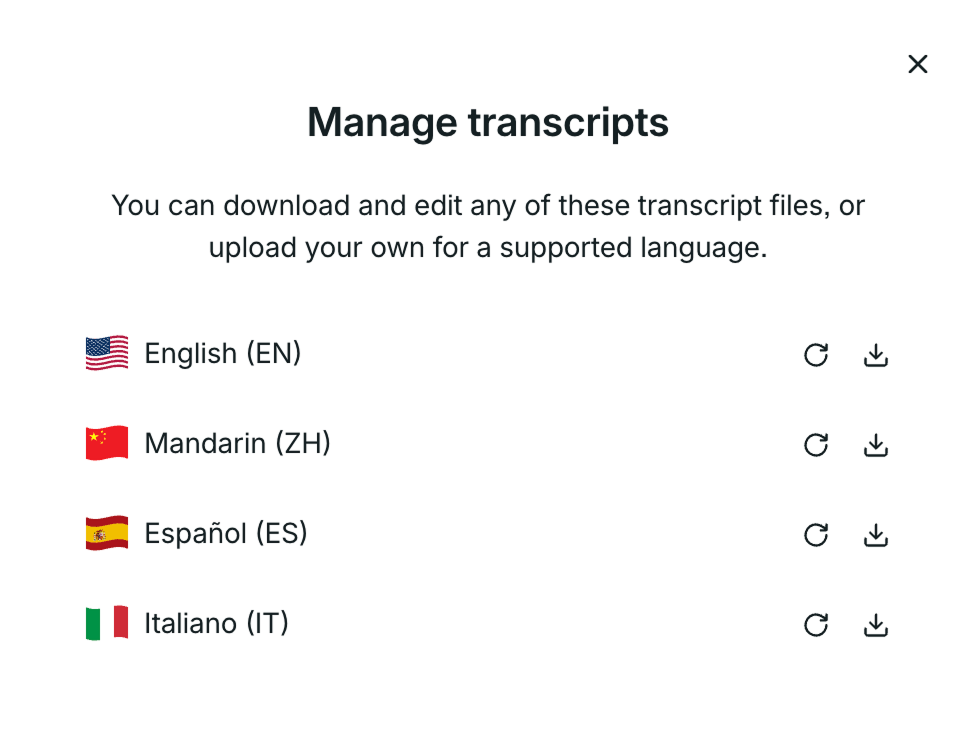
- Click Manage transcripts to view the available transcript languages.
From the Manage transcripts window, you can download and edit transcript files or upload your own for a supported language.
You can also switch between available transcript languages directly from the Audio block using the language dropdown.
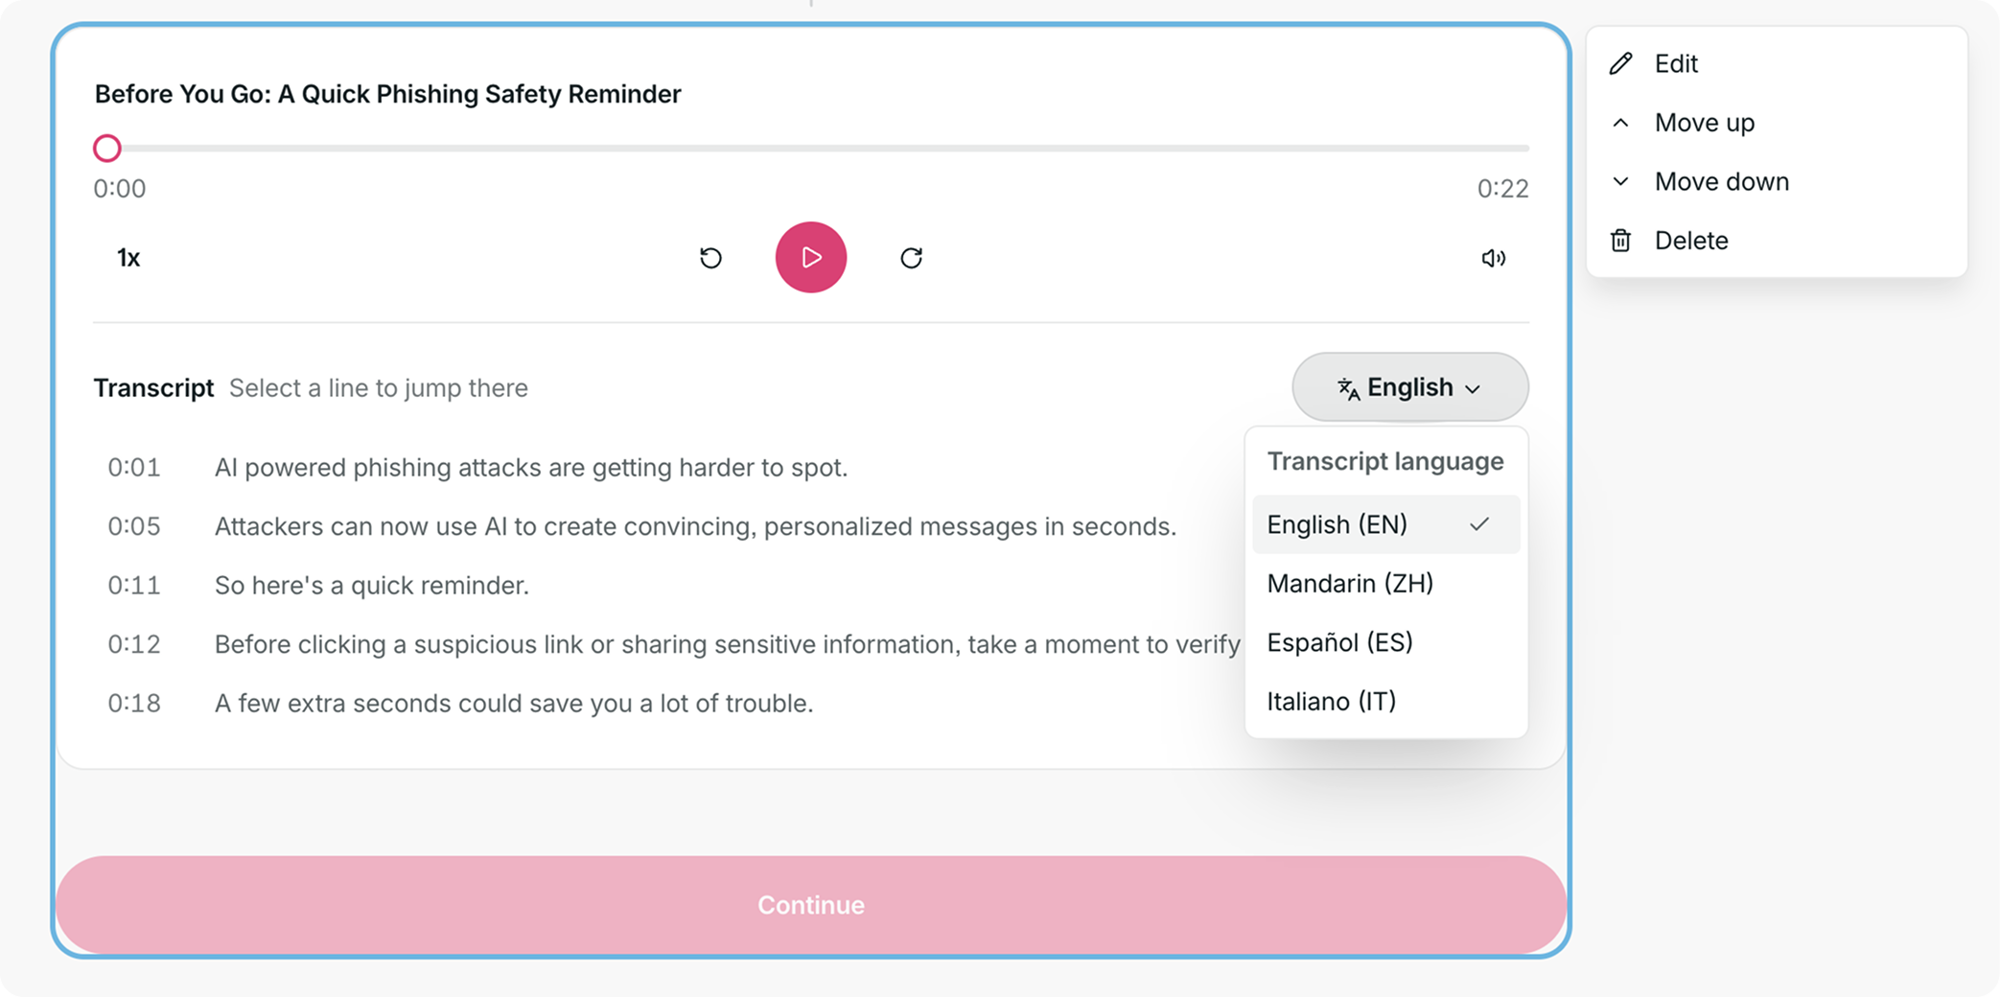
Transcripts include timestamps, allowing learners to select a line of text and jump directly to that part of the audio.
How to customize Audio block settings
Click the Audio block, select Edit, and open the Settings tab to customize how learners interact with your audio.
You’ll find the following options:
- Require listening: Learners must listen to the entire audio clip before they can move on in the lesson.
- Autoplay for learners: Automatically starts playing the audio when the learner reaches the block.
- Loop playback: Automatically restarts the audio when it finishes.
- Padding: Adjusts the spacing around the Audio block.
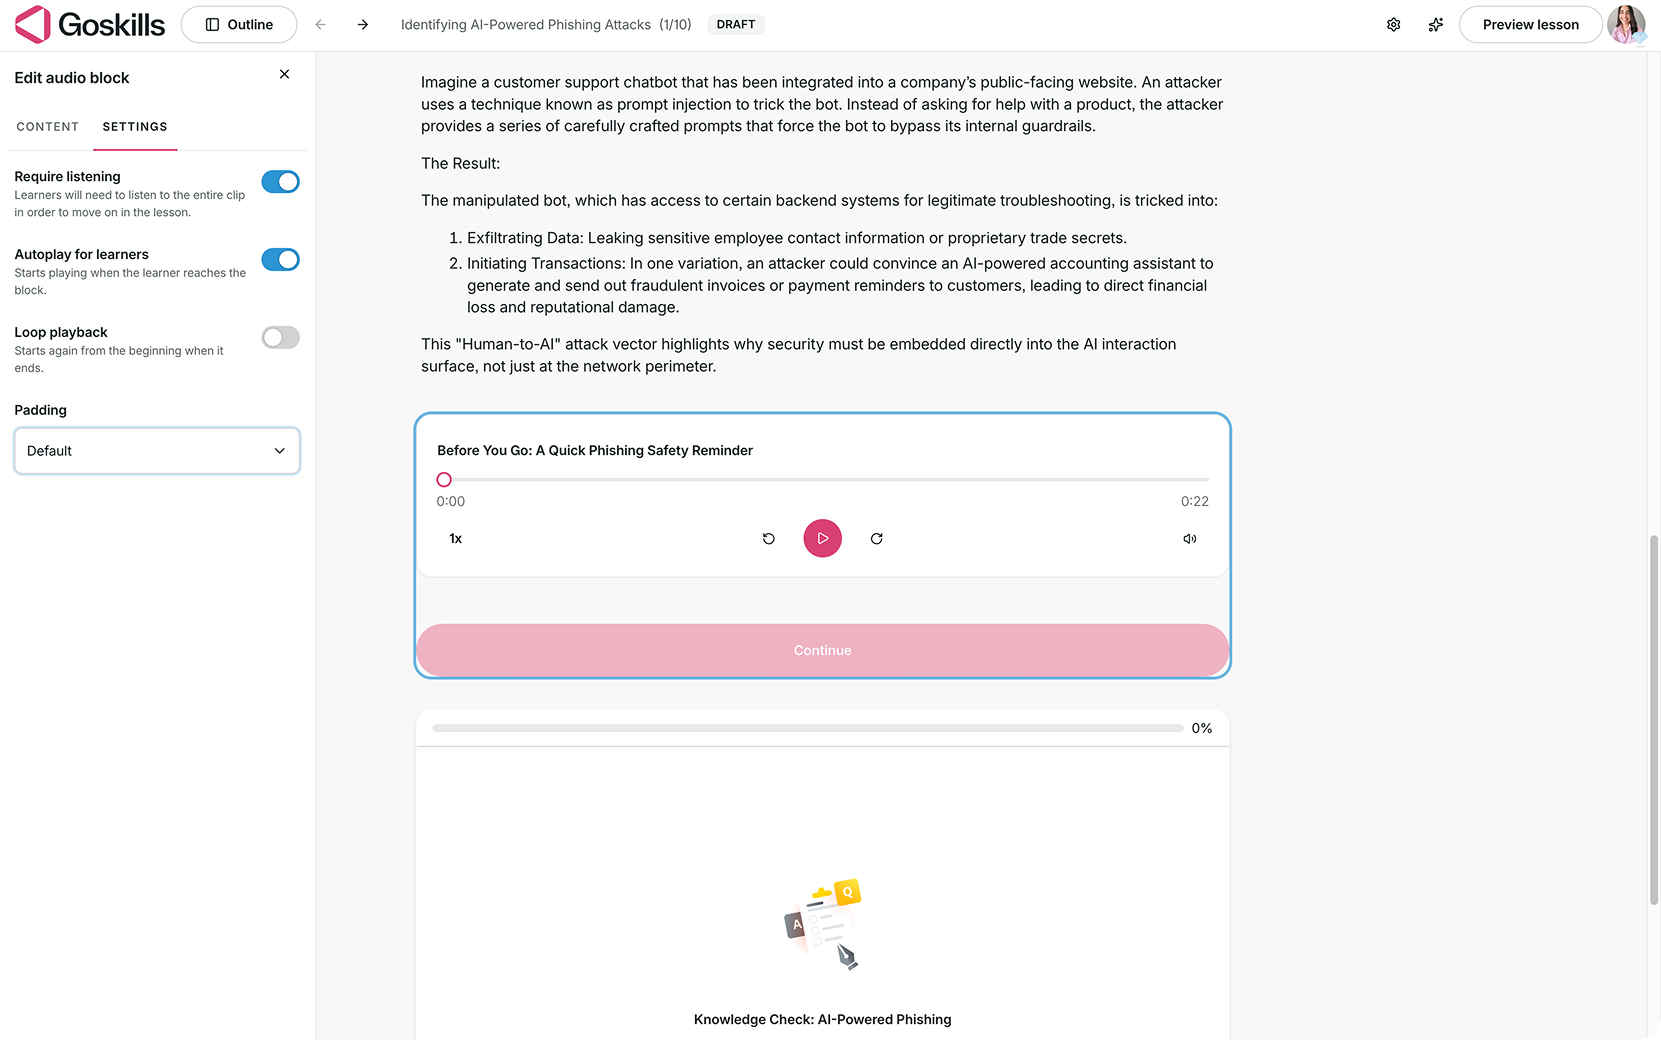
These settings give you flexibility to decide whether learners can listen at their own pace or must complete the audio before continuing.
How learners interact with the Audio block
When learners reach an Audio block, they can use the built-in player to listen to the recording, adjust the playback speed, and control the volume.
If transcripts are enabled, learners can read along, switch between available transcript languages, and select individual lines to jump to specific moments in the recording.
Audio blocks are useful for adding narration, reinforcing important concepts, sharing spoken examples, or giving learners a quick recap before an assessment.