
Image blocks in the GoSkills Course Builder help you bring your training content to life with visuals, making information easier to understand and remember.
There are four options under the Image category: Image, Image + text, Labeled image, and Multiple images.
In this guide, we’ll walk through how to add, edit, and customize these blocks, along with practical ideas for using them in your courses.
How to add an image block
- Open your course in the GoSkills Course Builder and navigate to the lesson where you want to add an image.
- Click Add a block and select Image from the block picker.
- Choose the type of image block you want to add.
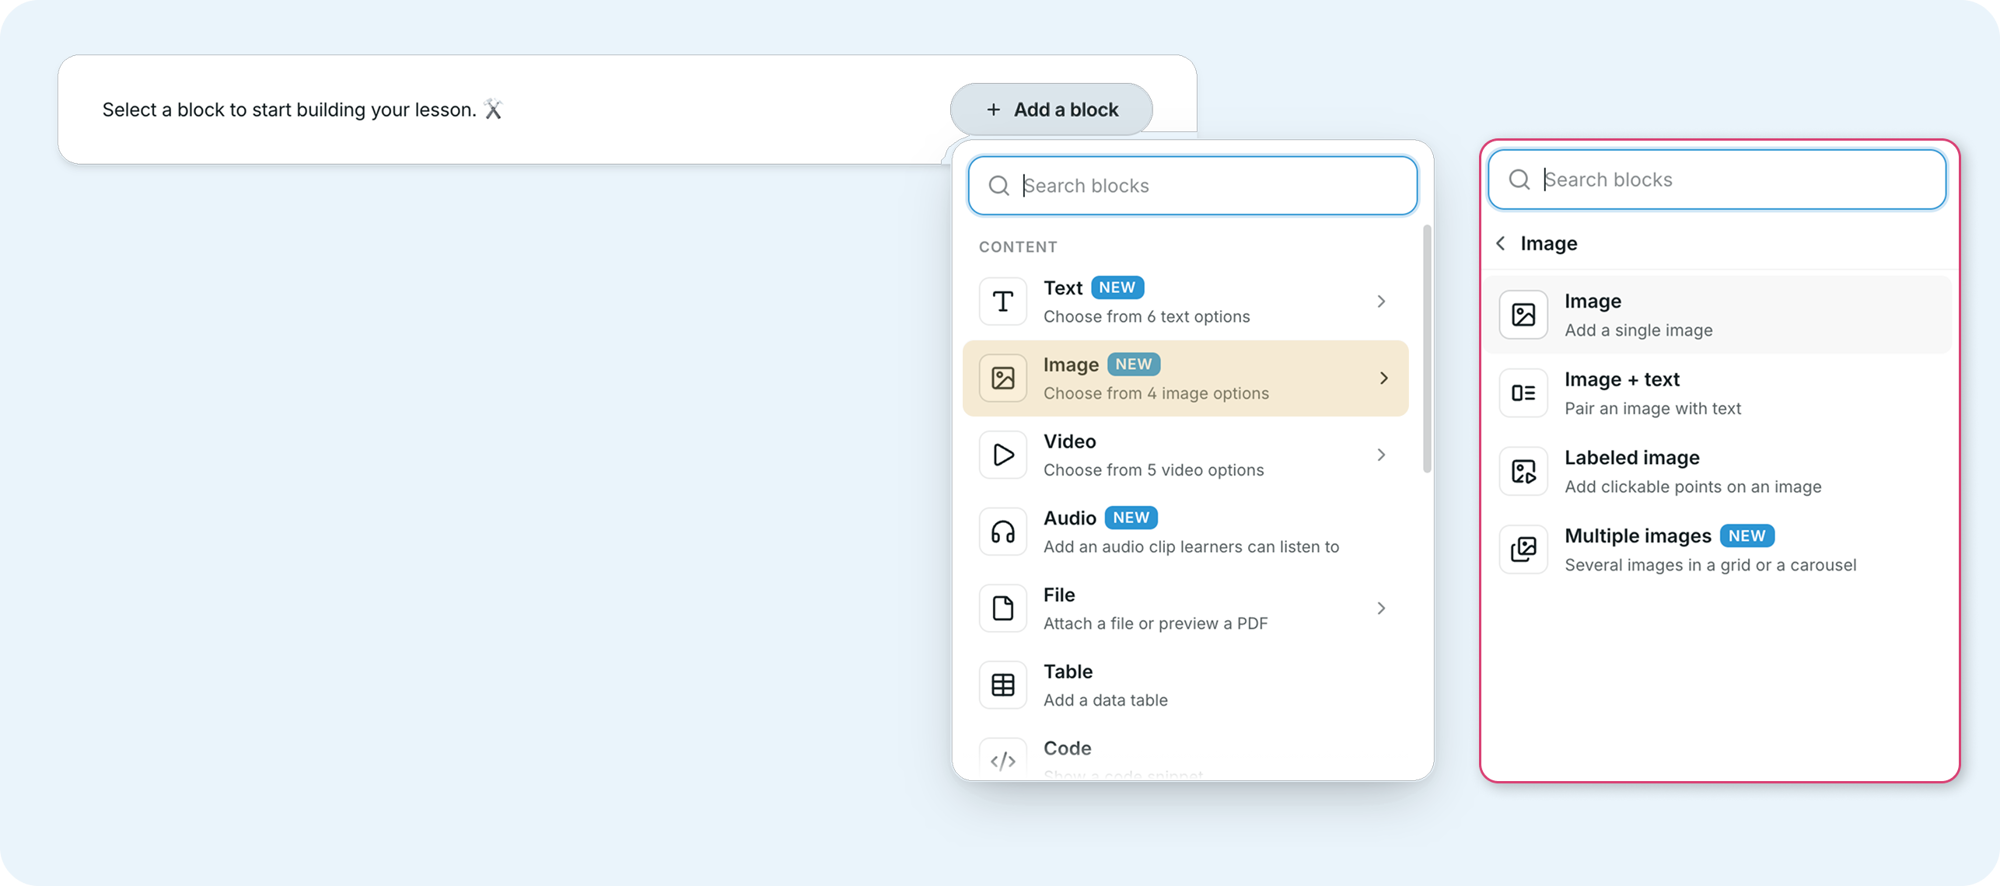
You can upload your own images or choose from the built-in photo gallery, which lets you search for images from Unsplash.
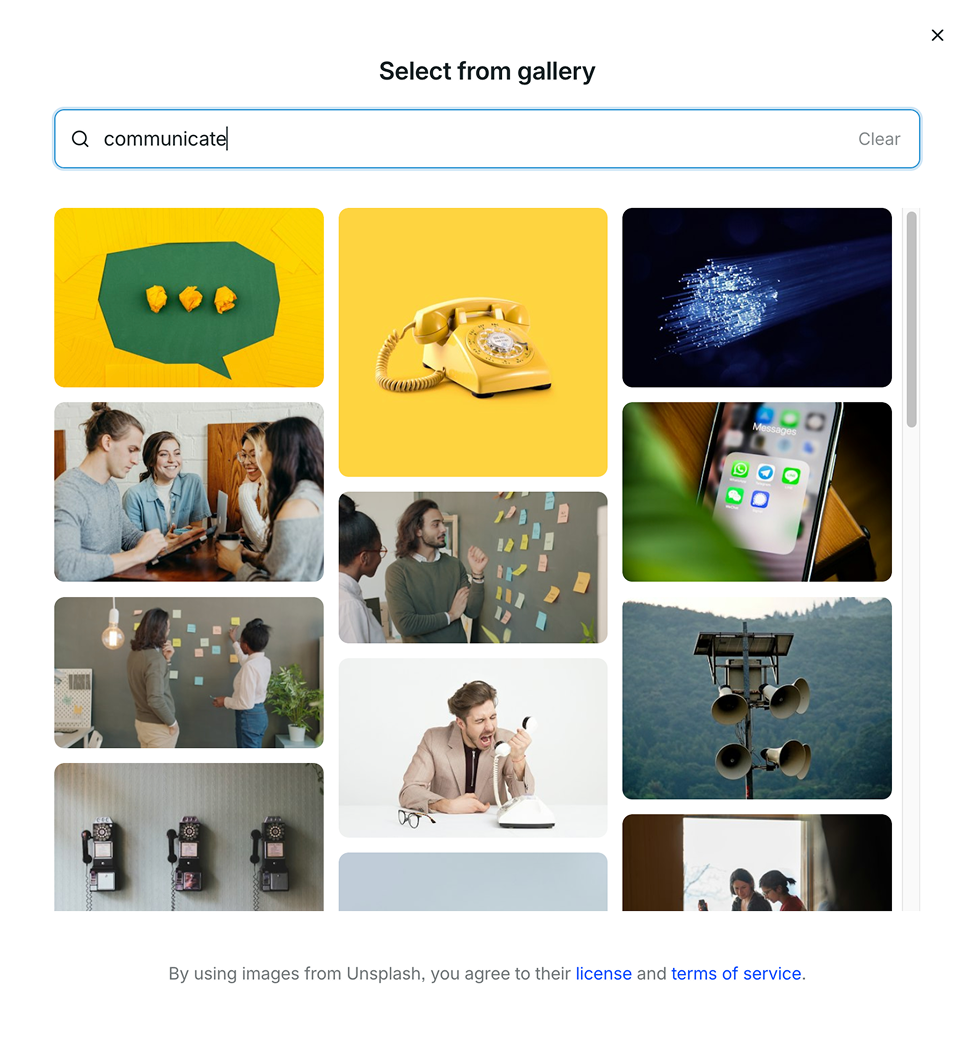
Each image block offers different content and display options, depending on how you want to present your visuals.
Image block
The Image block lets you add a single picture to your lesson. It’s ideal for illustrating a concept, showing an example, or breaking up longer sections of text.
To customize an Image block, open the block menu and select Edit.
Under Content, you can change the image and add alternative text (alt text), which helps screen readers describe the image to learners who cannot see it.
Under Settings, you can:
- Image size: Adjust how large the image appears in the lesson.
- Include caption: Add a short description below the image.
- Link the image: Make the image clickable so learners can open a website.
- Padding: Adjust the spacing around the image.
You can also replace an image by selecting Upload an image or Select from gallery from the block menu.
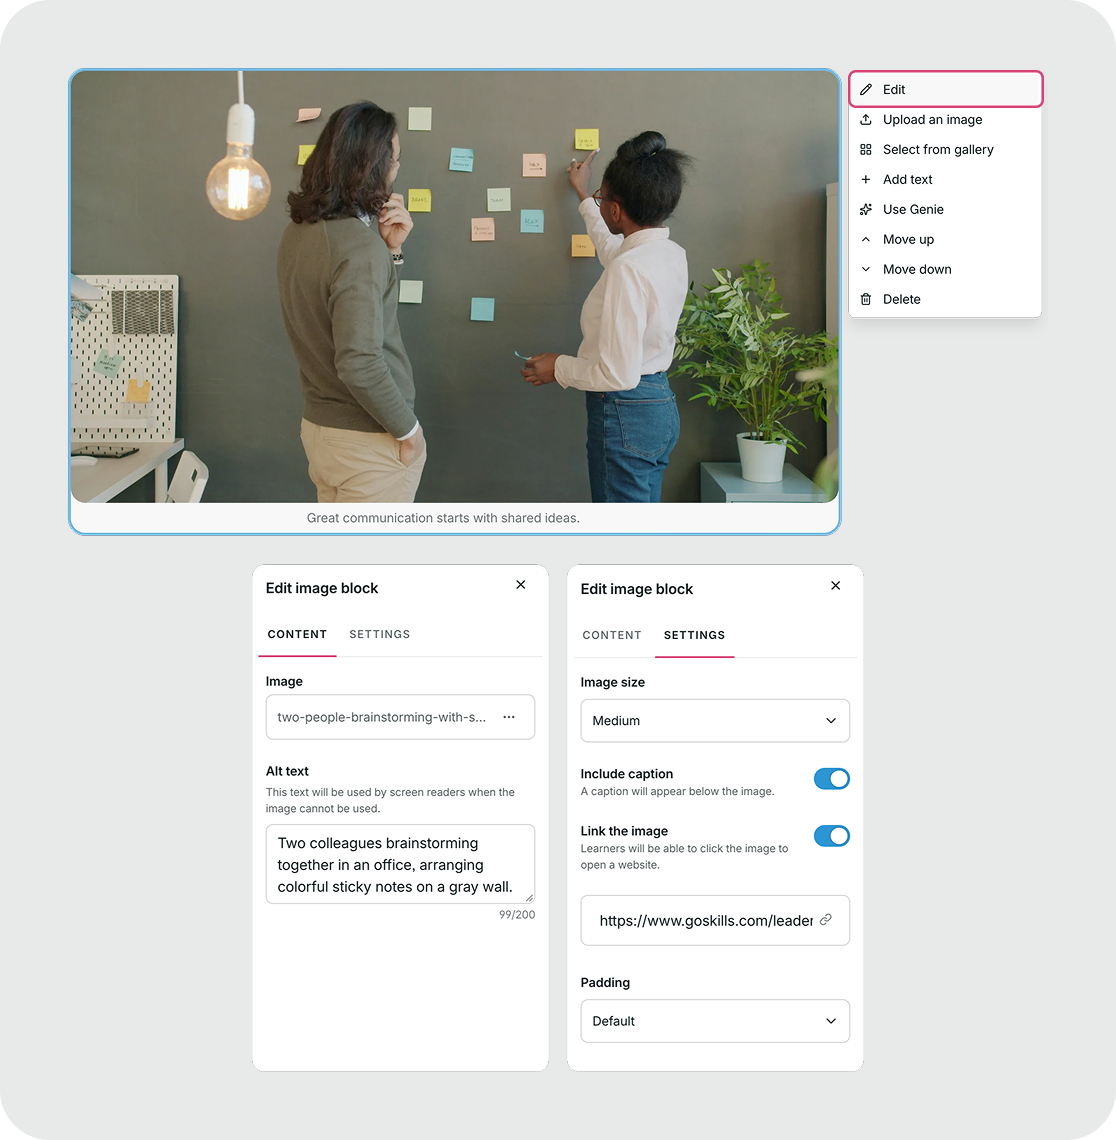
Training example: Add screenshots to demonstrate a software feature, illustrate a workplace procedure, or provide visual examples of effective communication techniques.
Image + text block
The Image + text block combines a picture with written content, allowing learners to connect a visual with its explanation without switching between separate blocks.
To customize an Image + text block, open its settings. You can adjust:
- Content alignment: Align the text and image at the top, center, or bottom.
- Content order: Choose whether the image appears before or after the text.
- Image size: Adjust the size of the image.
- Include caption: Display a caption below the image.
- Include a button: Add a clickable button that directs learners to a website.
- Background and padding: Customize the block’s appearance and spacing.
You can also edit the accompanying text using the rich-text editor and add alt text to the image.
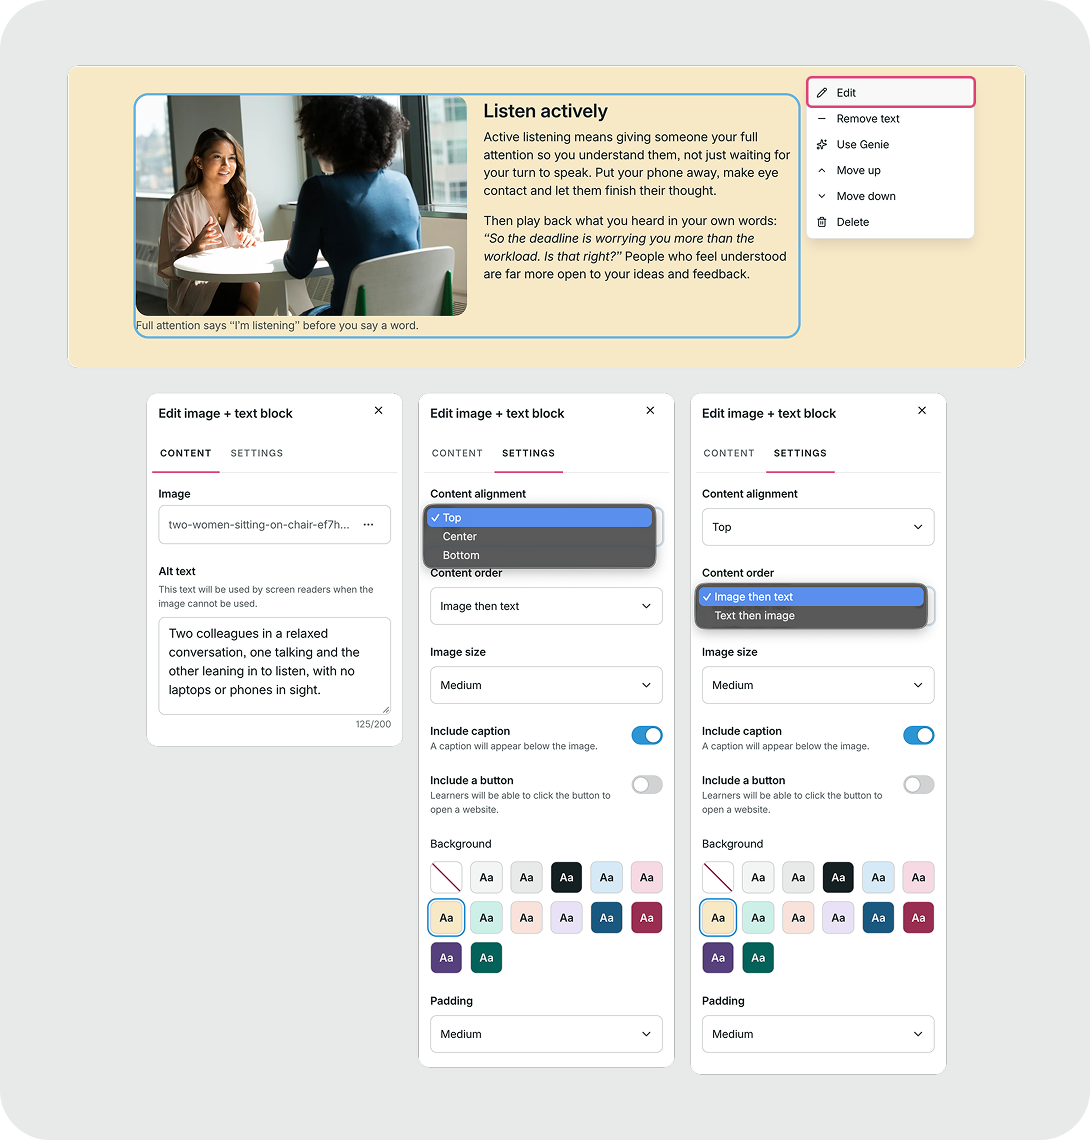
Training example: Pair a workplace scenario with an explanation of a communication technique, illustrate a safety practice with supporting instructions, or introduce a new tool alongside a description of its benefits.
Labeled image block
The Labeled image block turns a picture into an interactive learning experience by letting you add clickable points to specific areas of an image.
Learners can select each point to reveal additional information, making this block useful for exploring diagrams, identifying components, or examining details within a visual.
Adding and editing labels
- Add a Labeled image block and upload or select your image.
- Click anywhere on the image to add a label.
- Enter a Label title and Label description.
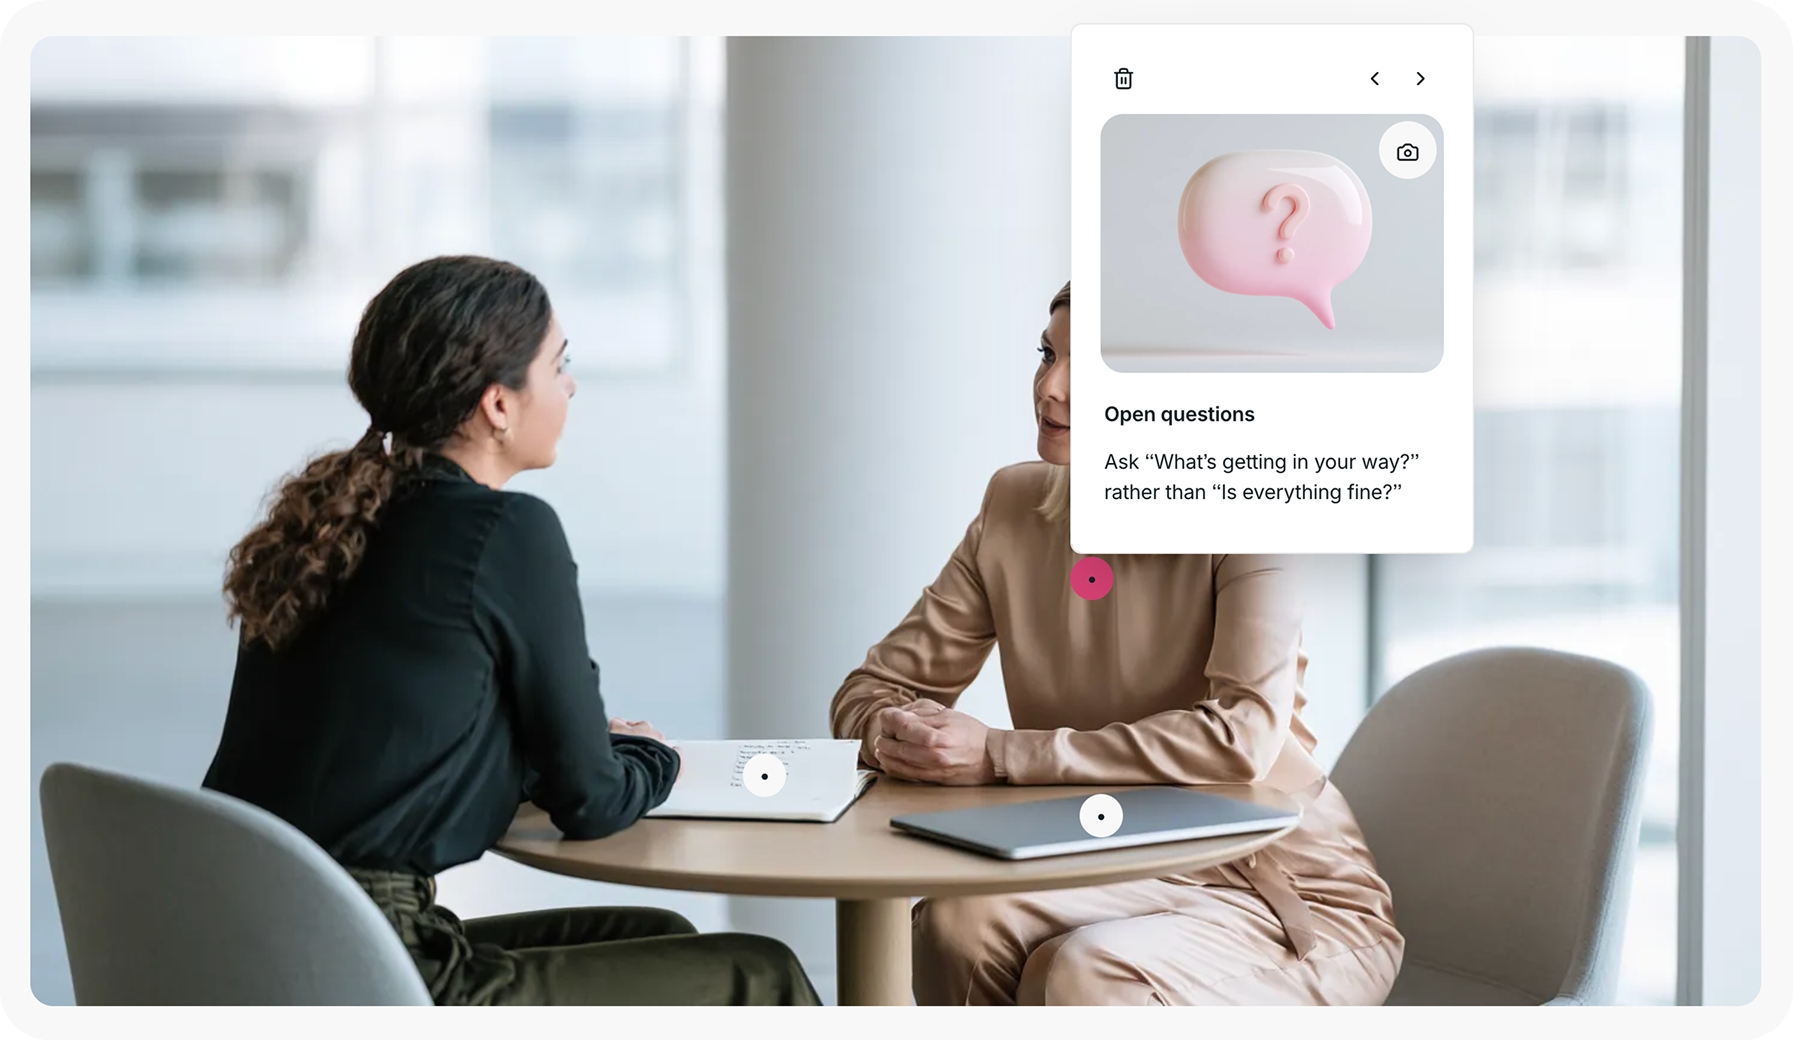
- Optionally, add an image to the label for additional context.
- Repeat the process to add more labels.
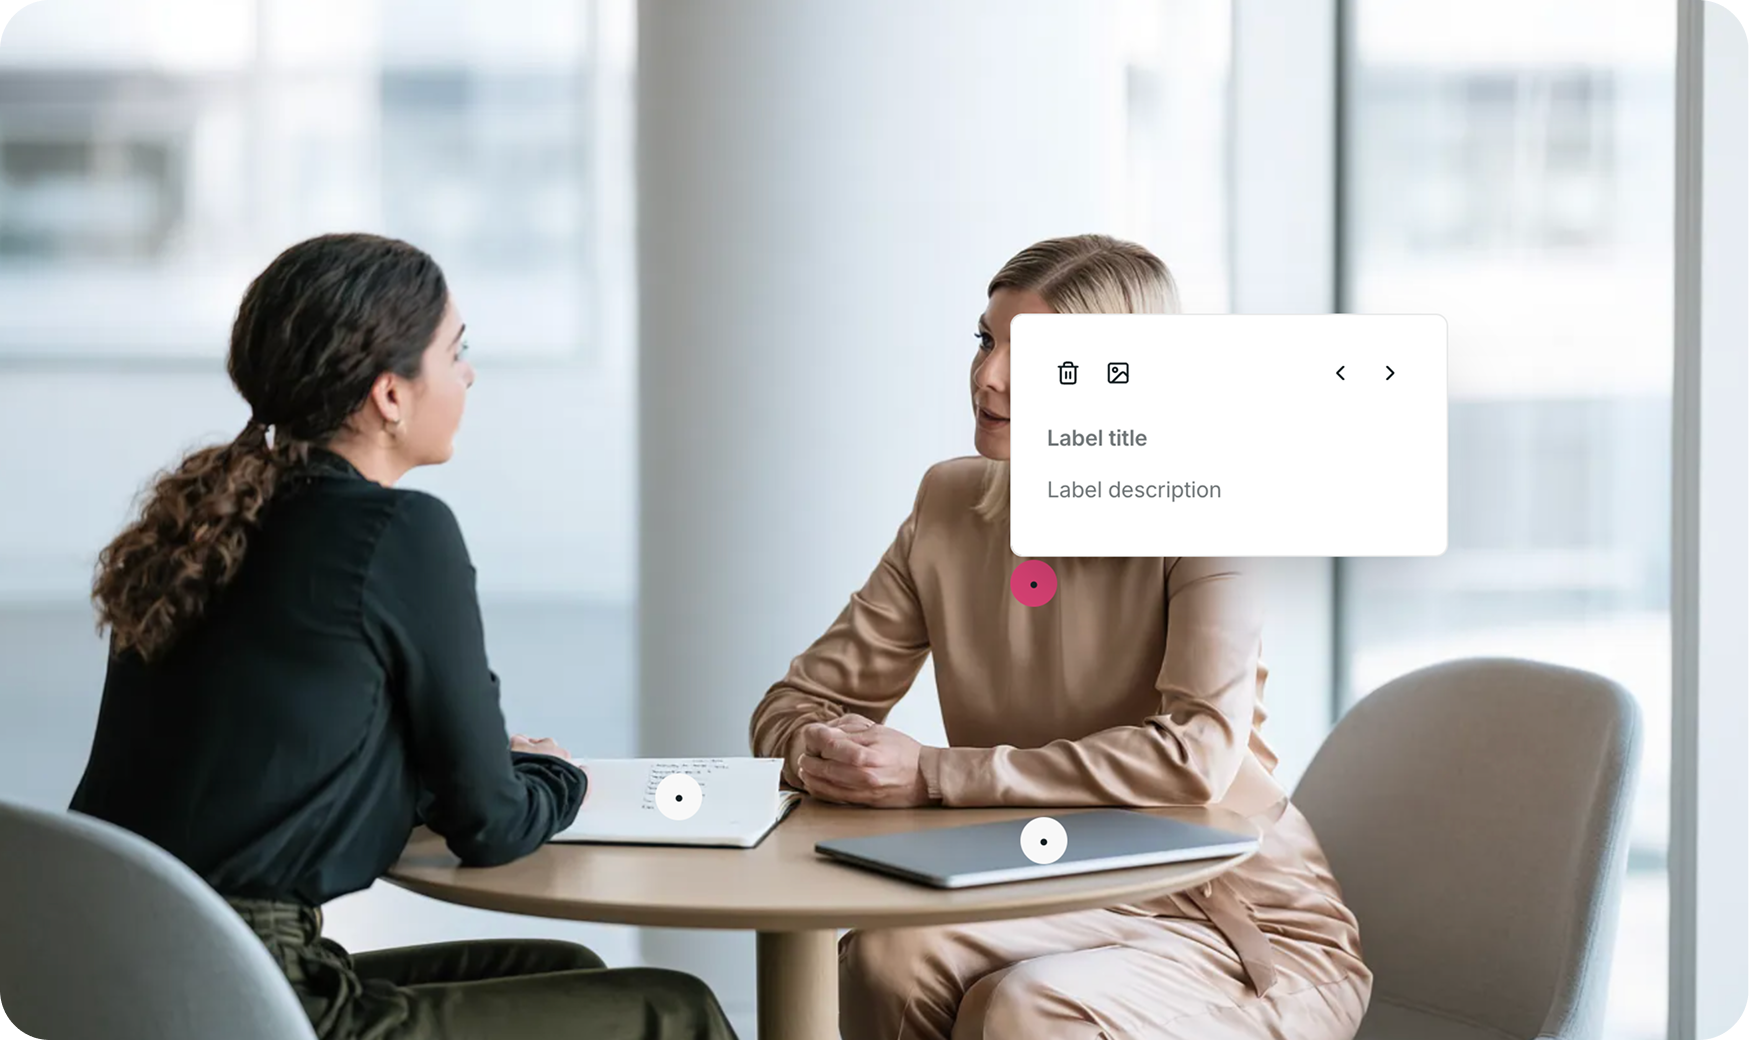
Each label opens in a panel when selected. Learners can also navigate between labels using the arrows in the panel.
Customizing your labeled image
Open the block menu and select Edit to access its settings.
Under Content, you can manage your image and reorder or edit the labels.
Under Settings, you can customize:
- Image size: Adjust the size of the image.
- Include caption: Display a caption below the image.
- Require all labels to be viewed: Learners must open every label before they can continue with the lesson.
- Label icon: Choose whether labels appear as bullets, numbers, or letters.
- Label icon color: Change the color of the clickable points.
- Alt text: Add a description of the image for accessibility.
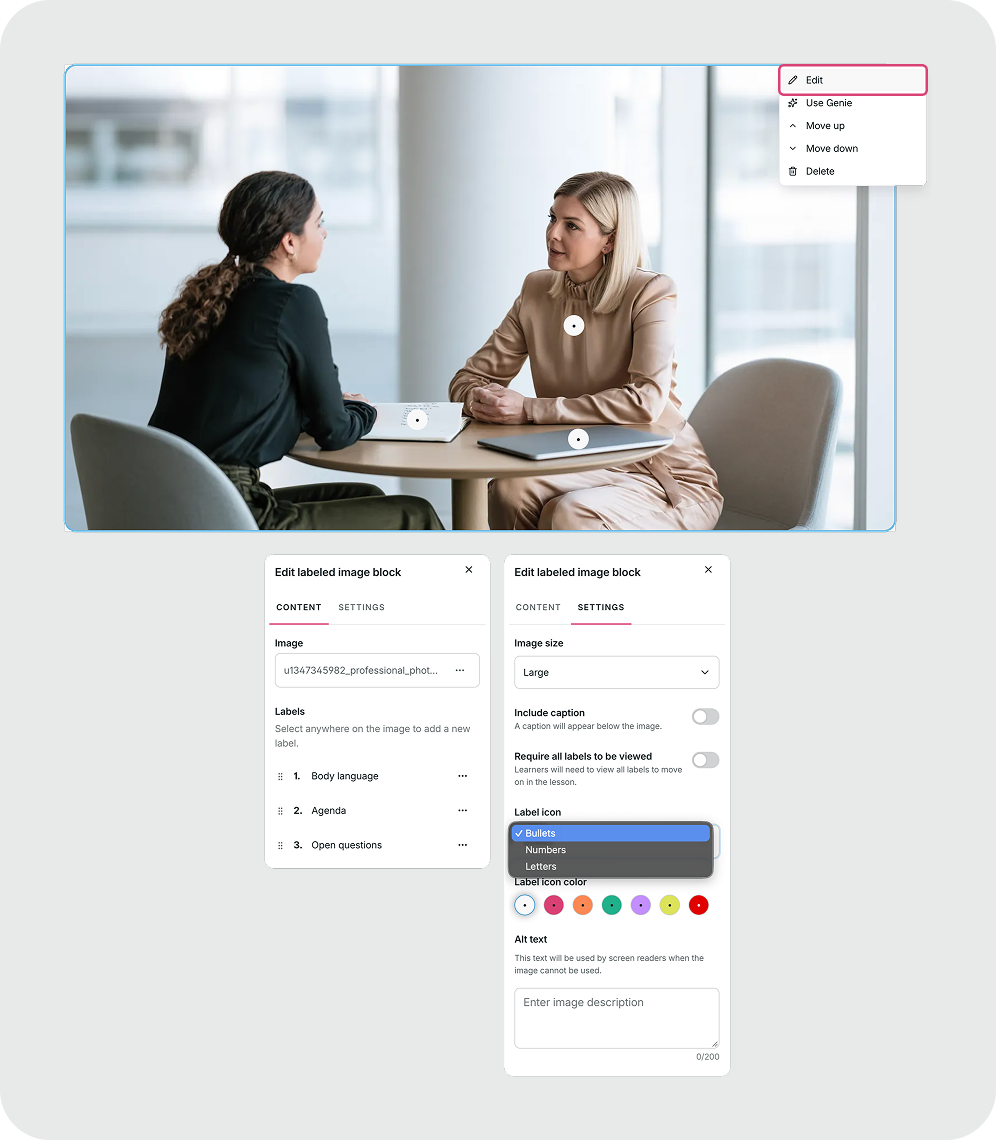
Training example: Create an interactive diagram of workplace equipment, label the different parts of a software interface, or highlight body language cues in a workplace conversation.
Multiple images block
The Multiple images block lets you display several pictures together, making it easier to organize visual examples, instructions, or related concepts within a single section.
You can add up to 20 images and choose how they’re displayed.
To add or manage your images, open the block menu and select Edit. Under Content, you can upload images, choose pictures from the gallery, or rearrange and remove existing images.
Under Settings, you can choose between two layouts:
- Grid: Display images in a grid with 2, 3, or 4 columns.
- Carousel: Present images one at a time, allowing learners to navigate between them using arrows.
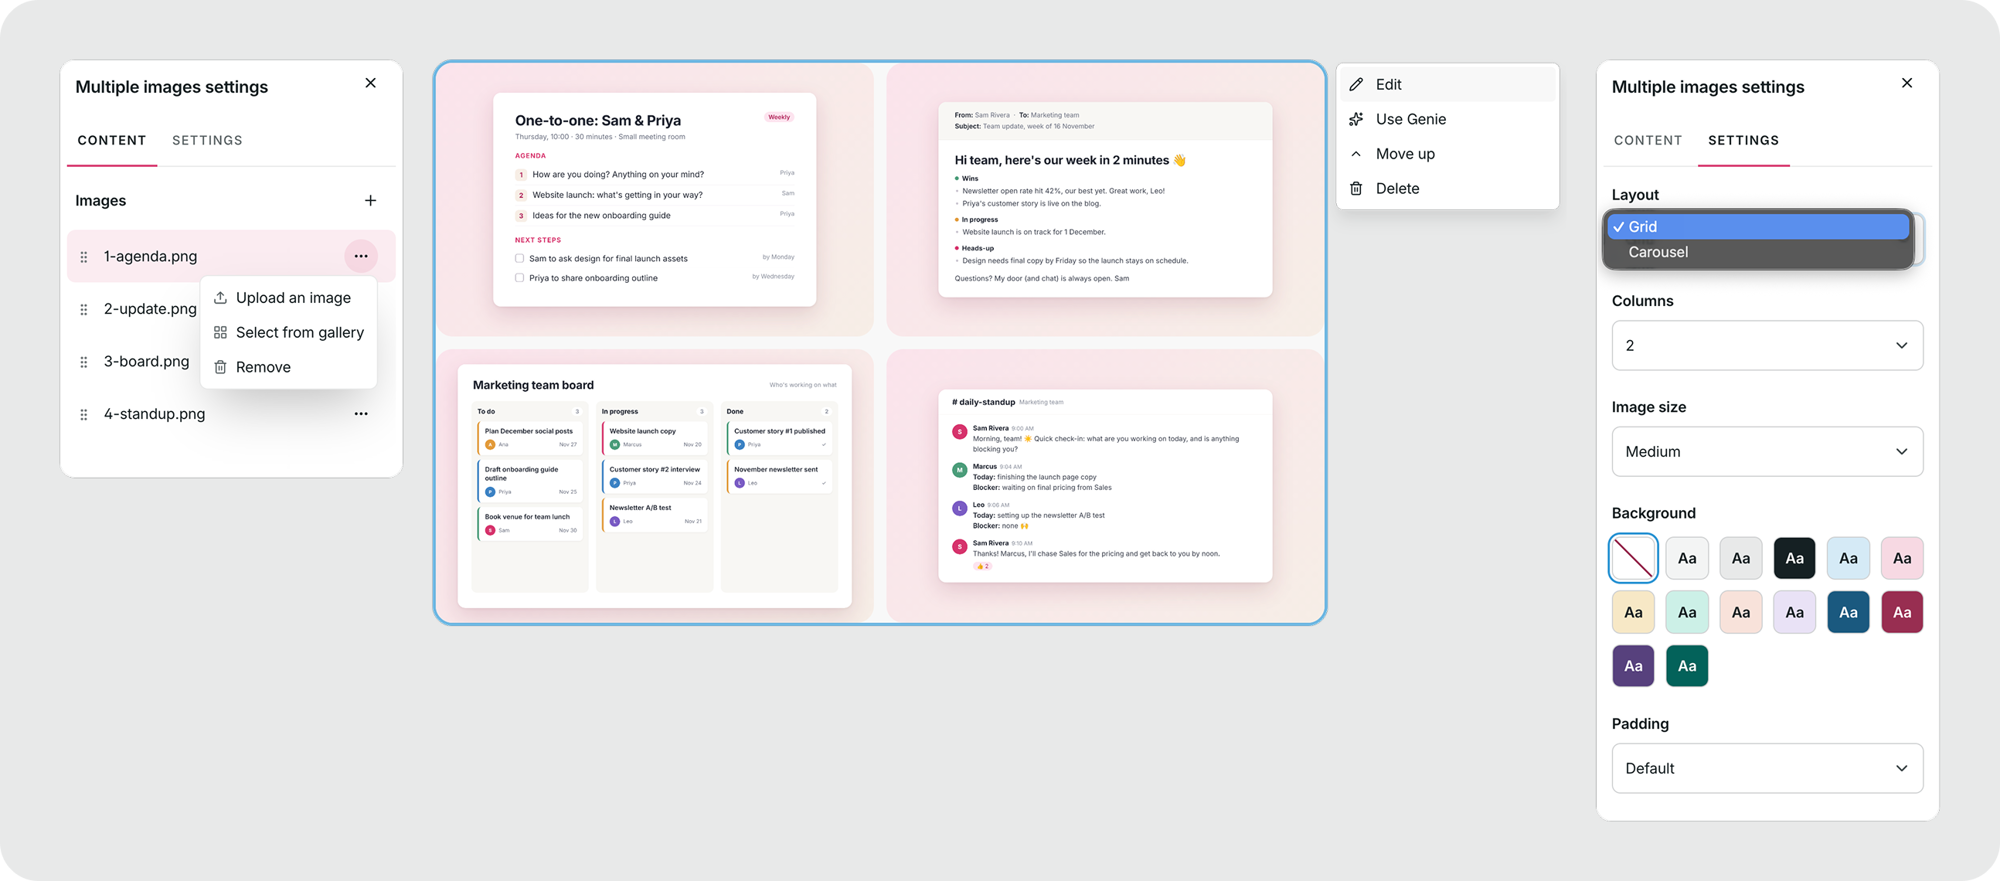
You can also customize the image size, background color, and padding.
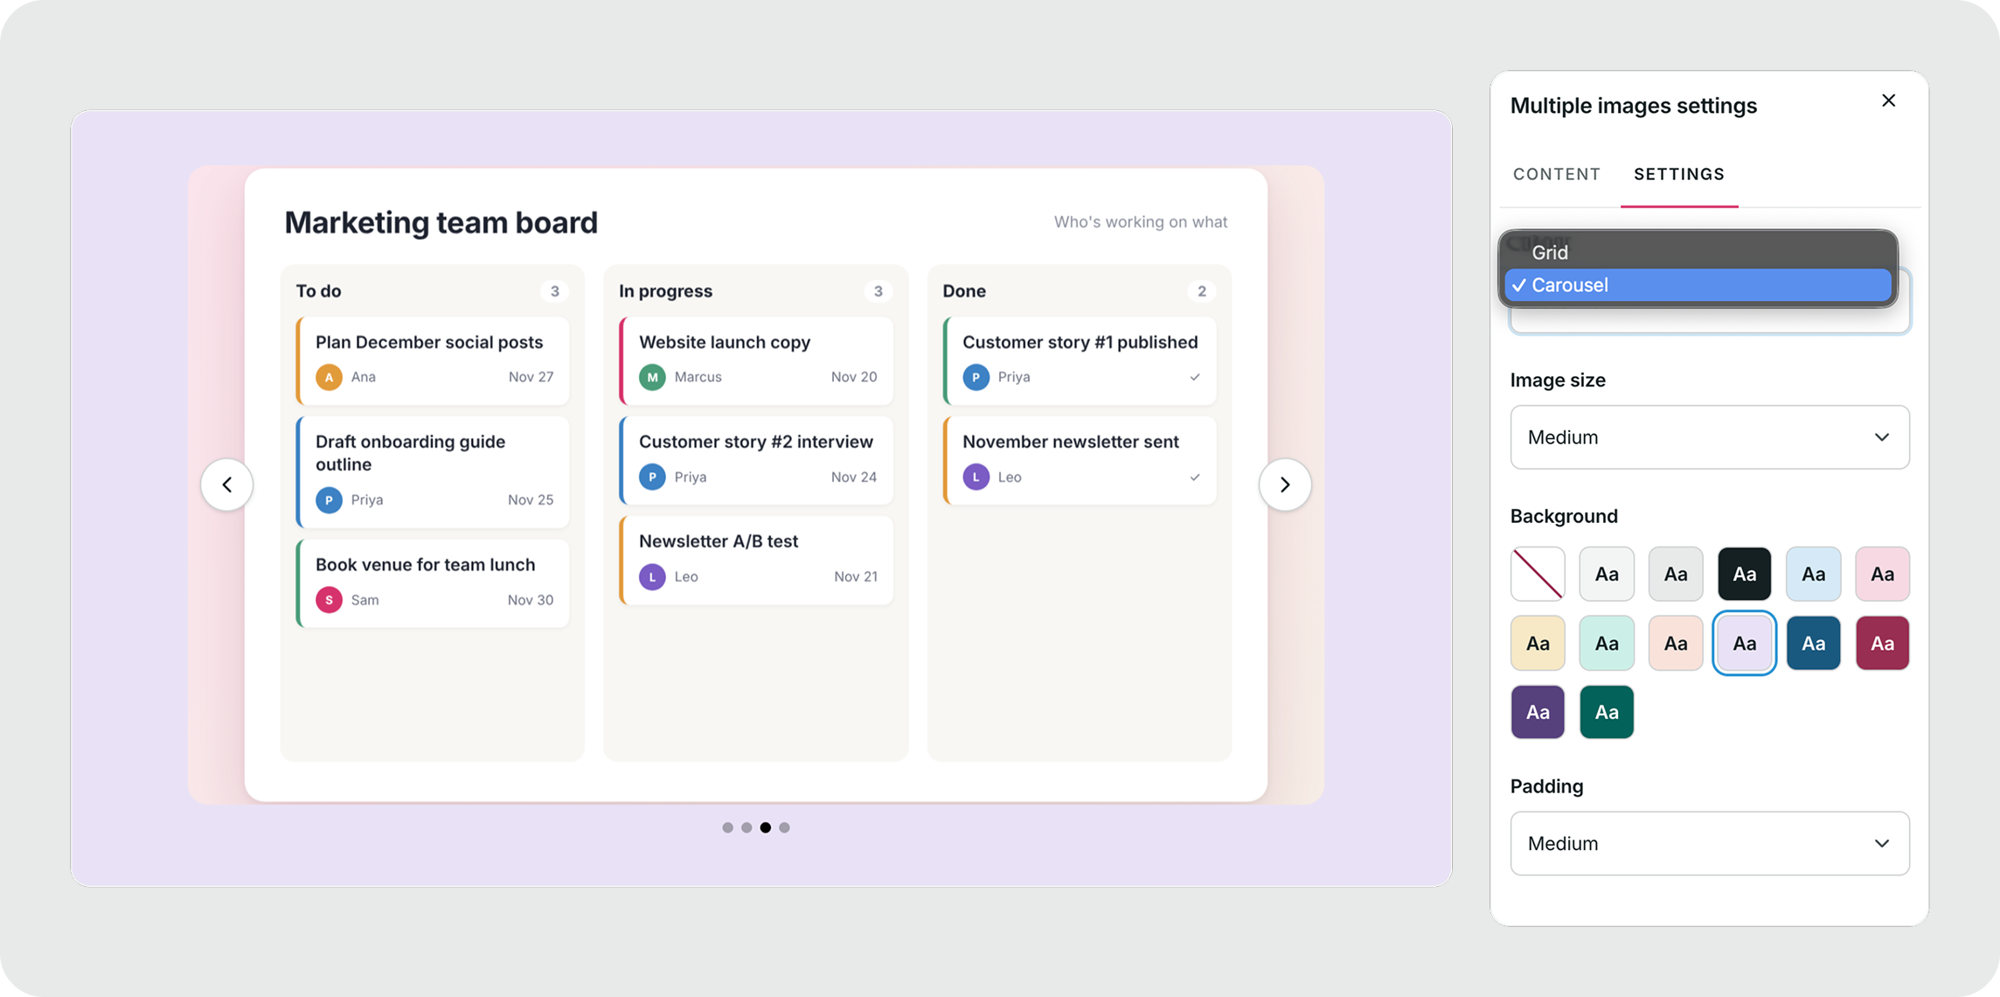
Learners can open individual pictures to view them at full size.
Multiple images blocks can be added to lessons, sessions, course overviews, completion pages, and test overviews, but not to creator profiles.
Training example: Display a series of screenshots from a software tutorial, compare examples of effective and ineffective workplace communication, or present visual examples of different safety procedures.
Using Genie with image blocks
You can also use Genie, the GoSkills AI assistant, to help create and update image block content.
Open the block menu, select Use Genie, and describe what you’d like to create or improve.