
Text blocks in the GoSkills Course Builder help you organize information, highlight important ideas, and make your training content easier to follow.
There are six options under the Text category: Text, List, Quote, Call out, Chips, and Cards.
In this guide, we’ll walk through how to add, edit, and customize these blocks, along with some ideas for using them in your courses.
How to add a text block
- Open your course in the GoSkills Course Builder and navigate to the lesson where you want to add content.
- Click Add a block and select Text from the block picker.
- Choose the type of block you want to add.
- Add your content directly to the block, or open the block menu and select Edit to access its customization options.
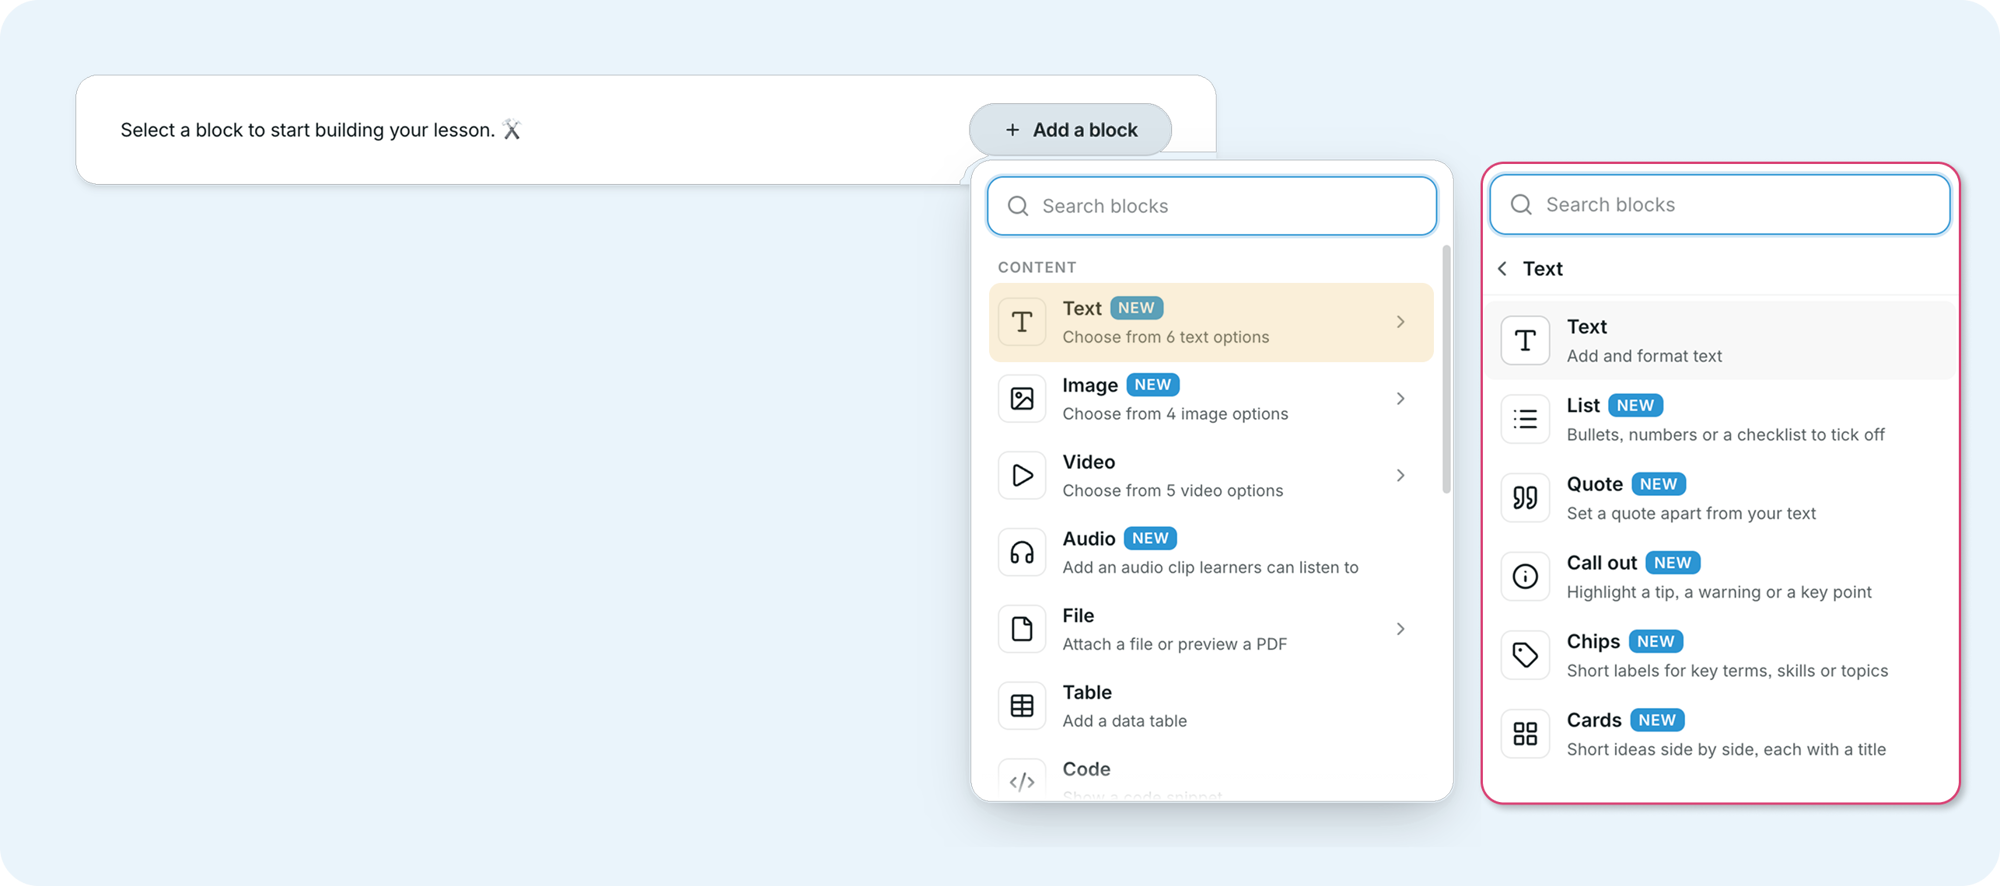
Each block offers different content and display options. You can also customize its background color and padding to match your course design.
Text block
The Text block is ideal for adding explanations, instructions, and other written content to your lessons.
You can format your content using the rich-text editor, including headings, bold and italic text, links, bulleted lists, numbered lists, and checklist formatting.
To customize its appearance, open the block menu and select Edit. From the Text block settings, you can change the background color and adjust the padding.
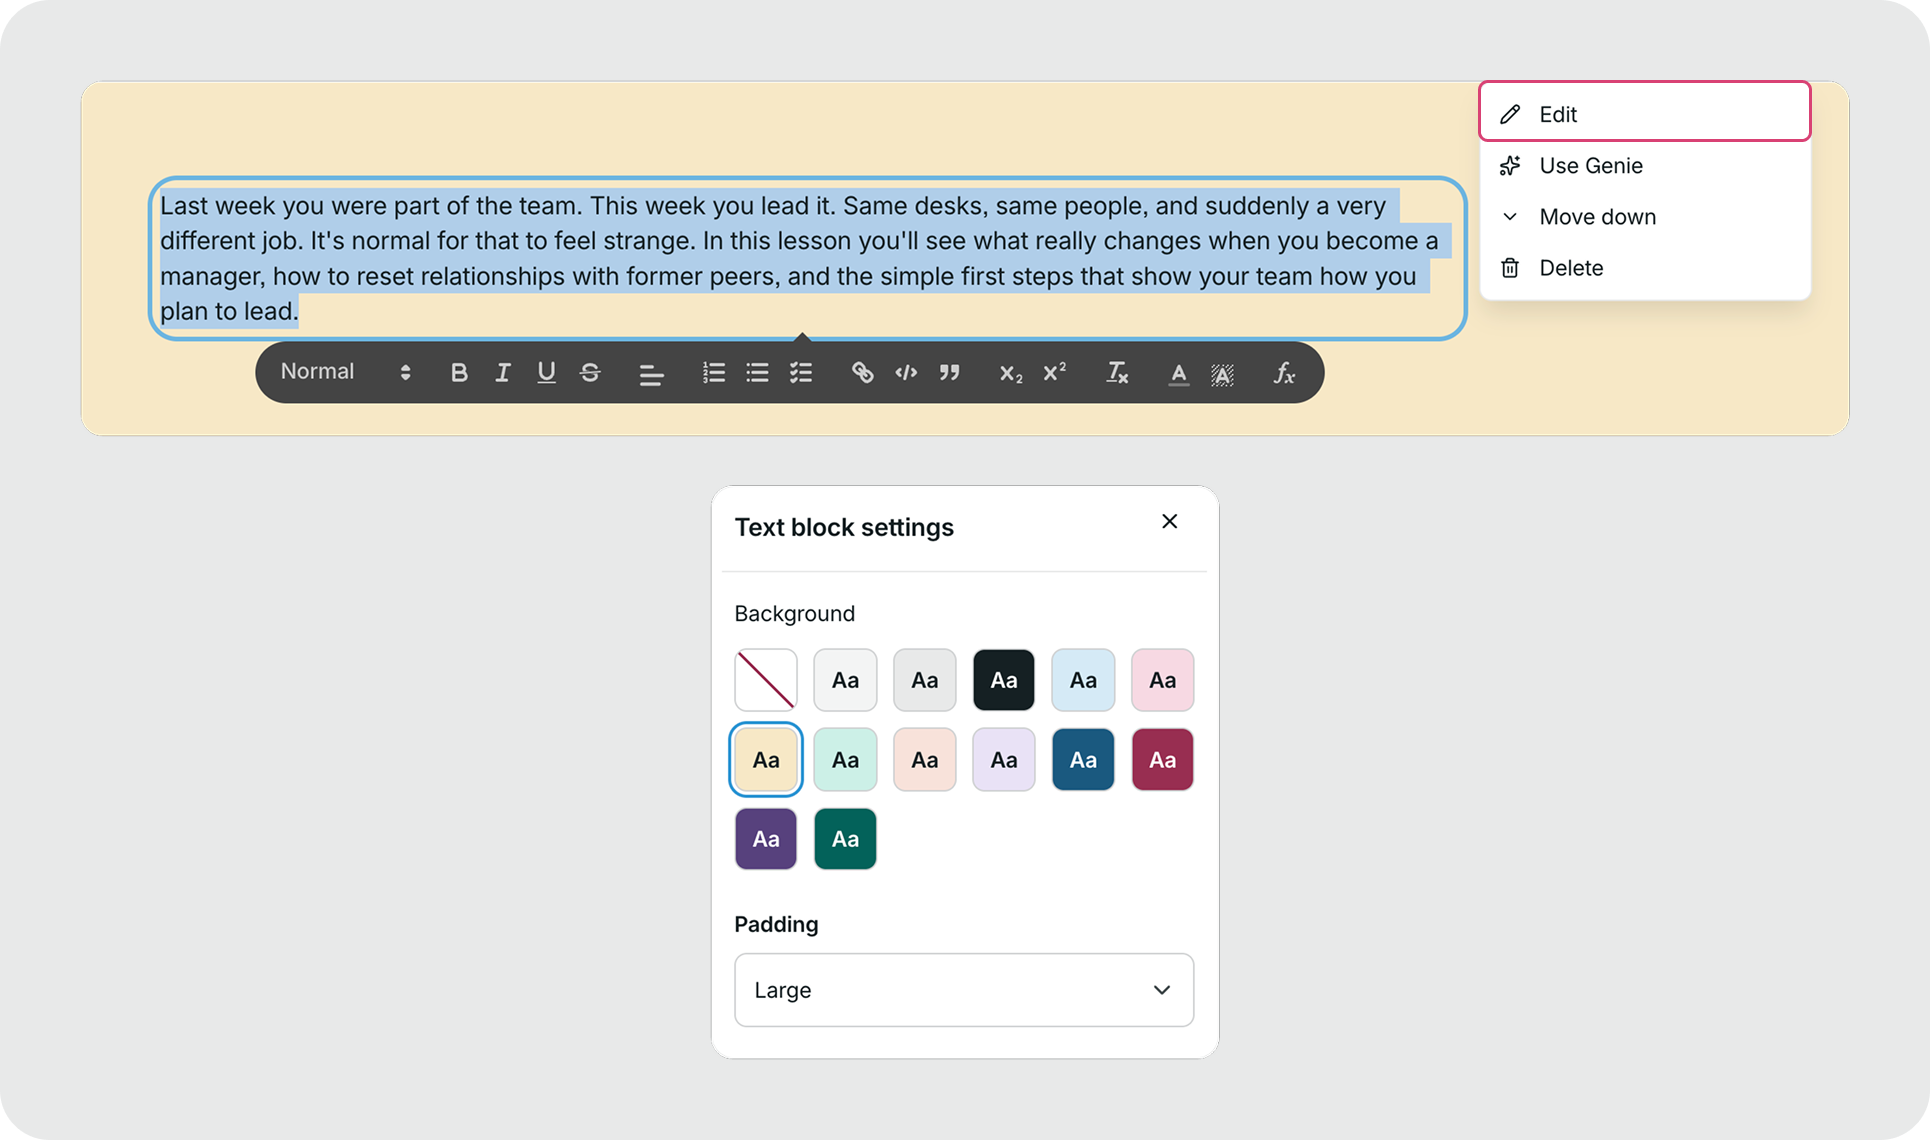
Tip: Checklist formatting in a regular Text block is for display purposes only. Learners cannot tick off the items, and their progress is not saved. To create an interactive checklist, use the List block instead.
Training example: Use a Text block to introduce a new topic, explain a workplace procedure, or provide context before an activity.
List block
The List block helps you organize information into easy-to-follow lists. You can choose from three formats:
- Bulleted: Present key points or related information without a specific order.
- Numbered: Display instructions, processes, or steps in a sequence.
- Checklist: Create an interactive list that learners can tick off as they go.
Each List block can include an optional title and up to 50 items.
To change the format, open the block menu, select Edit, and choose your preferred option under List type.
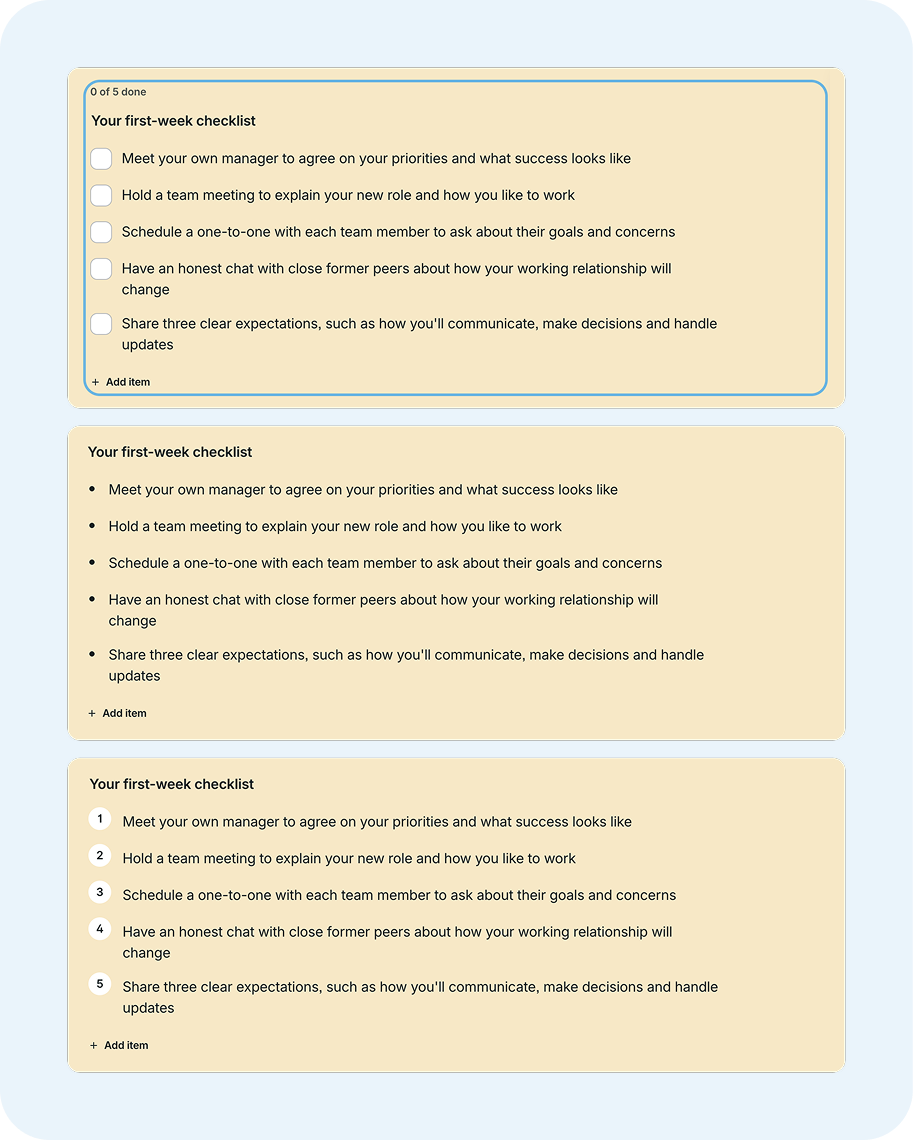
Creating an interactive checklist
Unlike regular text formatting, the Checklist option allows learners to mark items as complete. Their selections are saved, so they can return to the lesson without losing their progress.
When you select Checklist as the list type, you’ll find two additional settings:
- Require all items ticked: Learners must tick every item before they can continue to the next lesson.
- Show progress: Displays a progress indicator, such as “4 of 5 done,” so learners can see how many items they’ve completed.
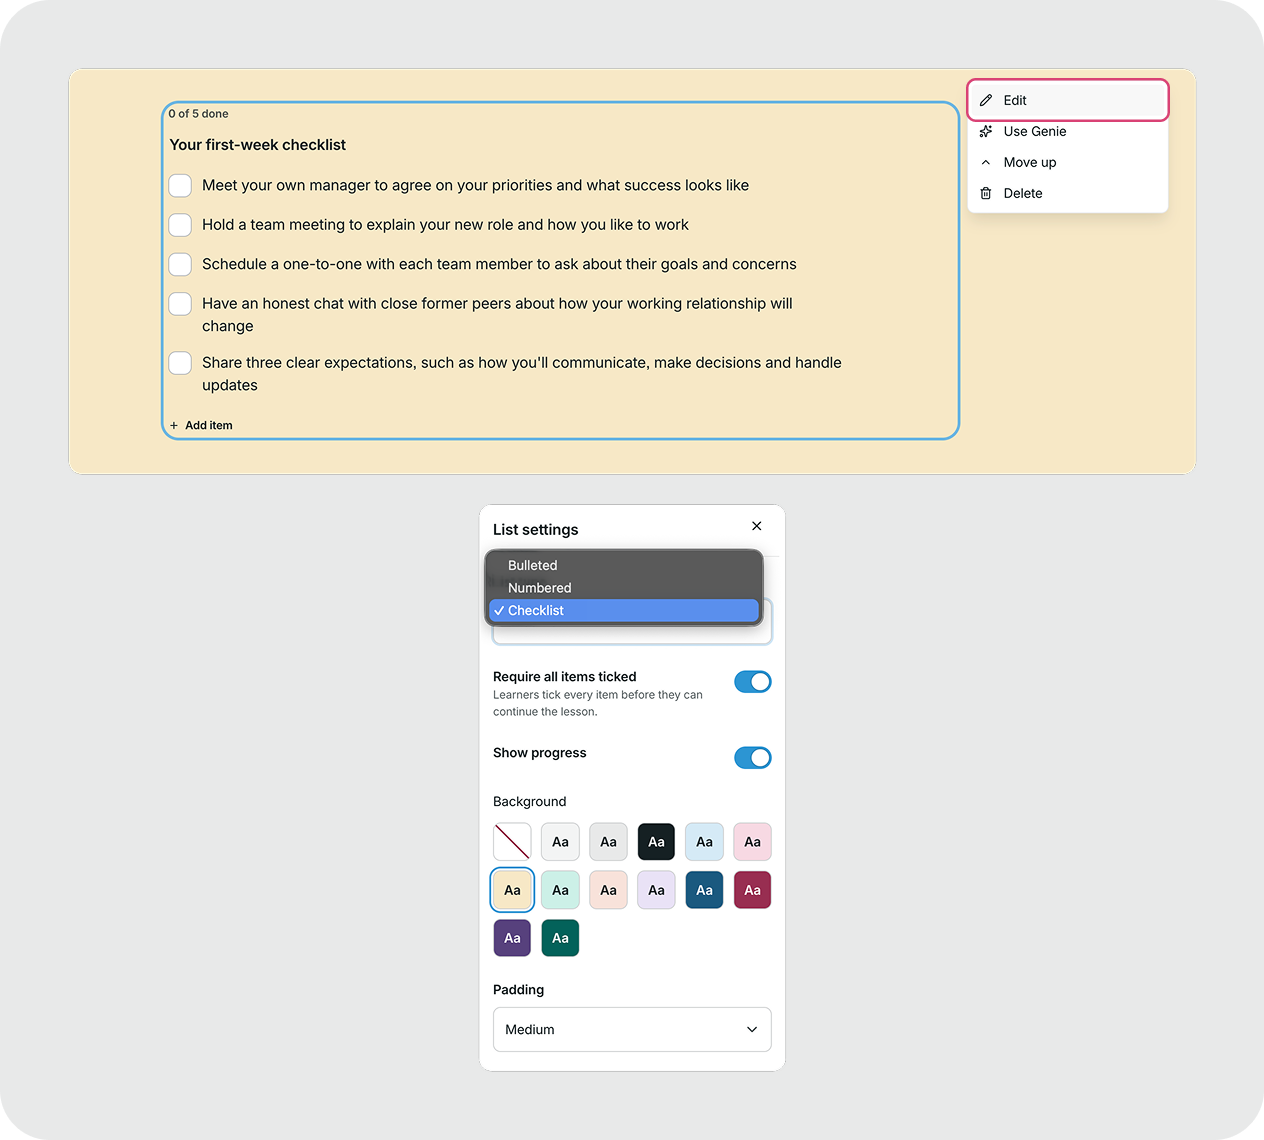
When learners tick all the items, the checklist displays an All done confirmation. If the checklist is required, the button to continue to the next lesson becomes available once every item has been ticked.
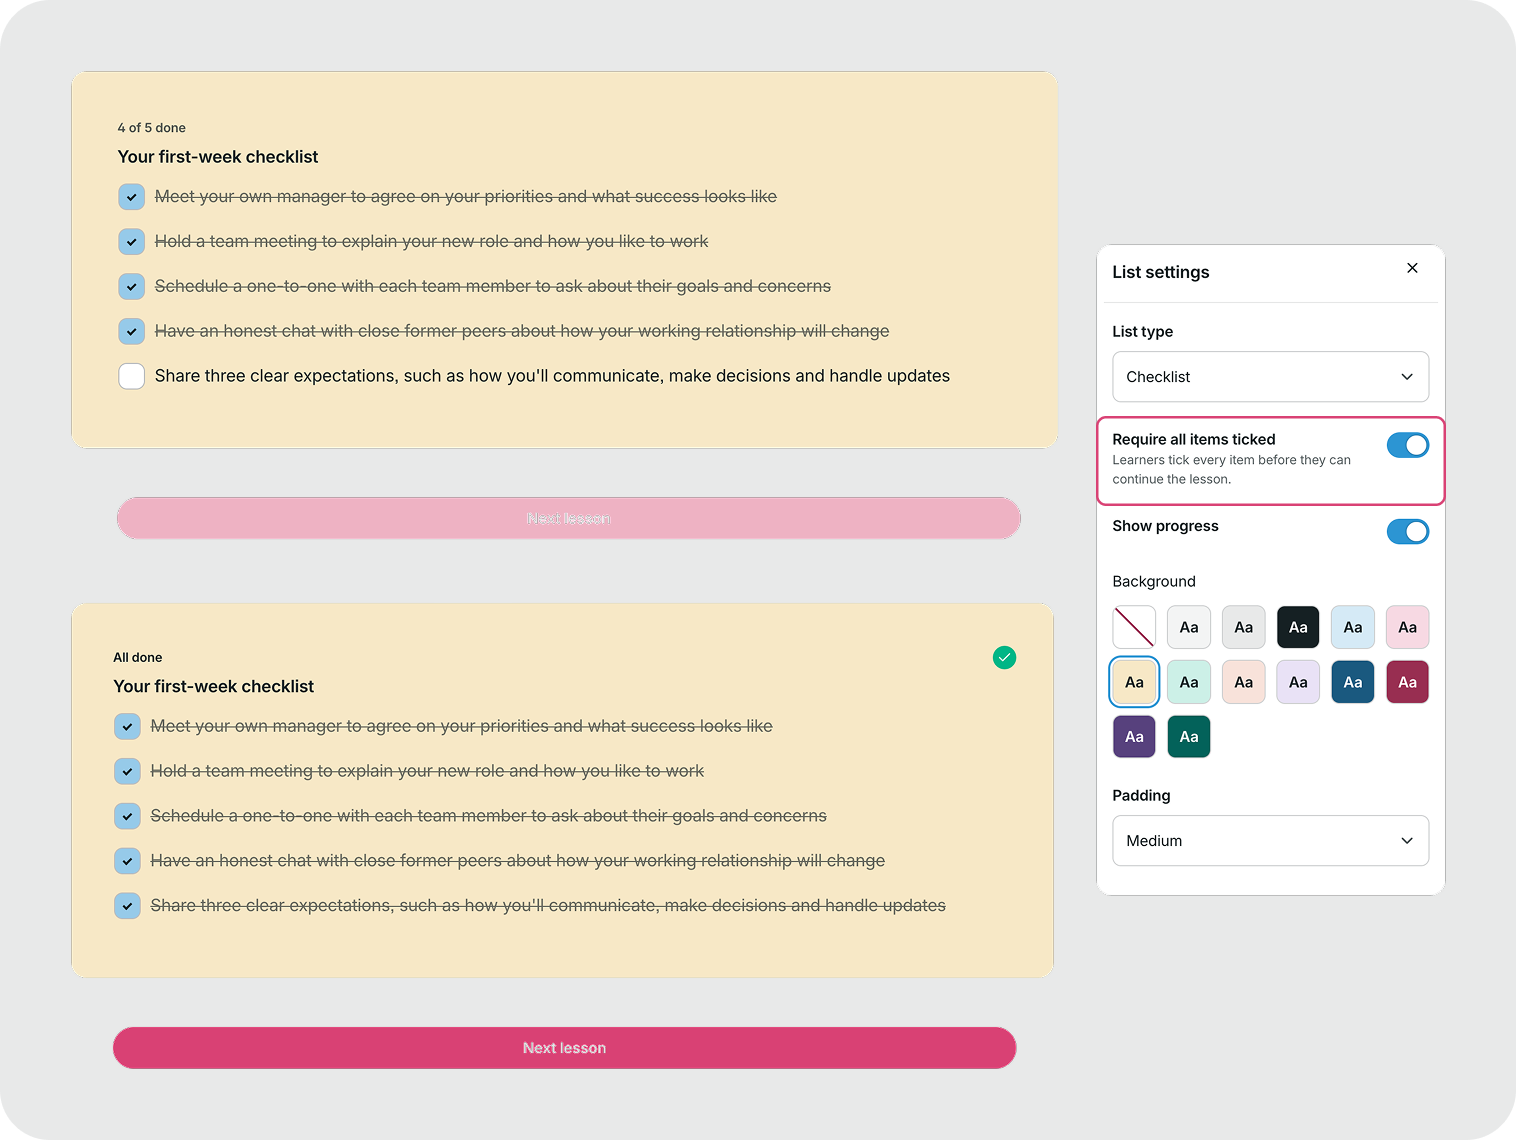
Checklist responses are also recorded in learner lesson reports, including which individual items were ticked. This information is available in report exports.
Training example: Create a new manager onboarding checklist covering essential first-week activities, or a workplace safety checklist to help learners review required procedures.
Quote block
The Quote block lets you highlight a statement, insight, or piece of advice and set it apart from the rest of your lesson.
You can add a quote of up to 600 characters and an attribution of up to 150 characters to identify who said it.
To customize a Quote block, open its settings. You can choose between two display styles:
- Side line: Displays the quote with a vertical line along the side.
- Centered: Places the quote and attribution in the center of the block.
You can also change the background color and padding.
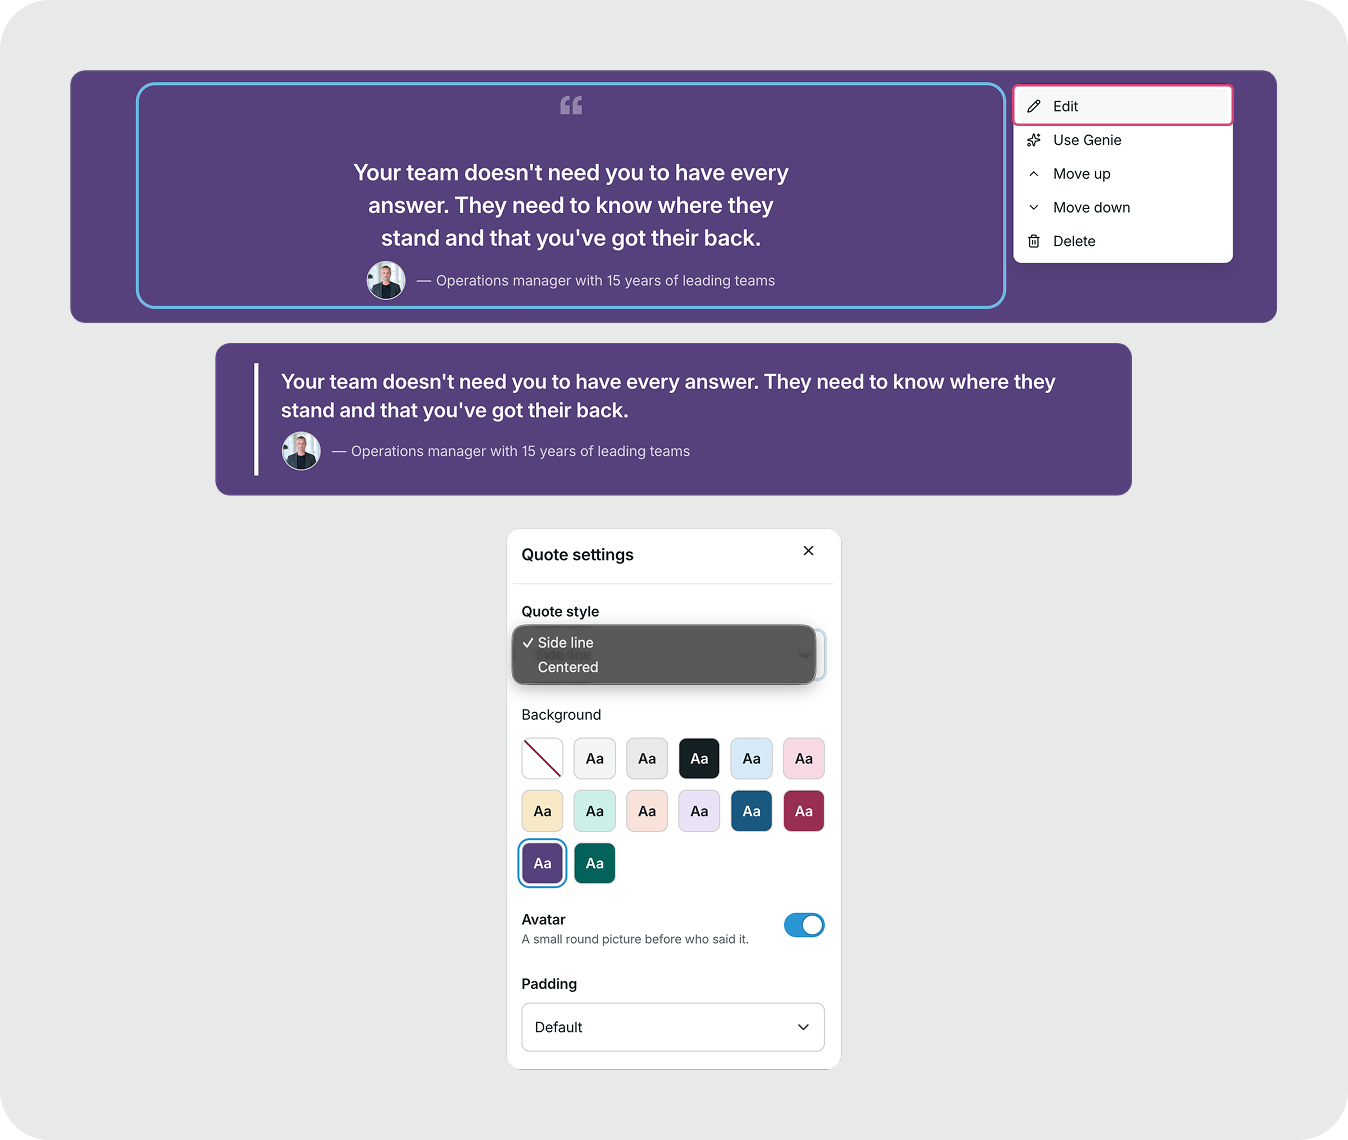
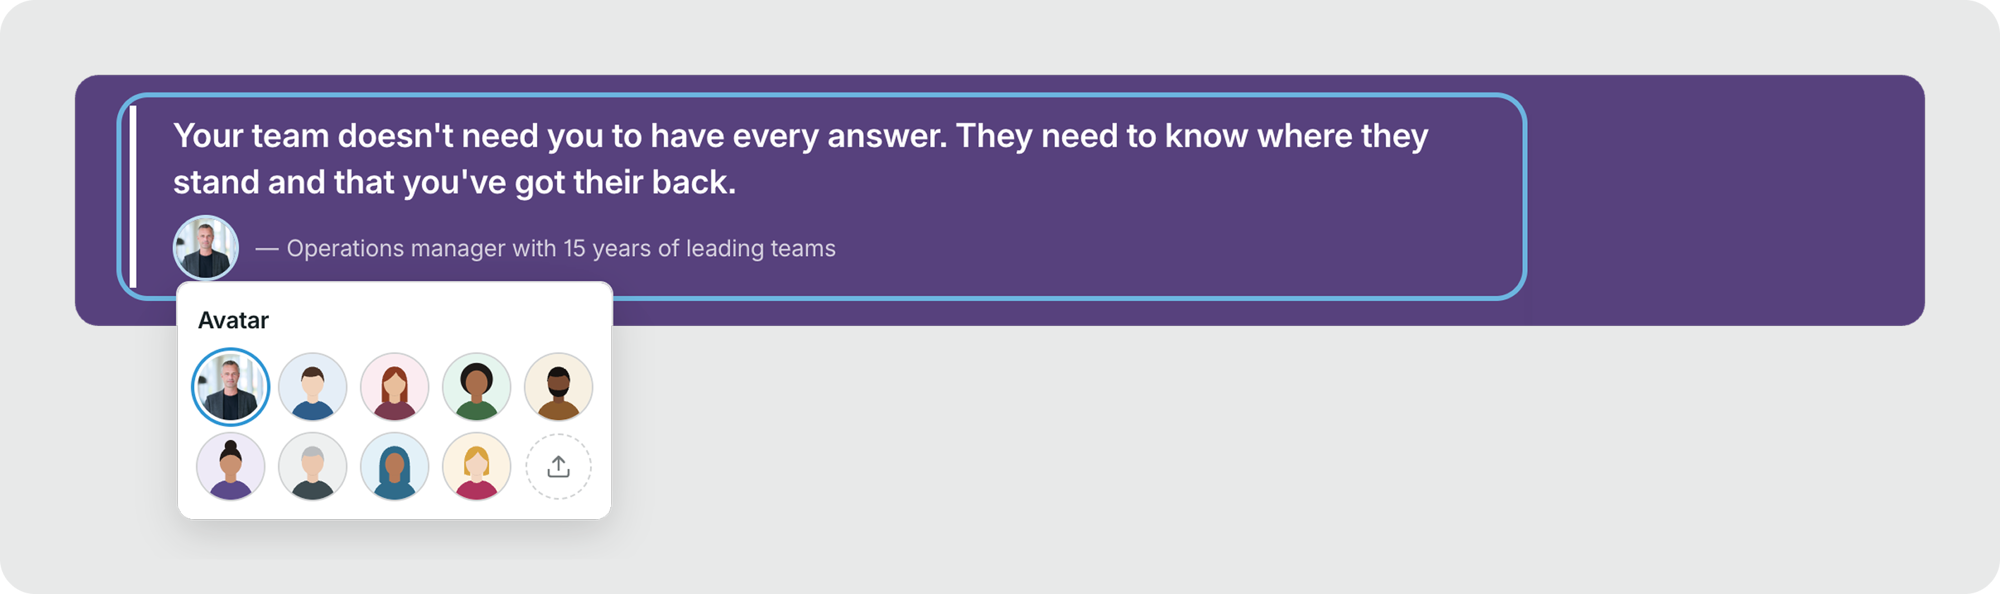
To include a picture of the speaker, enable Avatar. Choose from the available avatar options or upload your own image. The picture appears as a small, round image next to the attribution.
Training example: Highlight advice from an experienced manager, share an expert insight, or feature a testimonial from an employee about their learning experience.
Call out block
The Call out block is designed to draw attention to information learners shouldn’t miss.
It displays a short, formatted note inside a panel. You can also add an optional label of up to 60 characters, such as “Important,” “Remember,” or “Watch out.”
Use the rich-text editor to format your message, and adjust the background color and padding in the block settings.
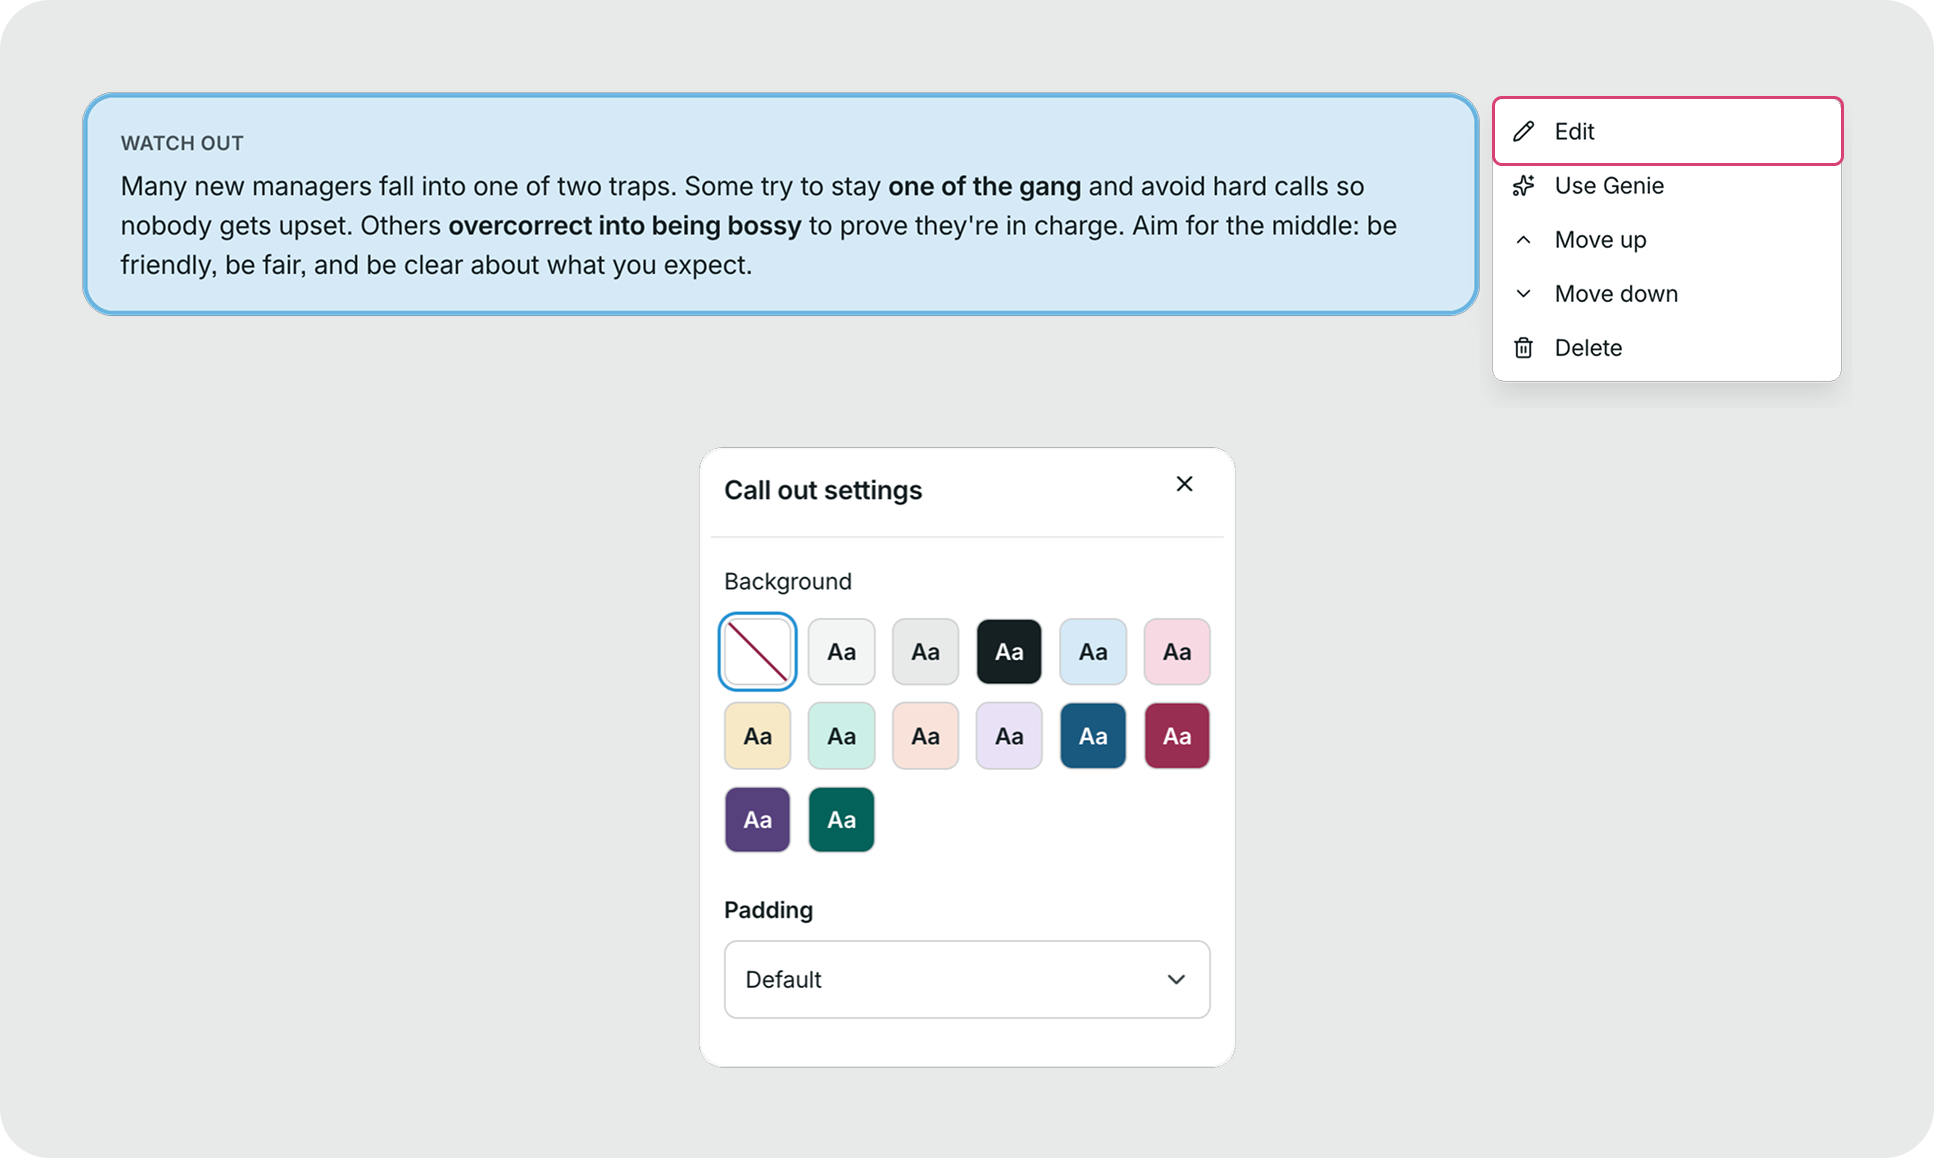
Training example: Highlight a common mistake in a software tutorial, remind employees about an important policy, or reinforce a key takeaway at the end of a lesson.
Chips block
The Chips block displays short labels in a compact, visual format. It’s useful for presenting keywords, skills, topics, or related concepts without lengthy explanations.
You can add up to 30 chips in a single block.
To customize a Chips block:
- Open the block menu and select Edit.
- Under Content, add, edit, or reorder your chips.
- Switch to Settings to choose a background color and adjust the padding.
You can also edit the chip labels directly on the block.
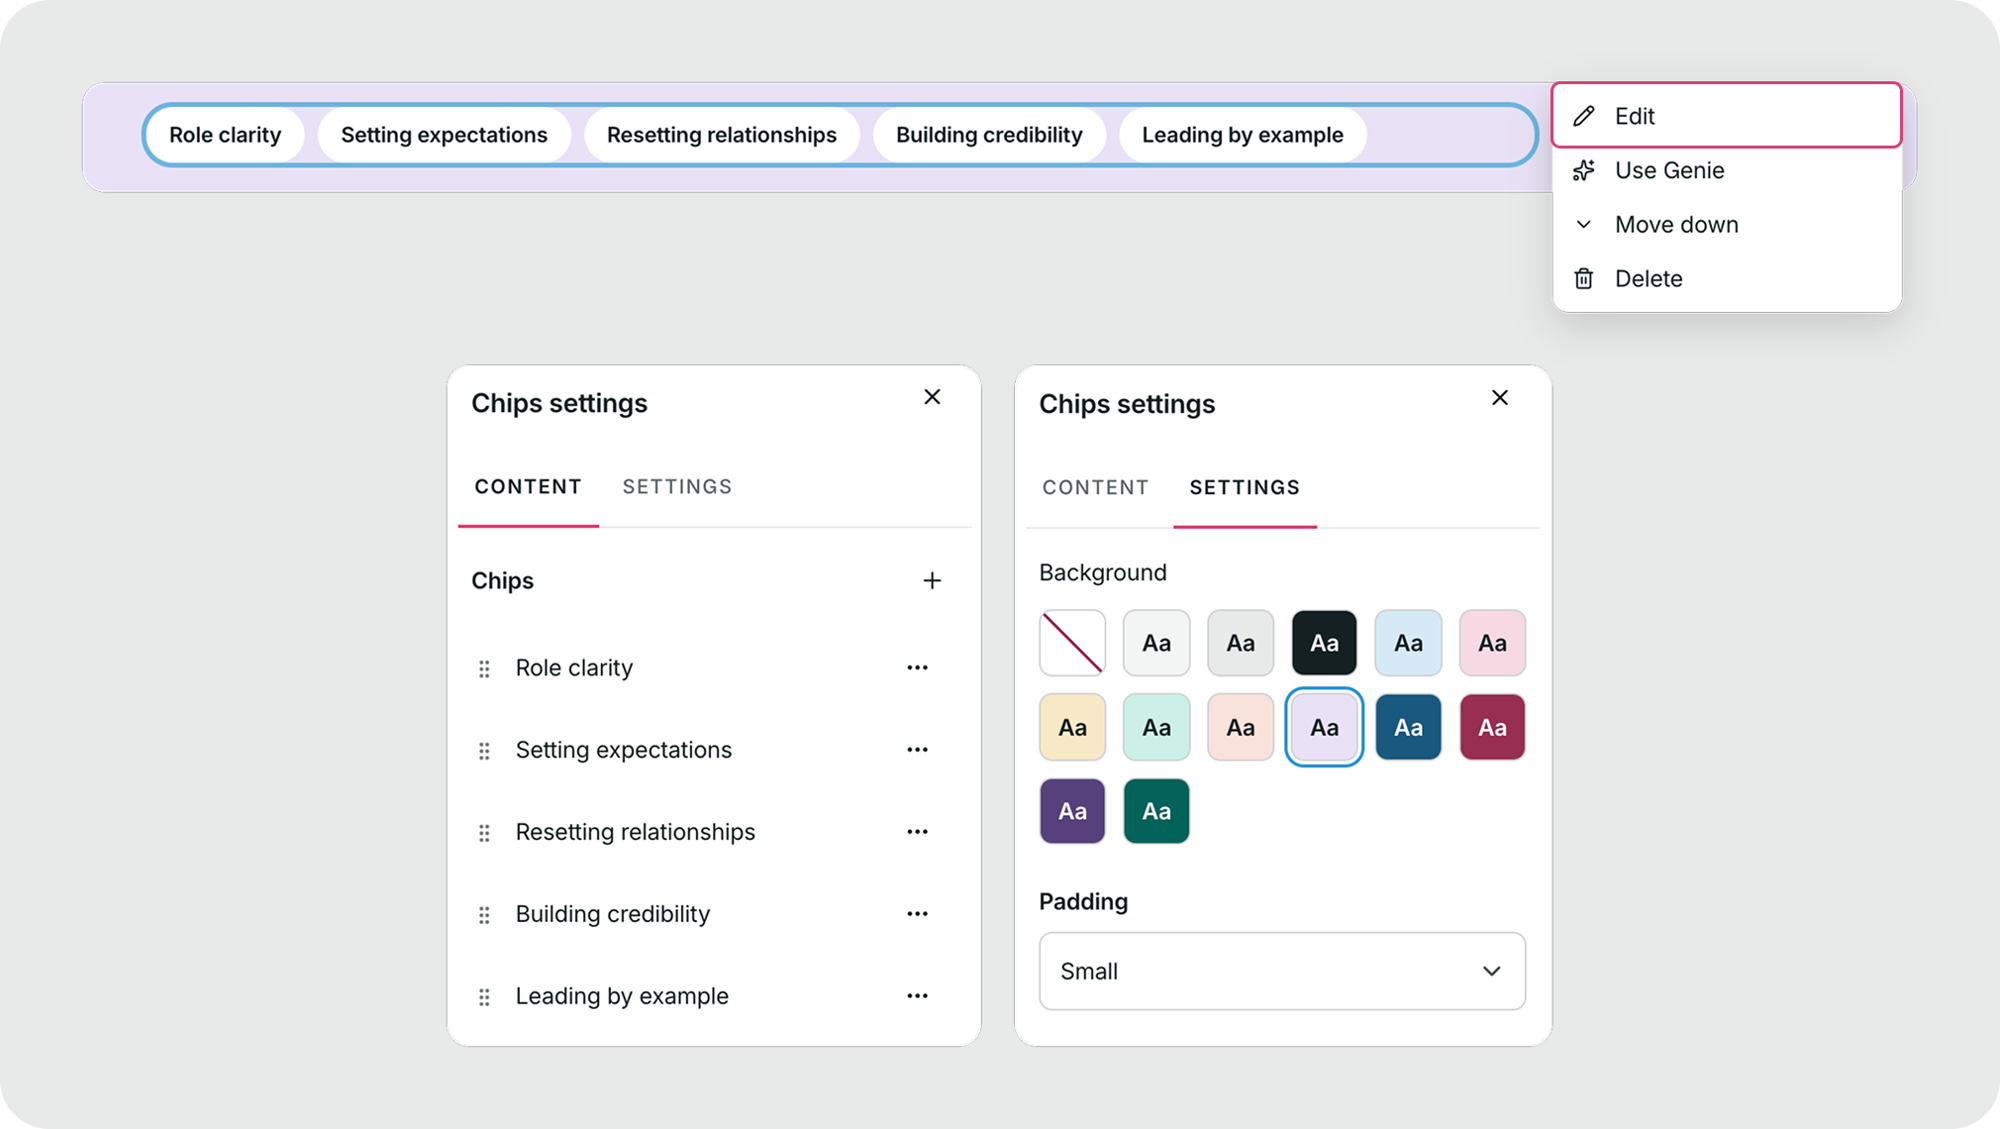
Training example: Highlight essential leadership skills such as active listening, delegation, empathy, and decision-making. Chips also work well for displaying course topics, learning objectives, or important terminology.
Cards block
The Cards block helps you organize related information into separate, easy-to-scan sections.
Each card includes a title and supporting text, making this format useful for presenting several ideas side by side.
You can add up to 12 cards in a single block.
To customize a Cards block:
- Open the block menu and select Edit.
- Under Content, add, edit, or reorder your cards.
- Under Settings, choose a background color and adjust the padding.
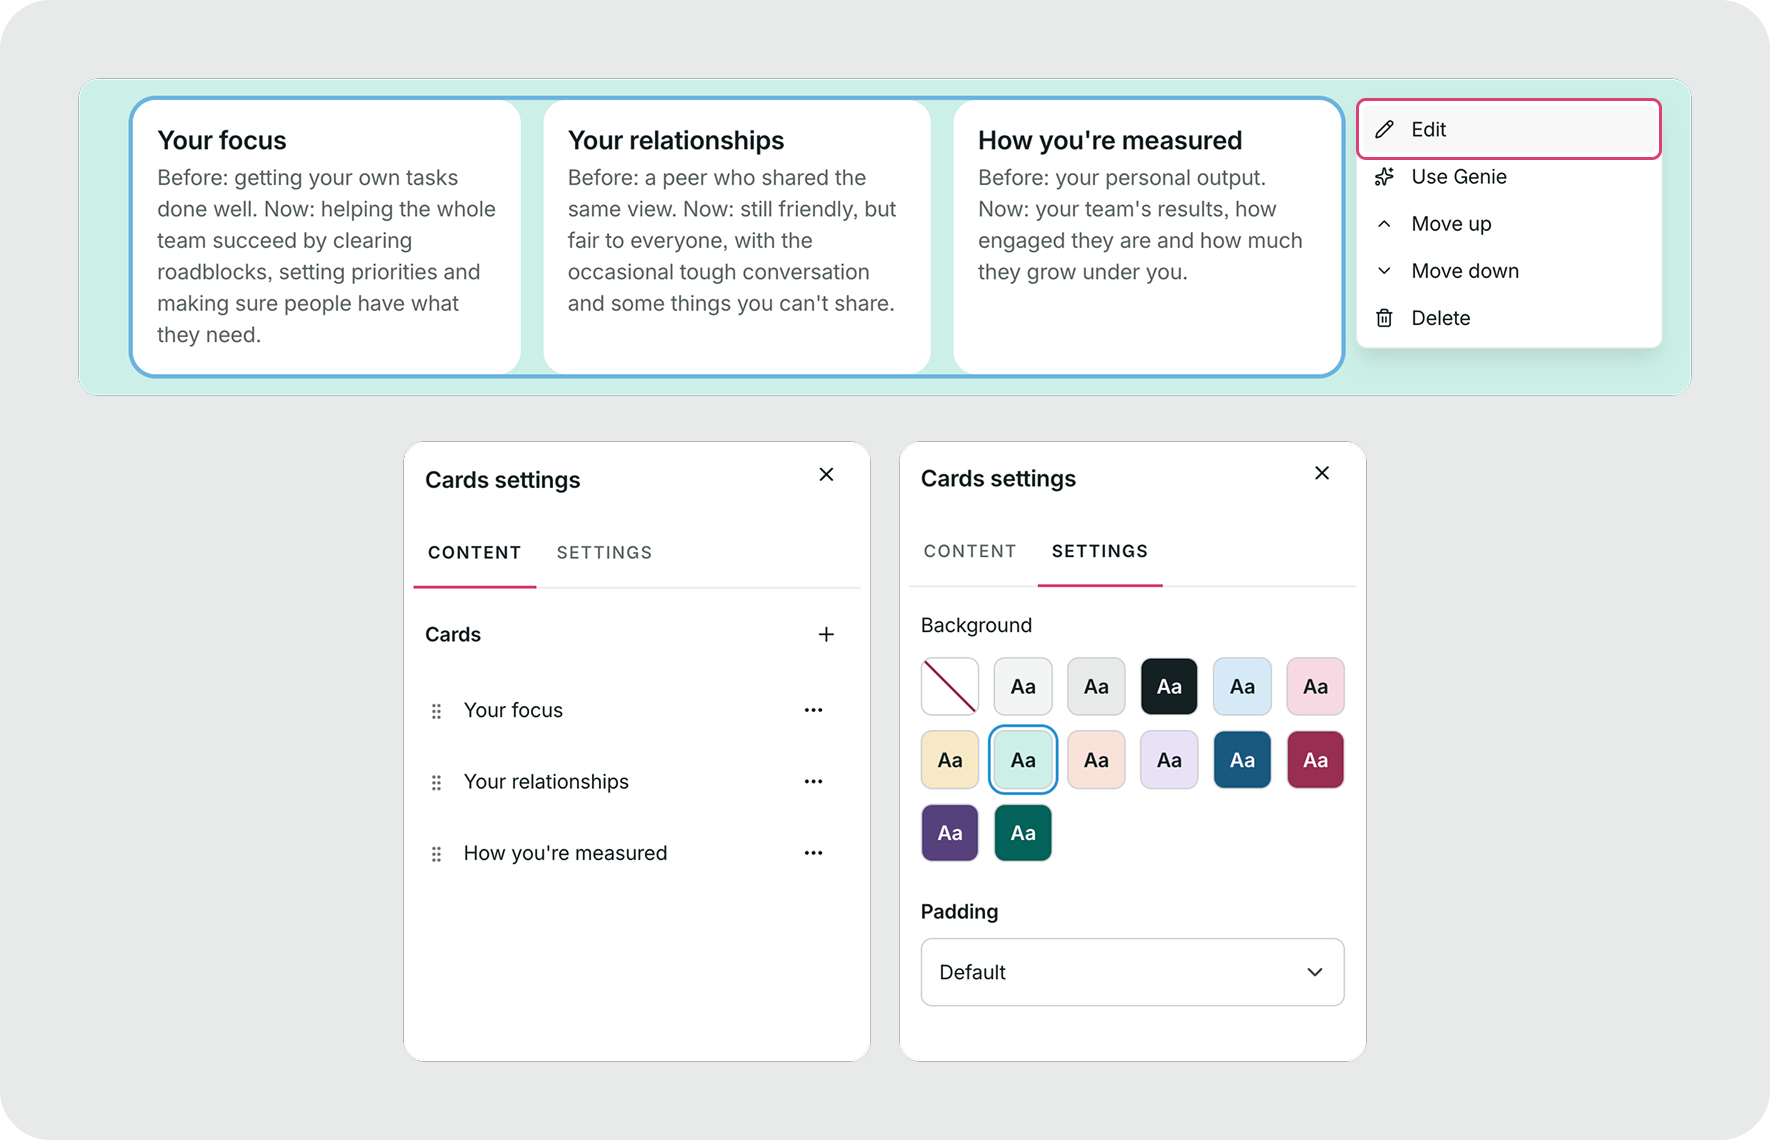
Training example: Compare different leadership approaches, explain the responsibilities of a new manager, or present several communication techniques with a short description of each.
Where can you use text blocks?
The available locations depend on the type of block you’re adding.
List blocks can be used in lessons and sessions, including inside Accordion, Step-through, and Timeline sections. You can also add bulleted and numbered lists to the course overview, but interactive checklists are not supported there.
Quote, Call out, Chips, and Cards blocks can be added to lessons, sessions, course overviews, completion pages, and test overviews.
These blocks cannot be added to a creator profile.
Using Genie with text blocks
You can also use Genie, the GoSkills AI assistant, to create or update any of the six text block types, including inside supported sections.
Open the block menu, select Use Genie, and describe what you need. For example, ask Genie to create a checklist, summarize key takeaways, or organize concepts into cards.
Note: Genie can currently add List blocks to lessons, but not to the course overview.
All new block types are also included in estimated course study time.